What is Continuous Integration with Java1. Select your Git repository2. Add a new delivery pipeline3. Add actions3.1 Build and test your Java application3.1.2 Maven version3.2 Deploy application to server3.3 Run db migration & restart server3.4 Send notification to Slack4. SummaryAdditional resources
CI/CD for Java
Java is a popular high-level, object-oriented programming language used for developing open-source and commercial applications that can run on any platform and operating system. The most commonly used framework among Java software developers is Spring Boot.
What is Continuous Integration with Java
In case of Java, Continuous Integration means automatically building and testing Java source code whenever developers push changes to the version control system. Once tested and free of errors, the code can be integrated into the main branch and deployed to a server or a cloud service, upgrading the process to CI/CD.
In the process, Buddy acts a CI server with extra functions that let developers easily configure a CI/CD pipeline using preconfigured actions. This allows them to run tests for different test cases with JUnit and TestNG, compile Java code and dependencies with build tools, and deploy it to the desired host.
 Example Java CI/CD pipeline
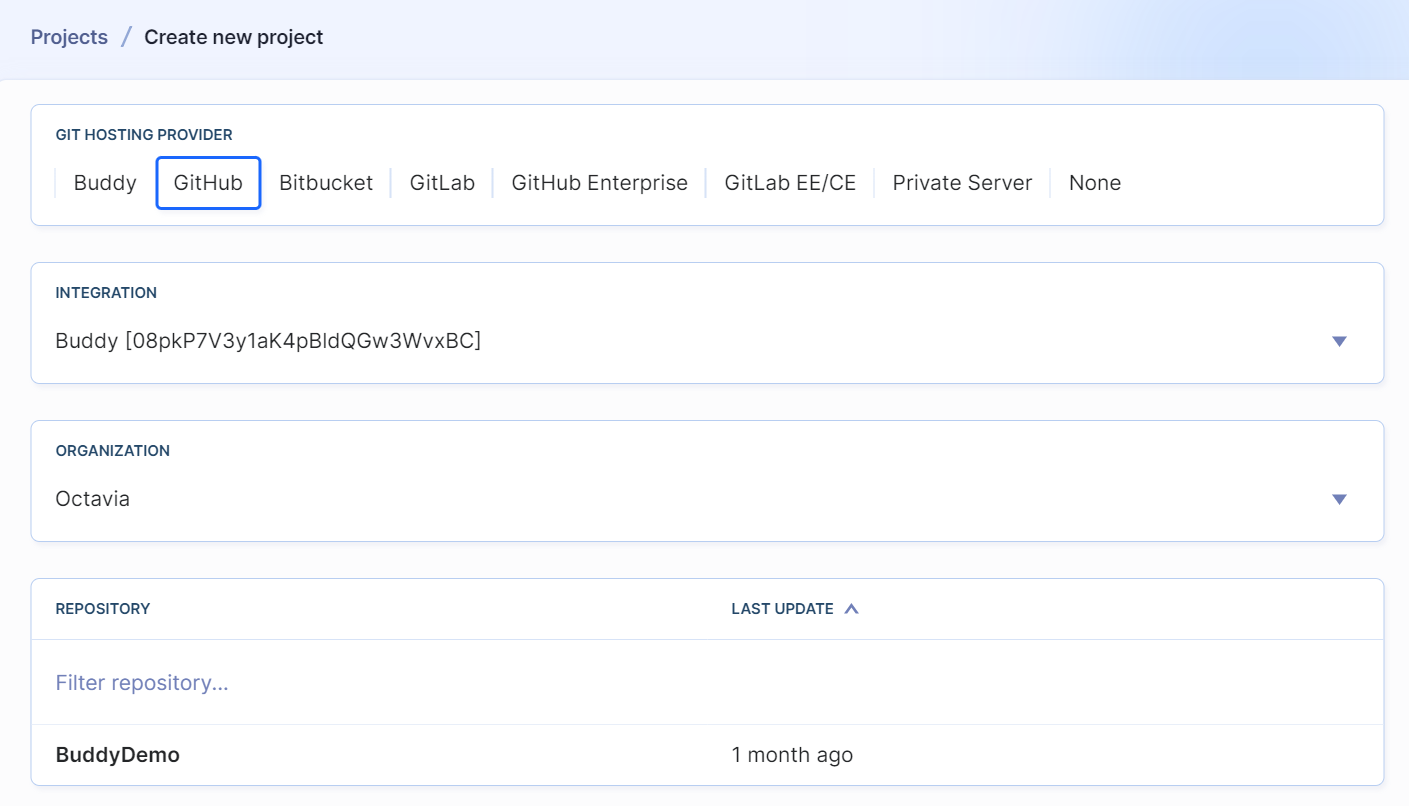
1. Select your Git repository
Buddy supports all popular version control providers, including GitHub, Bitbucket, and GitLab. You can also use your own private Git server, or host code directly on Buddy.
 Supported Git providers
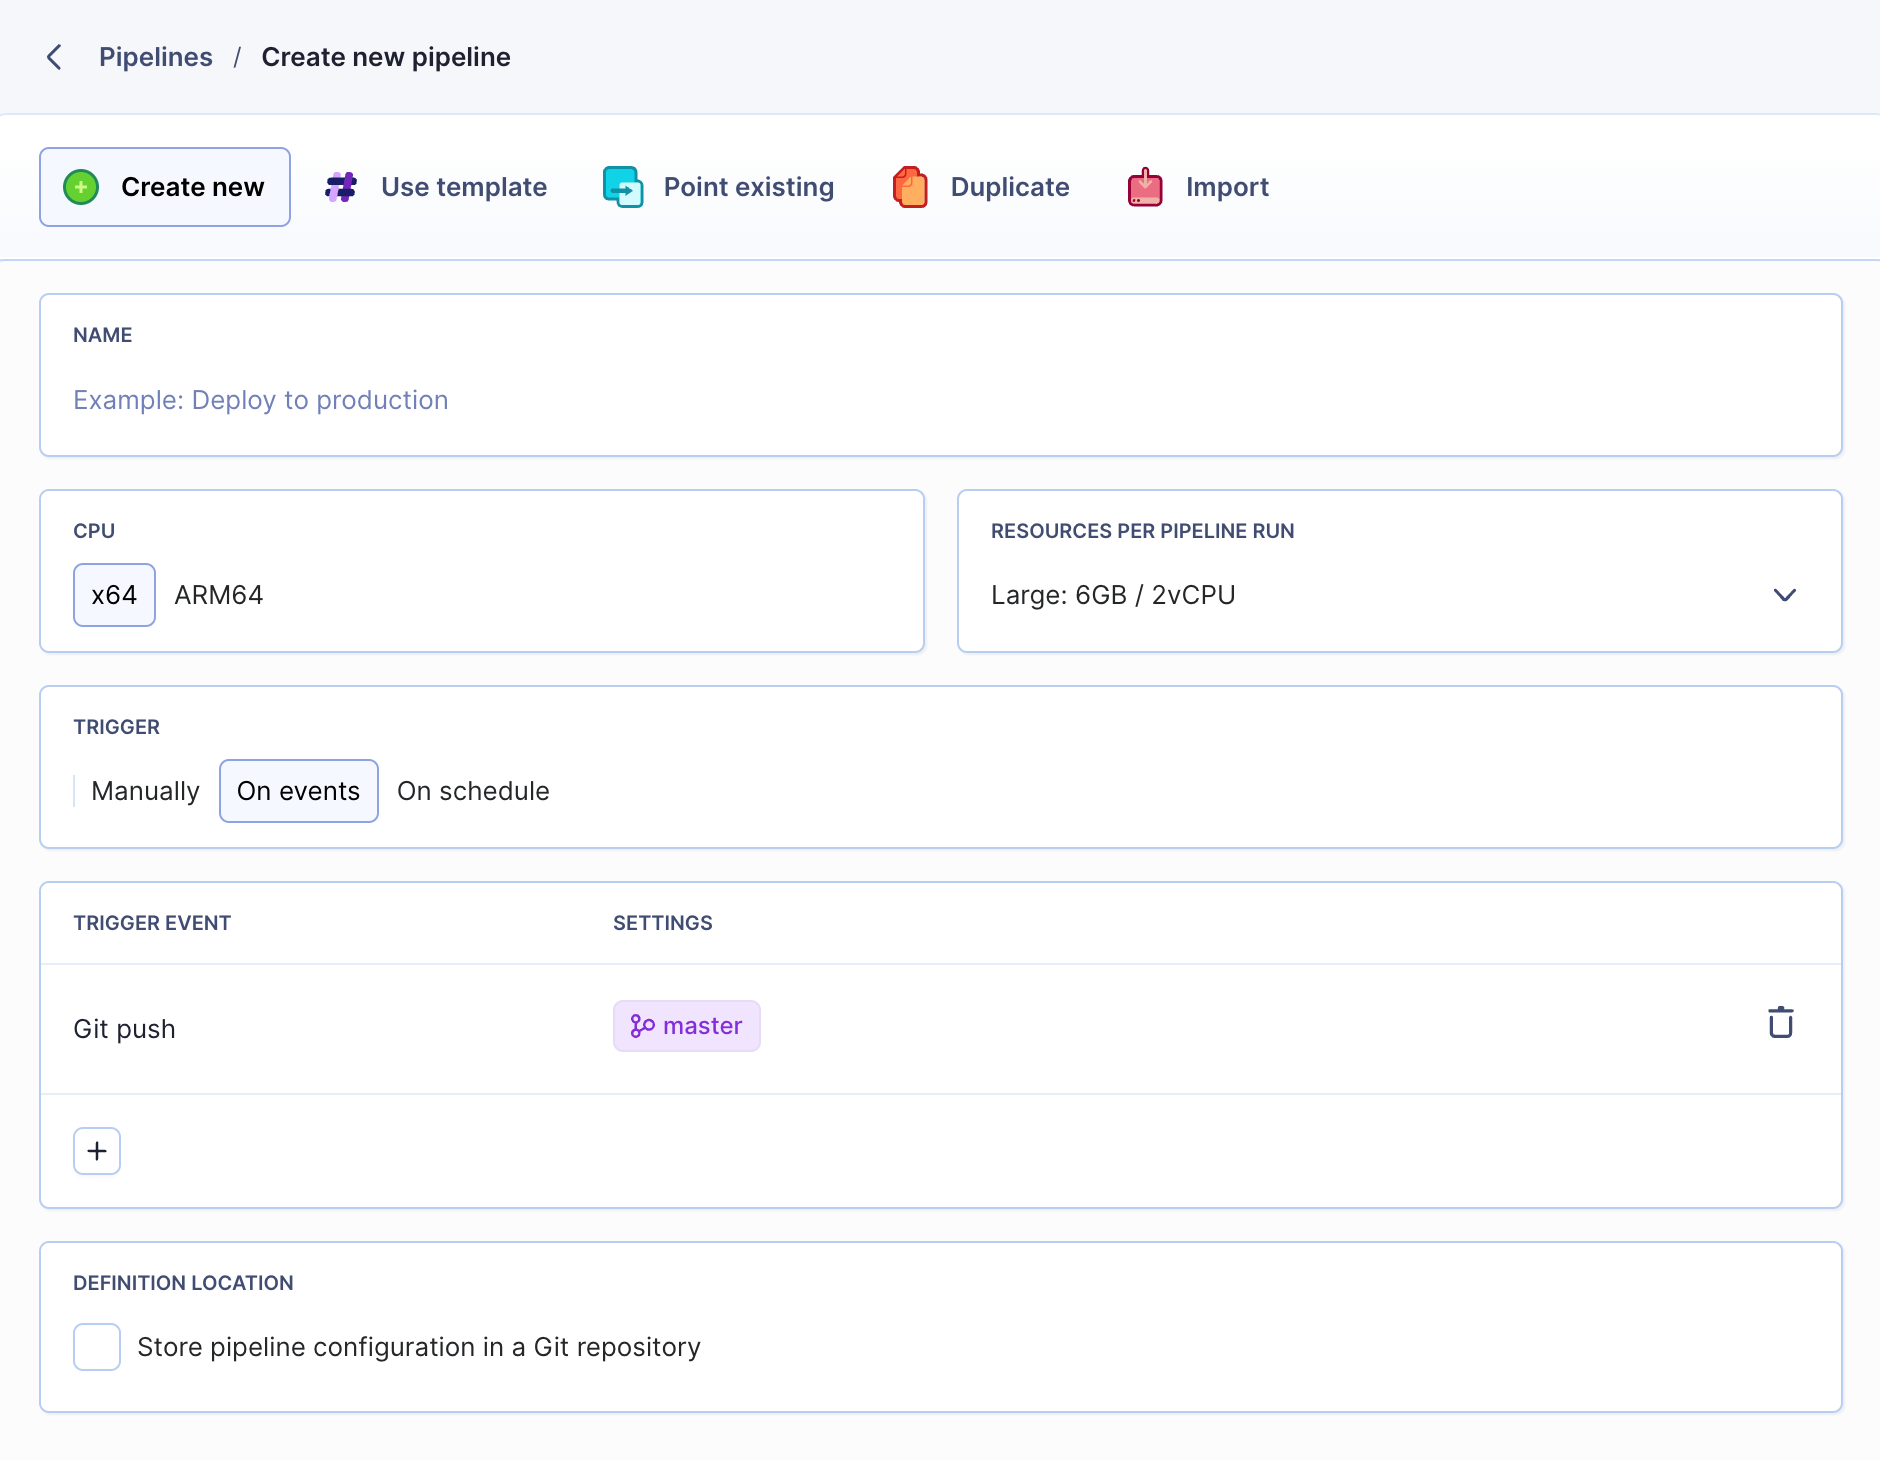
2. Add a new delivery pipeline
Enter the pipeline's name, select the trigger mode, and define the branch from which Buddy will fetch your code:
 Pipeline settings configuration
Trigger modes
- Manually (on click) — recommended for Production
- On events (automatic) — recommended for Development
- On schedule (on time interval) — recommended for Staging/Testing
Event-based triggers allow you to run pipelines whenever a push is made to any branch in the repository, or whenever a branch, tag or pull request is created or deleted.
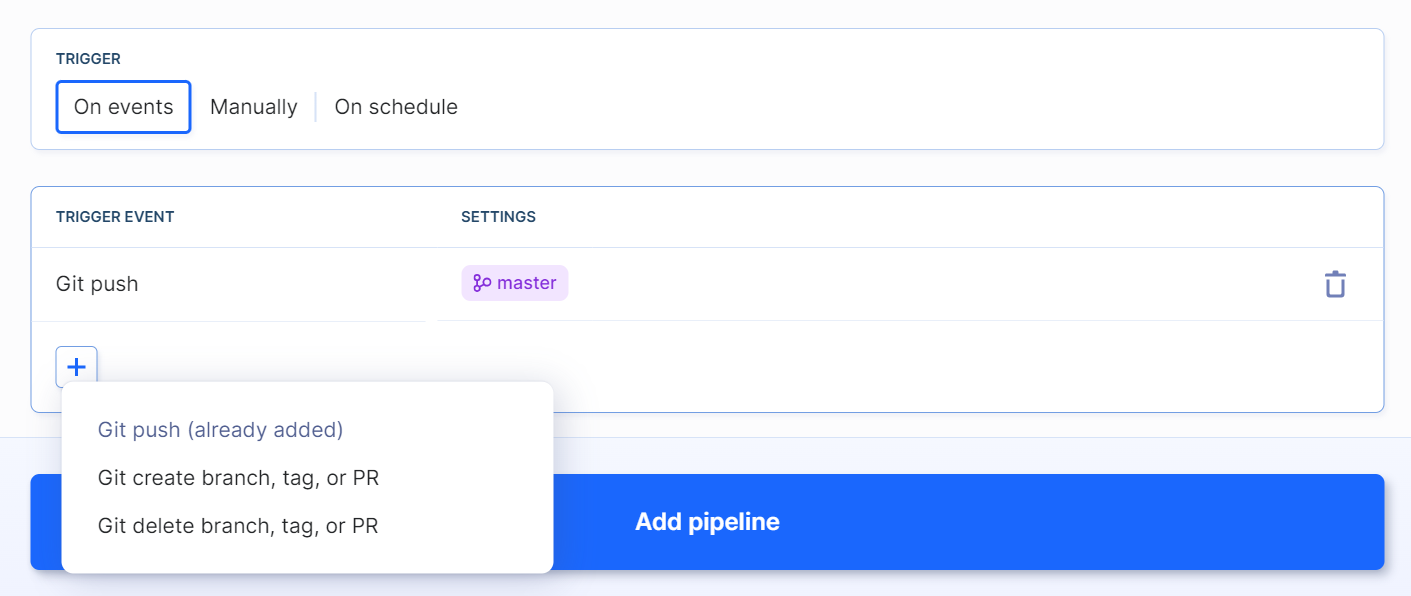 On event pipeline trigger mode
On event pipeline trigger mode
3. Add actions
Buddy lets you choose from dozens of predefined actions. In this example, we'll add a series of actions that will perform the following tasks:
- Pull code from GitHub repository (or any other provider)
- Build and test Java application with Maven
- Upload compiled code to server
- Run db migration & restart server
- Send notification to Slack
3.1 Build and test your Java application
Build actions are run in isolated containers run from official Docker images pulled from Docker Hub. When the pipeline is run, Buddy launches the container, runs commands defined by the user, and shares the results in the pipeline filesystem with deployment actions.
Look up and click the chosen Java compiler from the action to add it to the pipeline. In this example, we'll go with Maven:
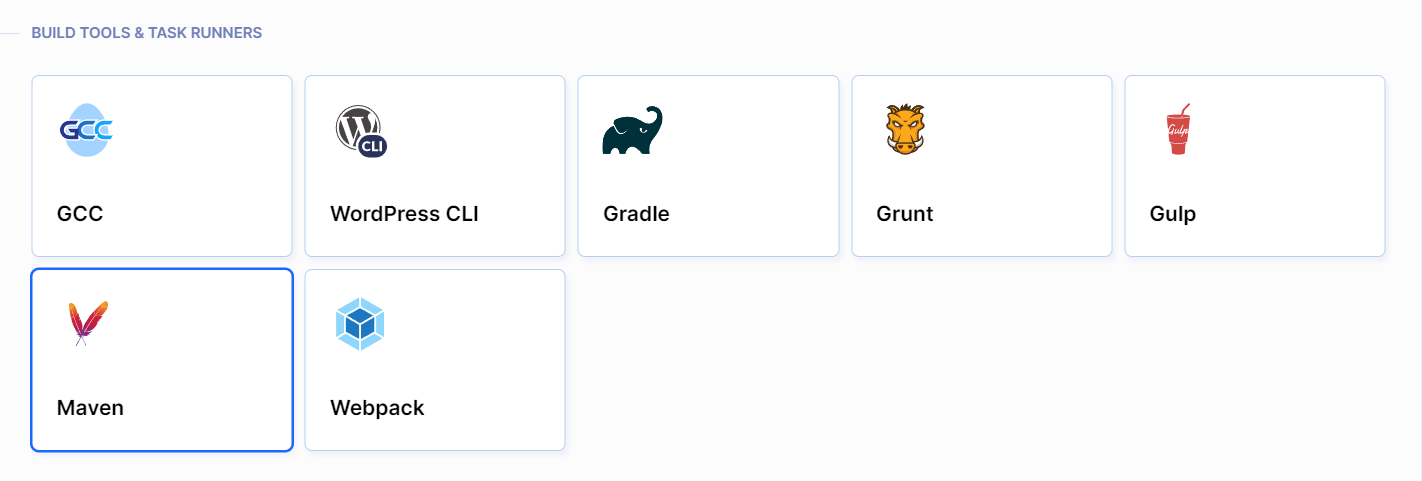 Action list
The Run tab acts like your local dev environment. This means you can run any type tasks (e.g. unit tests) required by your software development process, from creating a project with Spring Initializr to automated tests to building it with the selected compiler:
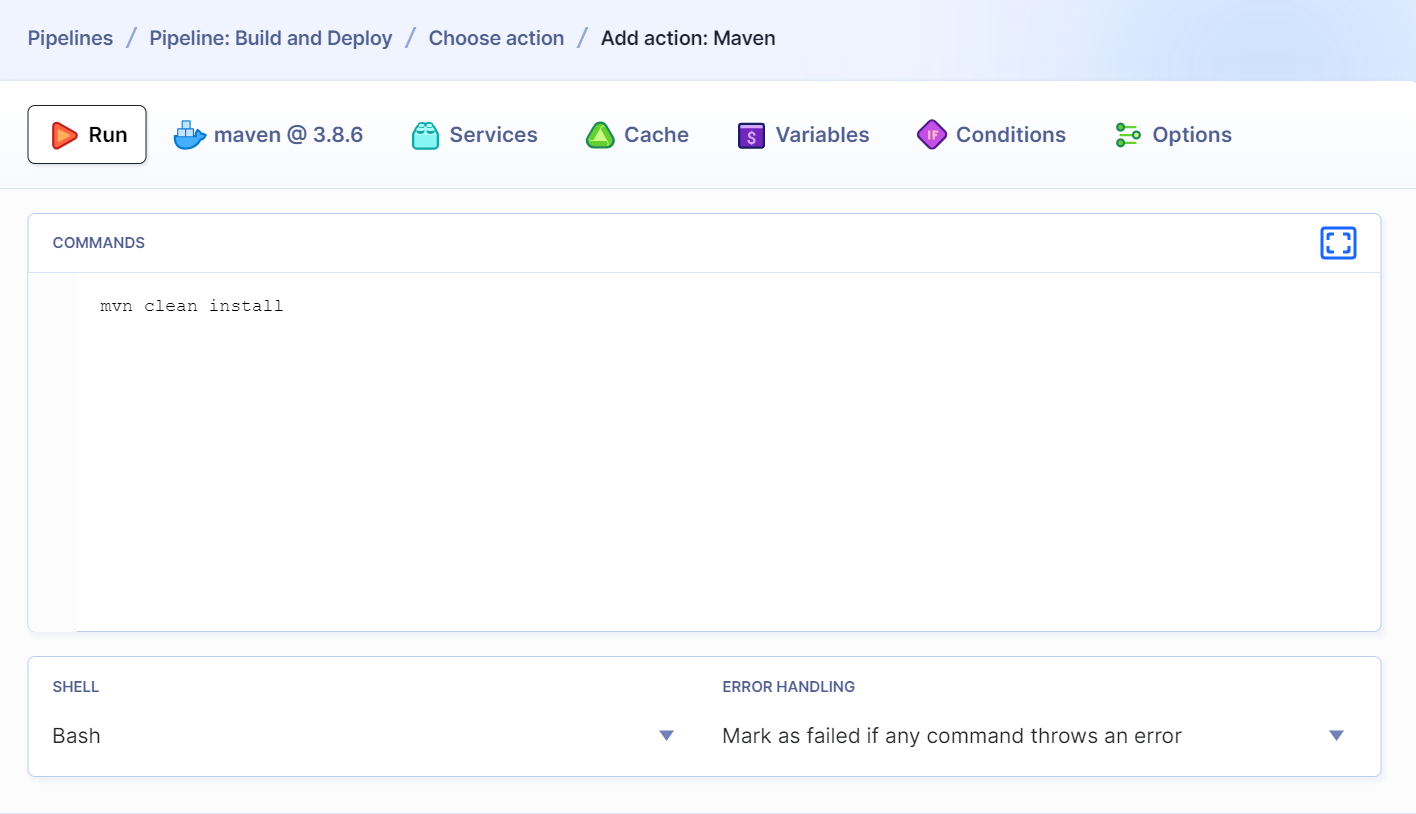 Default Maven build command
- Buddy has dedicated actions for Gradle and Maven compilers. If you use something else, e.g. Ant, you can define a custom Docker image as the runtime template.
- You can install Spring Boot dependencies and required tools (Java JDK, etc.) in the environment tab. You can even install Git directly in the container and run git operations in the CMD field.
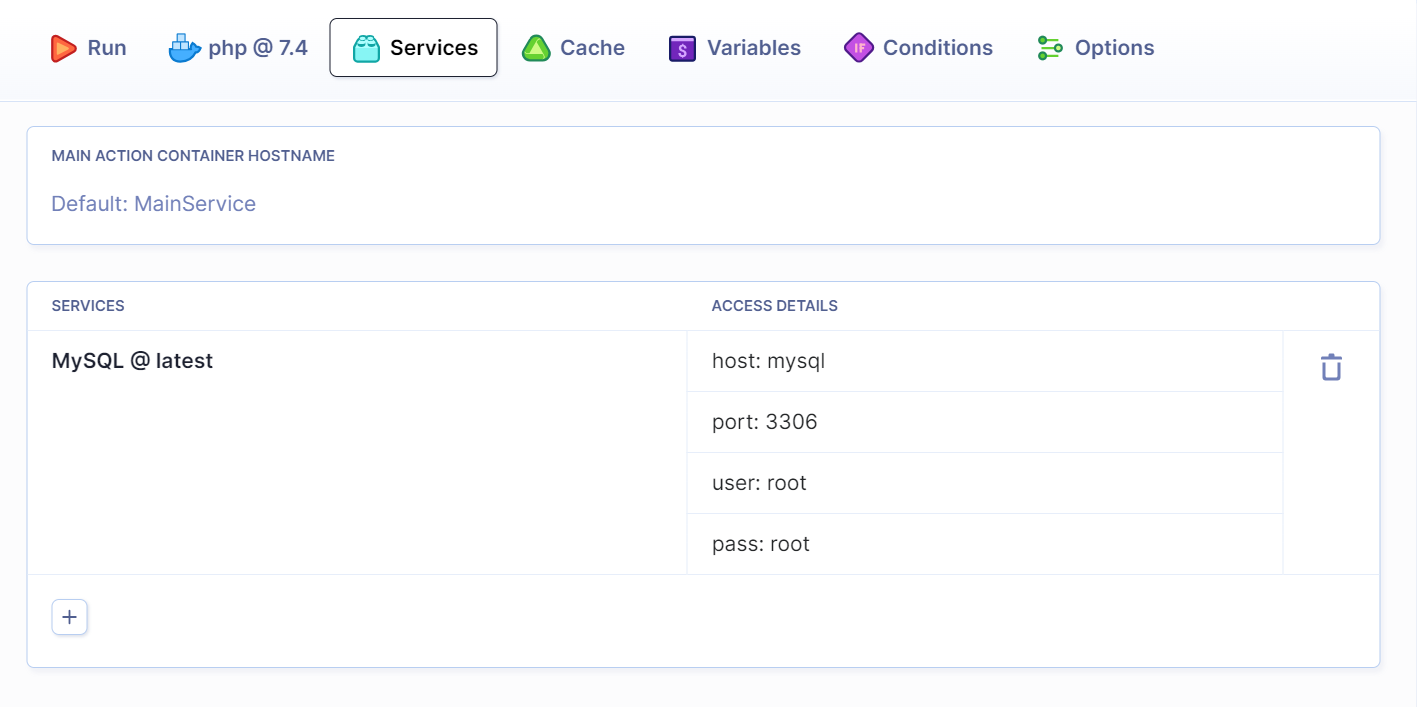
If your tests require a database to run, you can attach it in the Services tab:
 Services tab
Services tab
3.1.2 Maven version
You can change the version of Maven in the runtime environment tab:
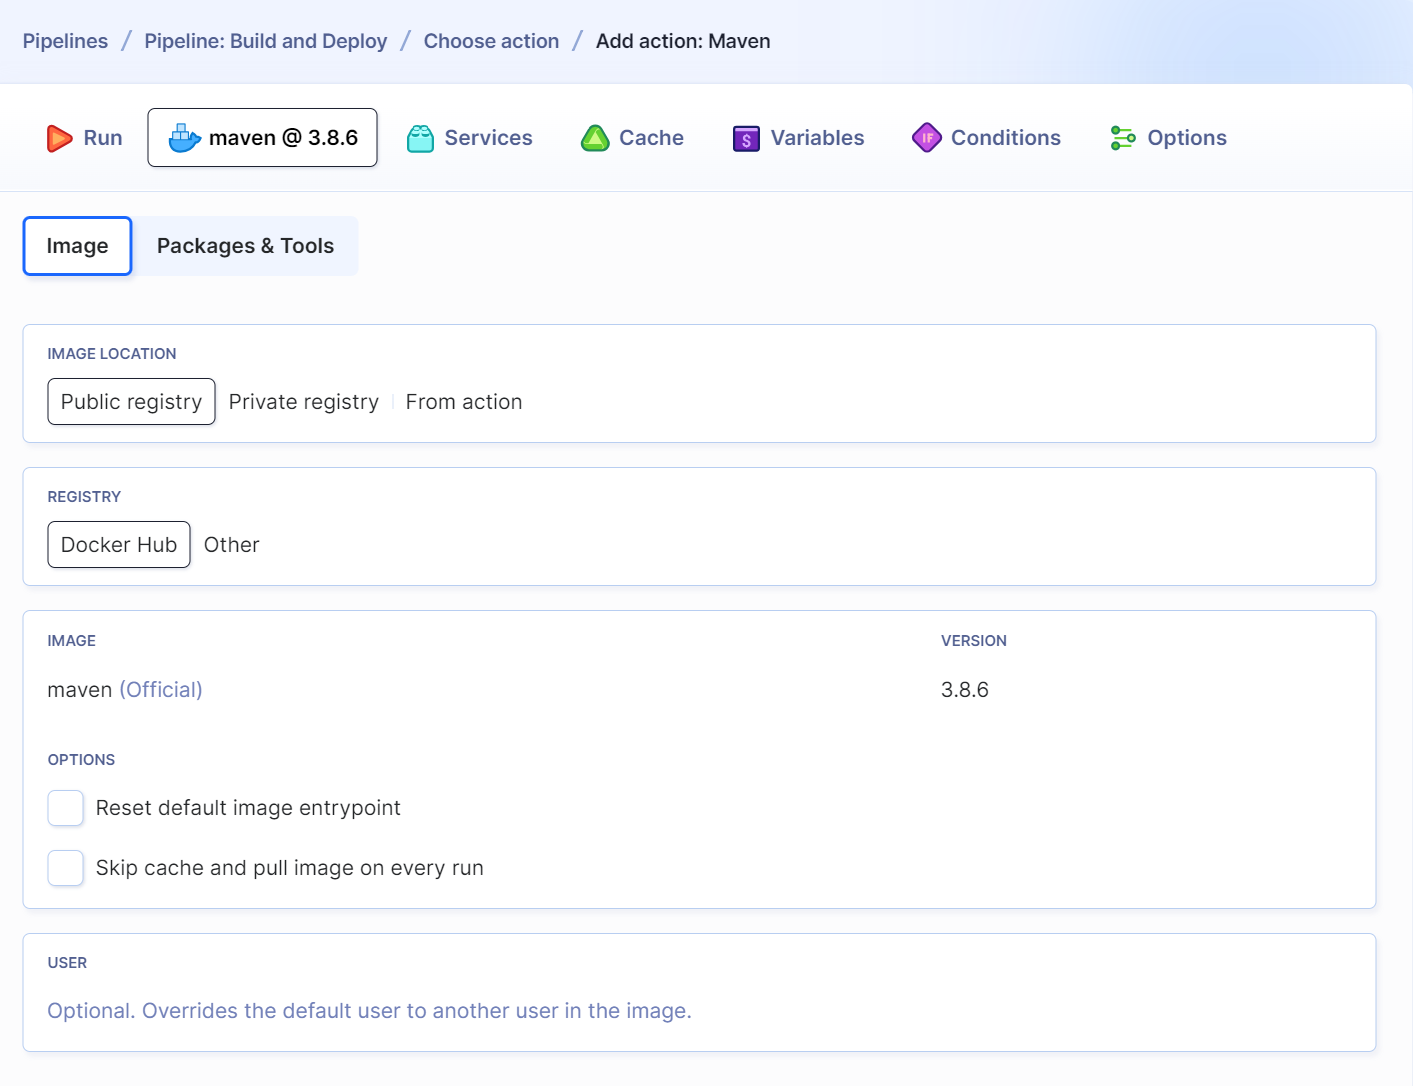 Image settings
3.2 Deploy application to server
The compiled application needs to be uploaded to the server. Head to the Transfer section and select your upload action (SFTP in our case):
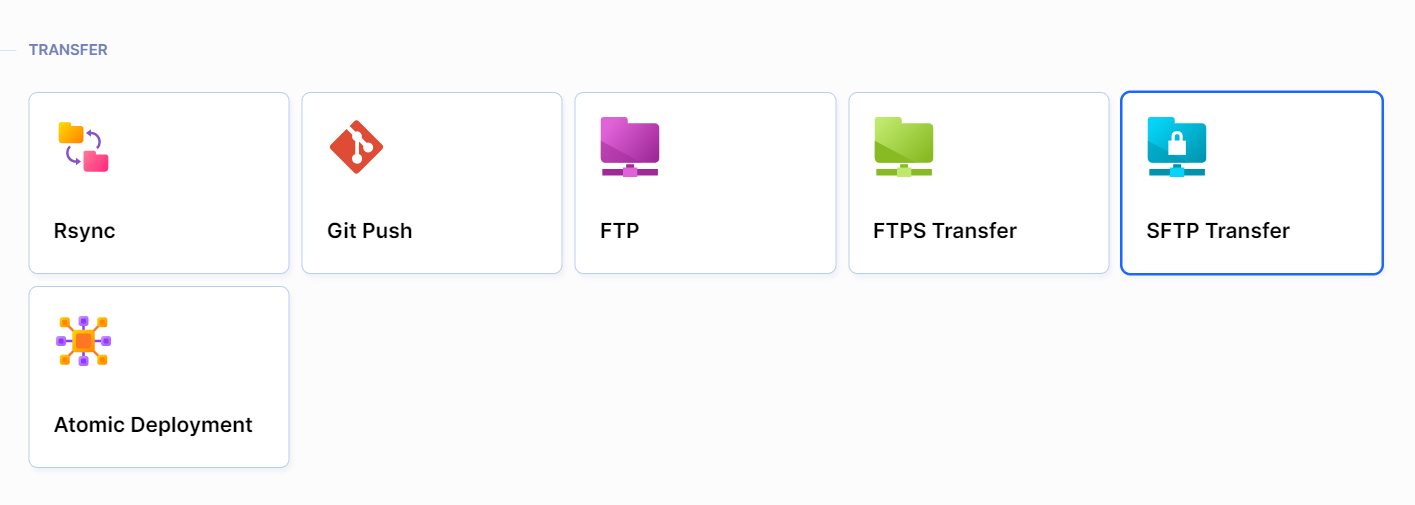 File transfer actions
When adding the action you can choose what and where should be uploaded:
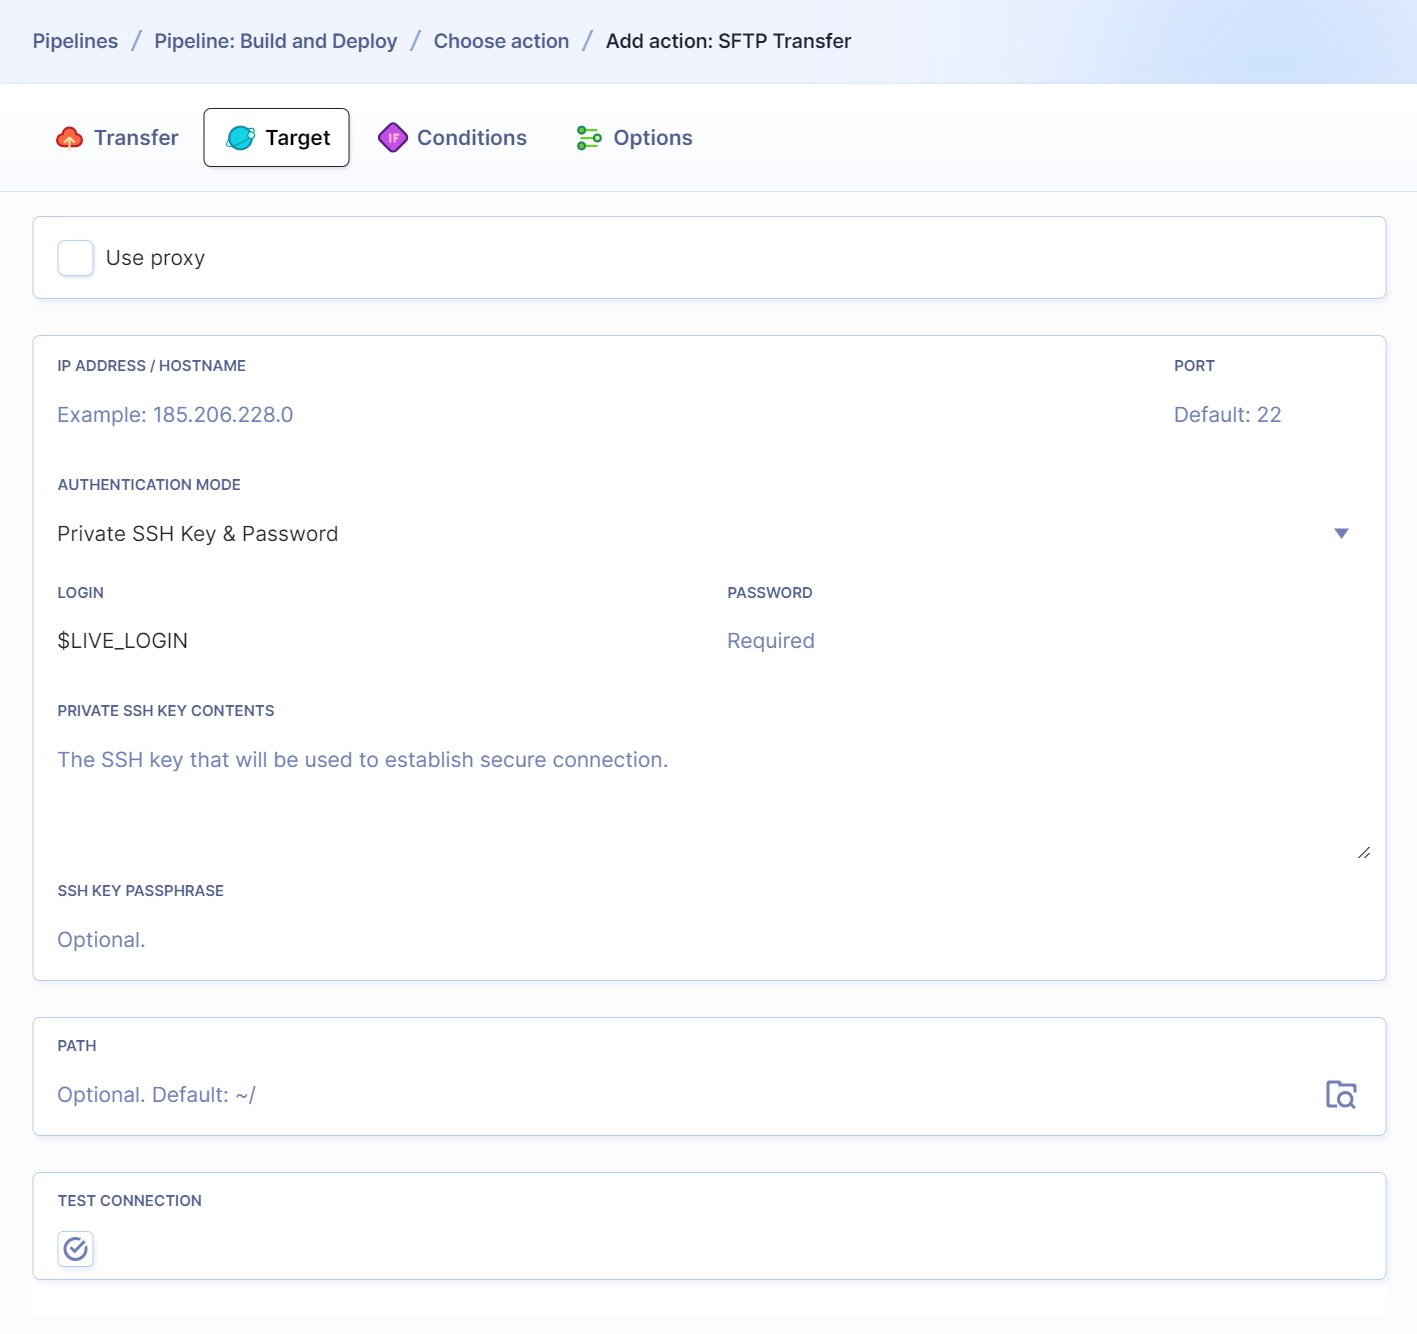 SFTP action configuration
3.3 Run db migration & restart server
Once the app is deployed, you can run additional commands on your server with the SSH action:
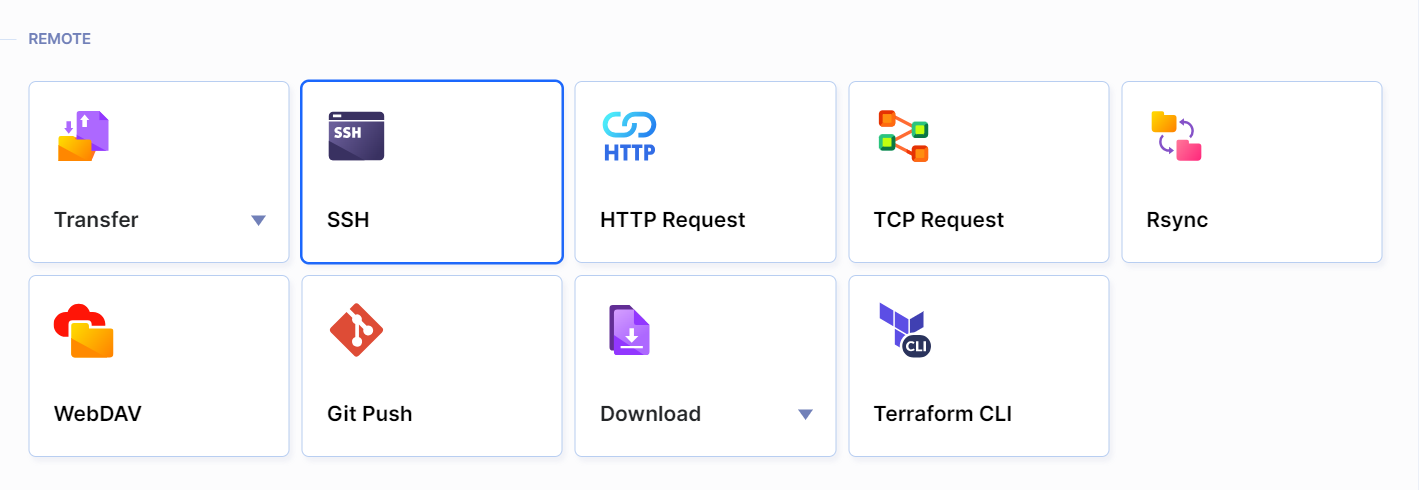 Remote management actions
Enter the commands to execute together and configure authentication details:
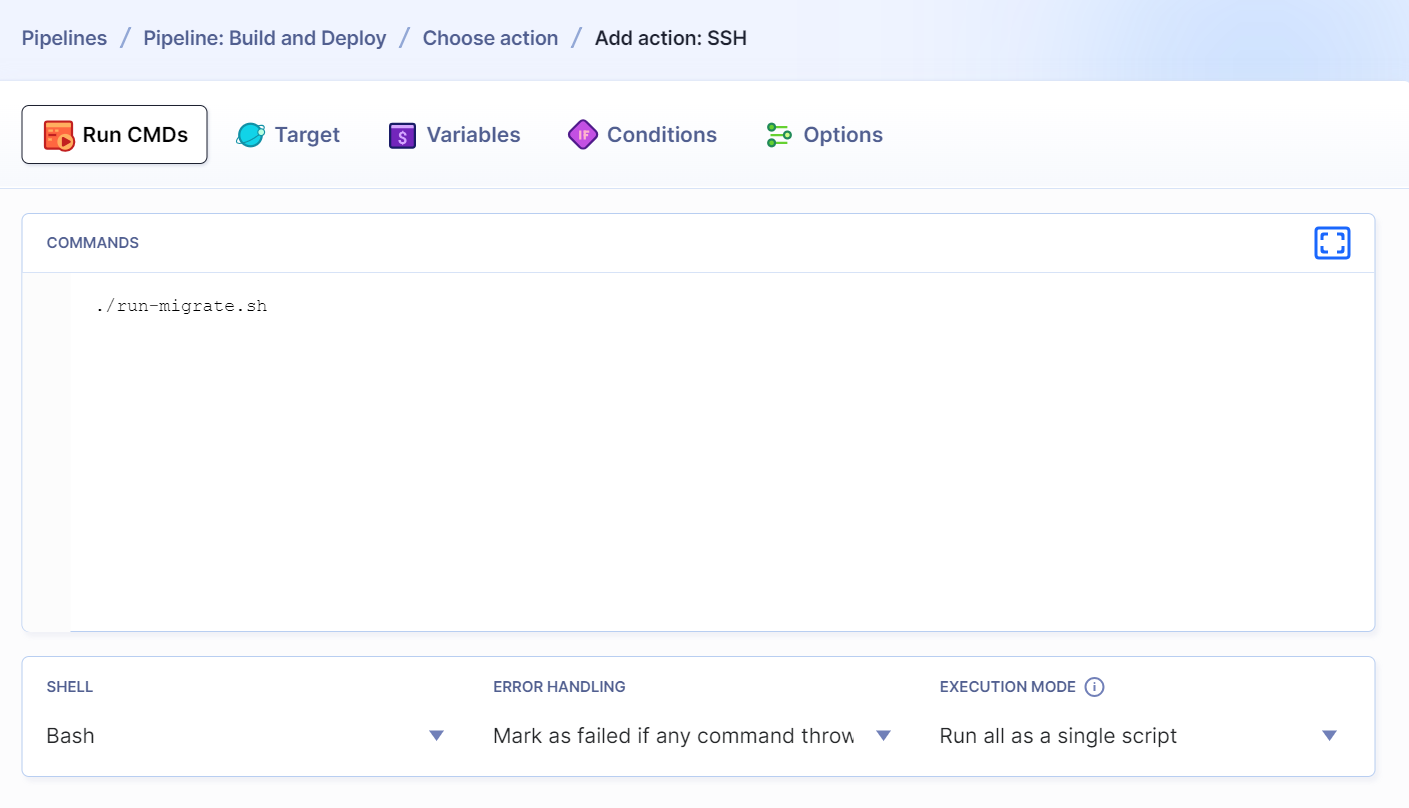 Command console in SSH action
3.4 Send notification to Slack
The last step is letting your team know that a new version was release with a notification action. In this example we'll use Slack:
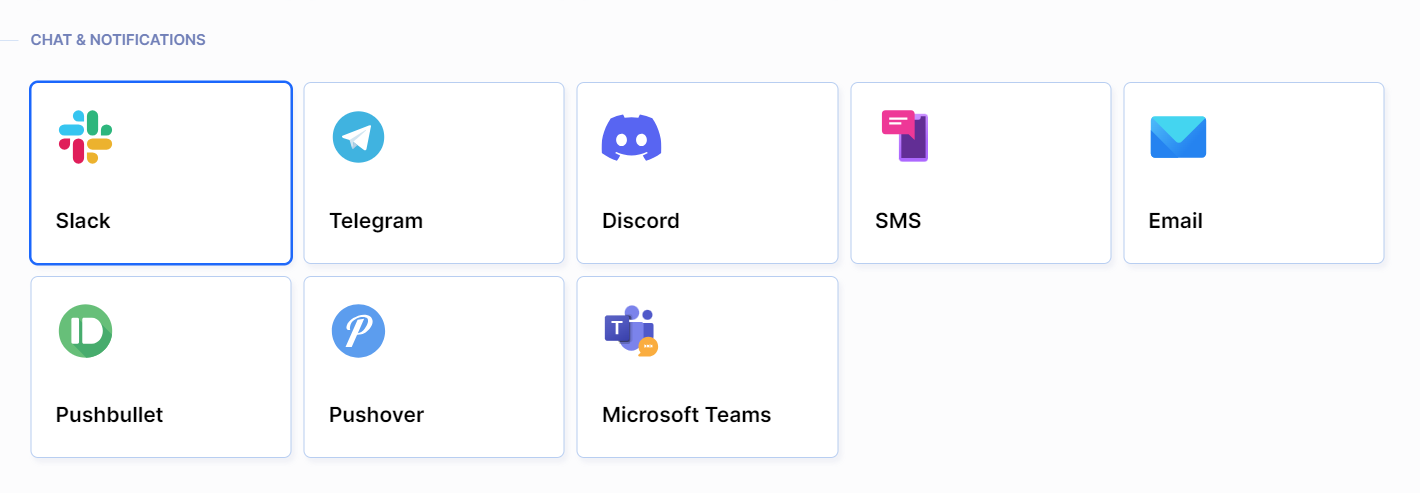 Notification actions
If you add this action in the On Failure tab, Buddy will only send the message if something goes wrong with your build or deployment.
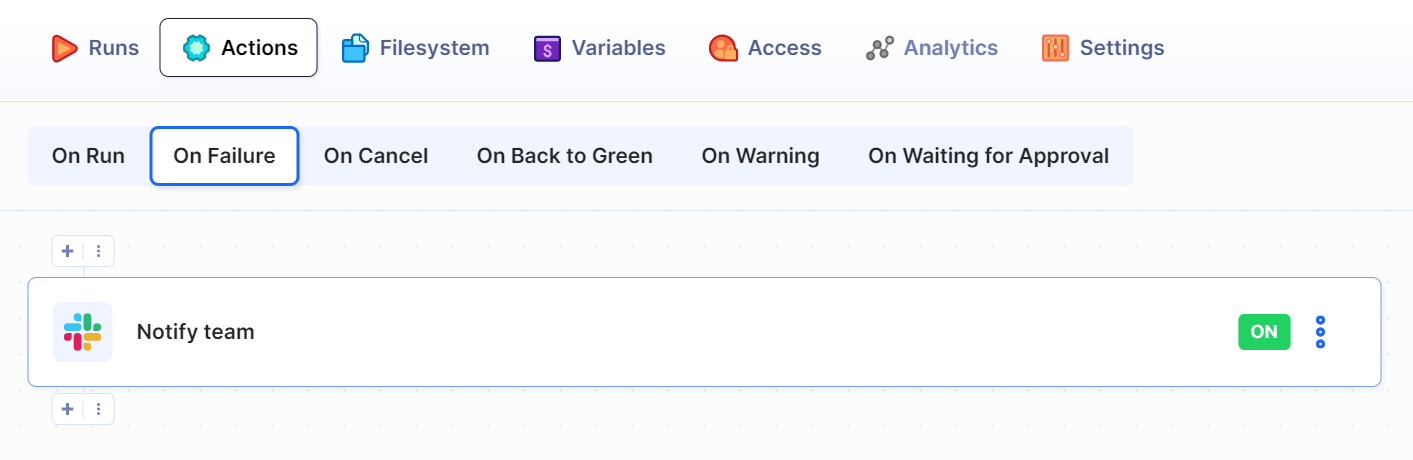 On failure notification
On failure notification
4. Summary
Congratulations! You have just automated your entire delivery process. Make a push to the selected branch and watch Buddy fetch, build, and deploy your project. With Continuous Delivery applied, you can now focus on what's really important: developing awesome apps! 🔥
There's much more Java developers can do with Buddy: create a CI/CD pipeline for staging and production environments, pass environment variables to between Docker containers, collect data with the JaCoCo Maven plugin, integrate with your favorite third-party services (AWS services, Google, Azure), trigger tests on pull requests, build your environment into a Docker image and push it to a Docker repository—perhaps upgrade the process to Continuous Deployment, with no manual interference whatsoever!
Additional resources
How to configure a CI/CD pipeline for Android Blog post: Introducing Apache JMeter
Last modified on February 28, 2024