CI/CD for Java
With Buddy, you can create a pipeline that compiles, tests, and deploys Java applications on a push to Git. The configuration is super simple and takes 10 to 15 minutes.
Image loading...
1. Create a new project
Go to Projects and click Create new project. Select your Git hosting provider (Buddy, GitHub, Bitbucket, GitLab, or Private Server) and enter your project name.
Image loading...
2. Add a new pipeline
Navigate to Pipelines and click New pipeline. In the form, configure the following:
- Name - Enter a descriptive name for your pipeline (e.g., "Deploy to production")
- ID - Optional identifier for the pipeline
- CPU - Select architecture: x64 or ARM64
- Resources per pipeline run - Choose resource allocation (default: Workspace default)
- Definition Location - Optionally check "Store configuration in a Git repository" to use YAML files
Click Add pipeline to create it.
Image loading...
3. Configure workflow: contexts and triggers
After creating the pipeline, go to the Workflow tab to configure:
Image loading...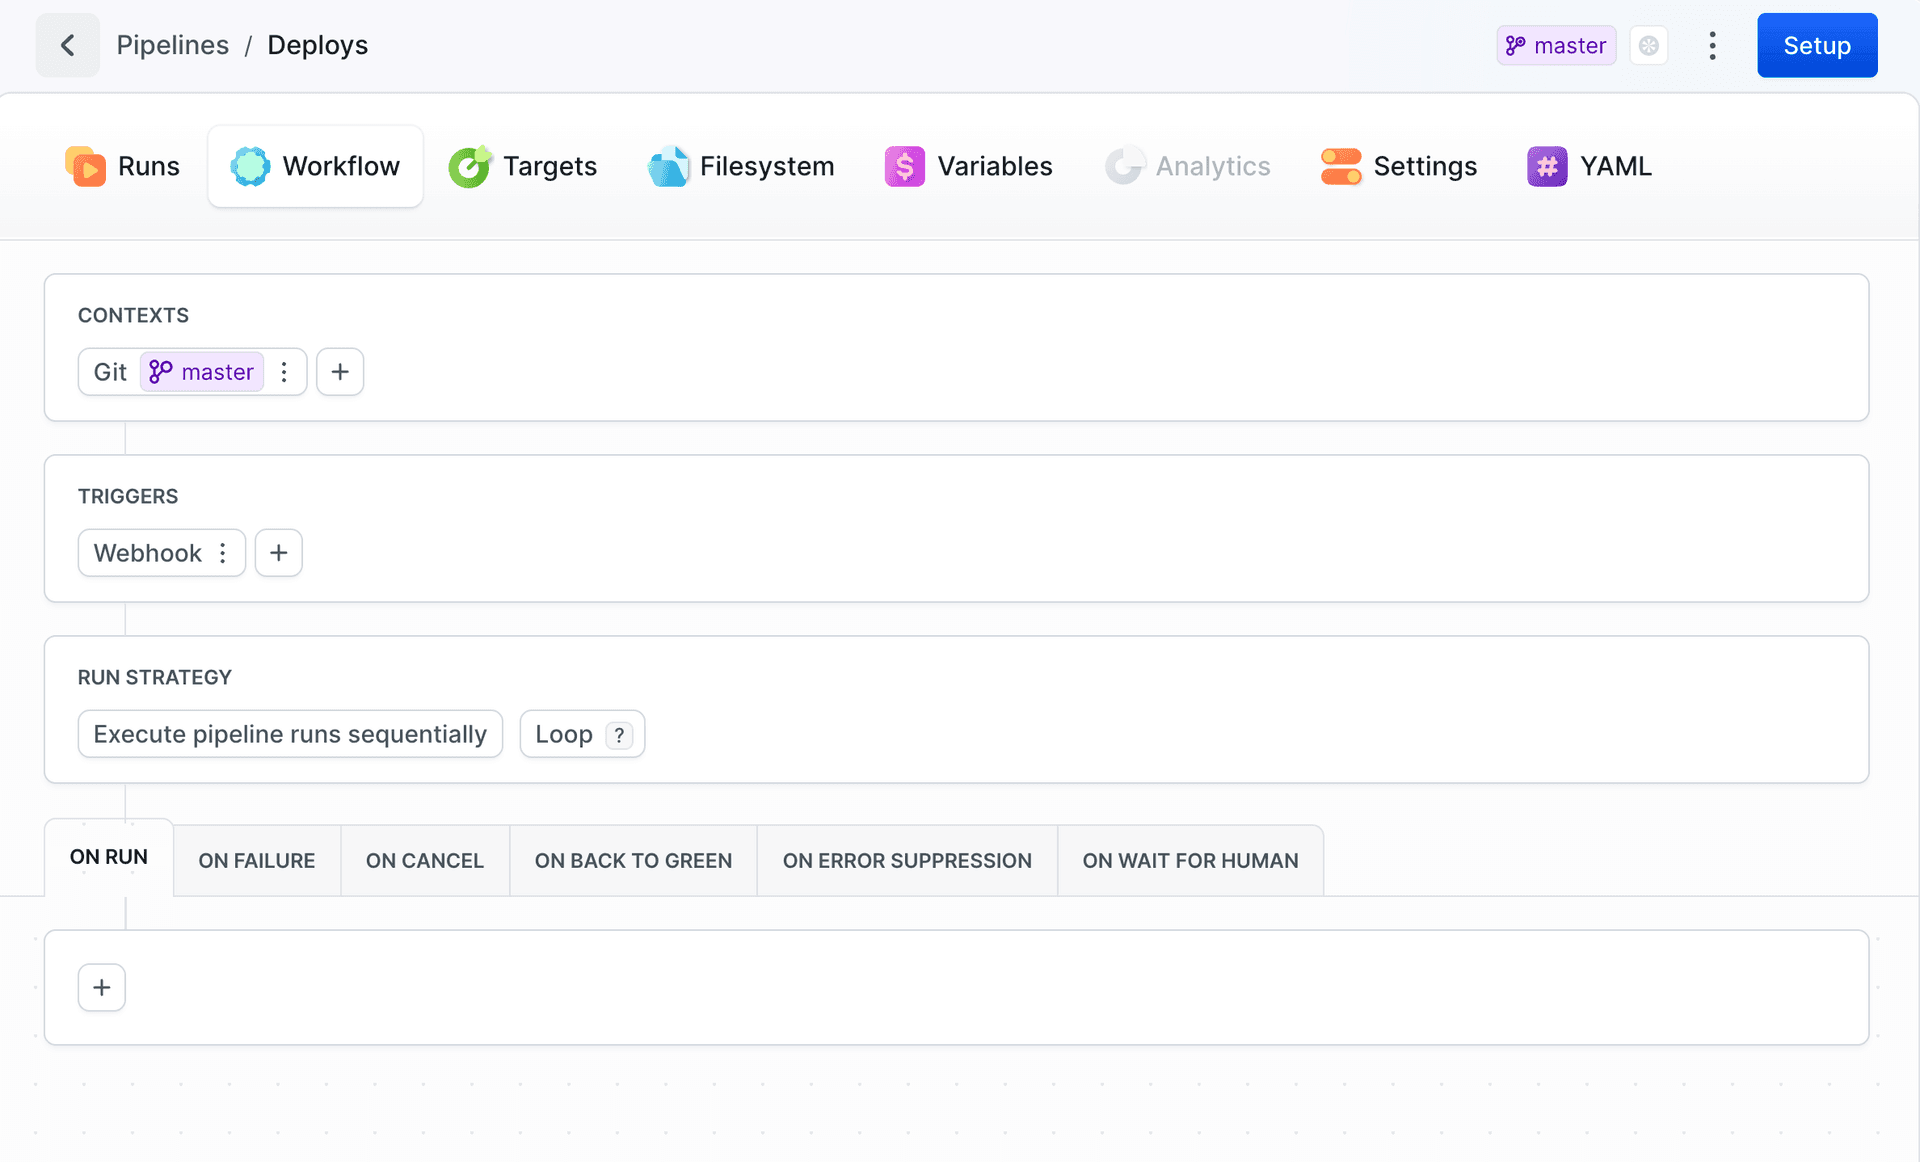
Contexts - Click
+to add Git branch/tag context or Environment. See Contexts.Triggers - Click
+to add Git events, Schedule, or Webhook. See Workflow Configuration.
4. Add actions
Buddy lets you choose from dozens of predefined actions. In this example, we'll add 4 actions that will perform the following tasks:
- Build and test your Java application with Maven
- Upload code toe server together with compiled assets
- Run db migration & restart server
- Send notification to Slack
4.1 Build and test your Java application
Look up and click Maven on the action list to add it to the pipeline:
Image loading...
The Run tab lets you determine the commands to execute. The default commands are:
bashmvn clean install$
Image loading...
4.1.2 Maven version
You can change the version of Maven and install missing packages & tools in the runtime environment tab:
Image loading...

4.2 Deploy application to server
The compiled application needs to be uploaded to the server. Head to the Deploy tab and select your upload action (Transfer in our case, where you can choose SFTP Target):
Image loading...
When adding the action you can choose what and where should be uploaded:
Image loading...
4.3 Run db migration & restart server
Once the app is deployed, you can run additional commands on your server with the SSH action:
Image loading...
Enter the commands to execute together and configure authentication details:
Image loading...
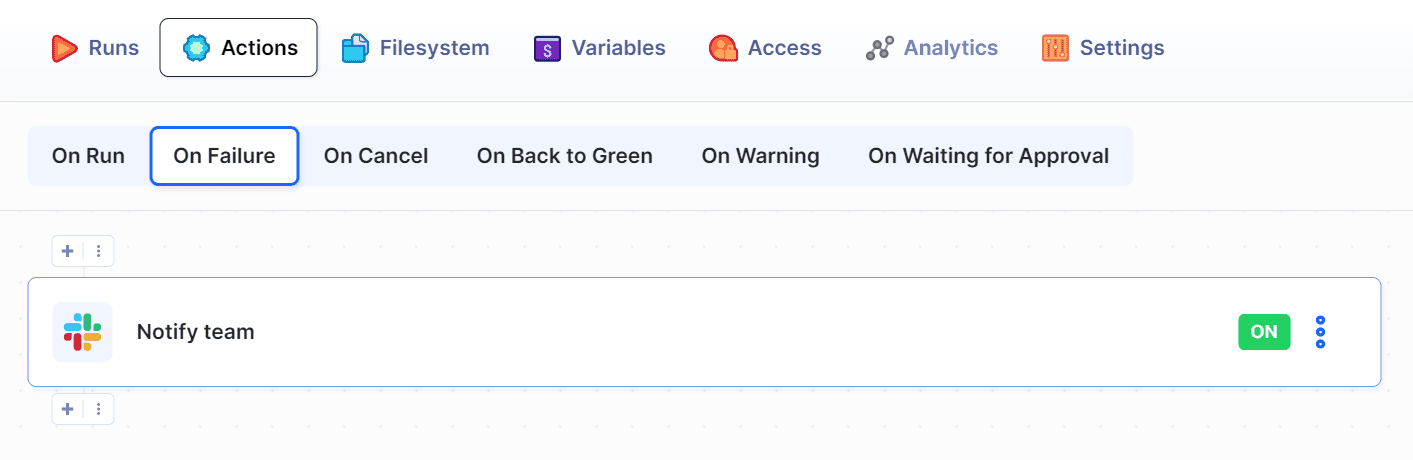
4.4 Send notification to Slack
You can configure Buddy to send your team a message after the deployment. In this example we'll use Slack:
Image loading...
5. Summary
Congratulations! You have just automated your entire delivery process. Make a push to the selected branch and watch Buddy fetch, build, and deploy your project. With Continuous Delivery applied, you can now focus on what's really important: developing awesome apps! 🔥
Last modified on Nov 20, 2025