Pipeline configuration
Pipelines are series of preconfigured actions that can be used to automate basically every aspect of software development. Here you will learn how to configure a pipeline which builds, signs, and deploys an iOS application on a push to the selected Git branch.
Image loading...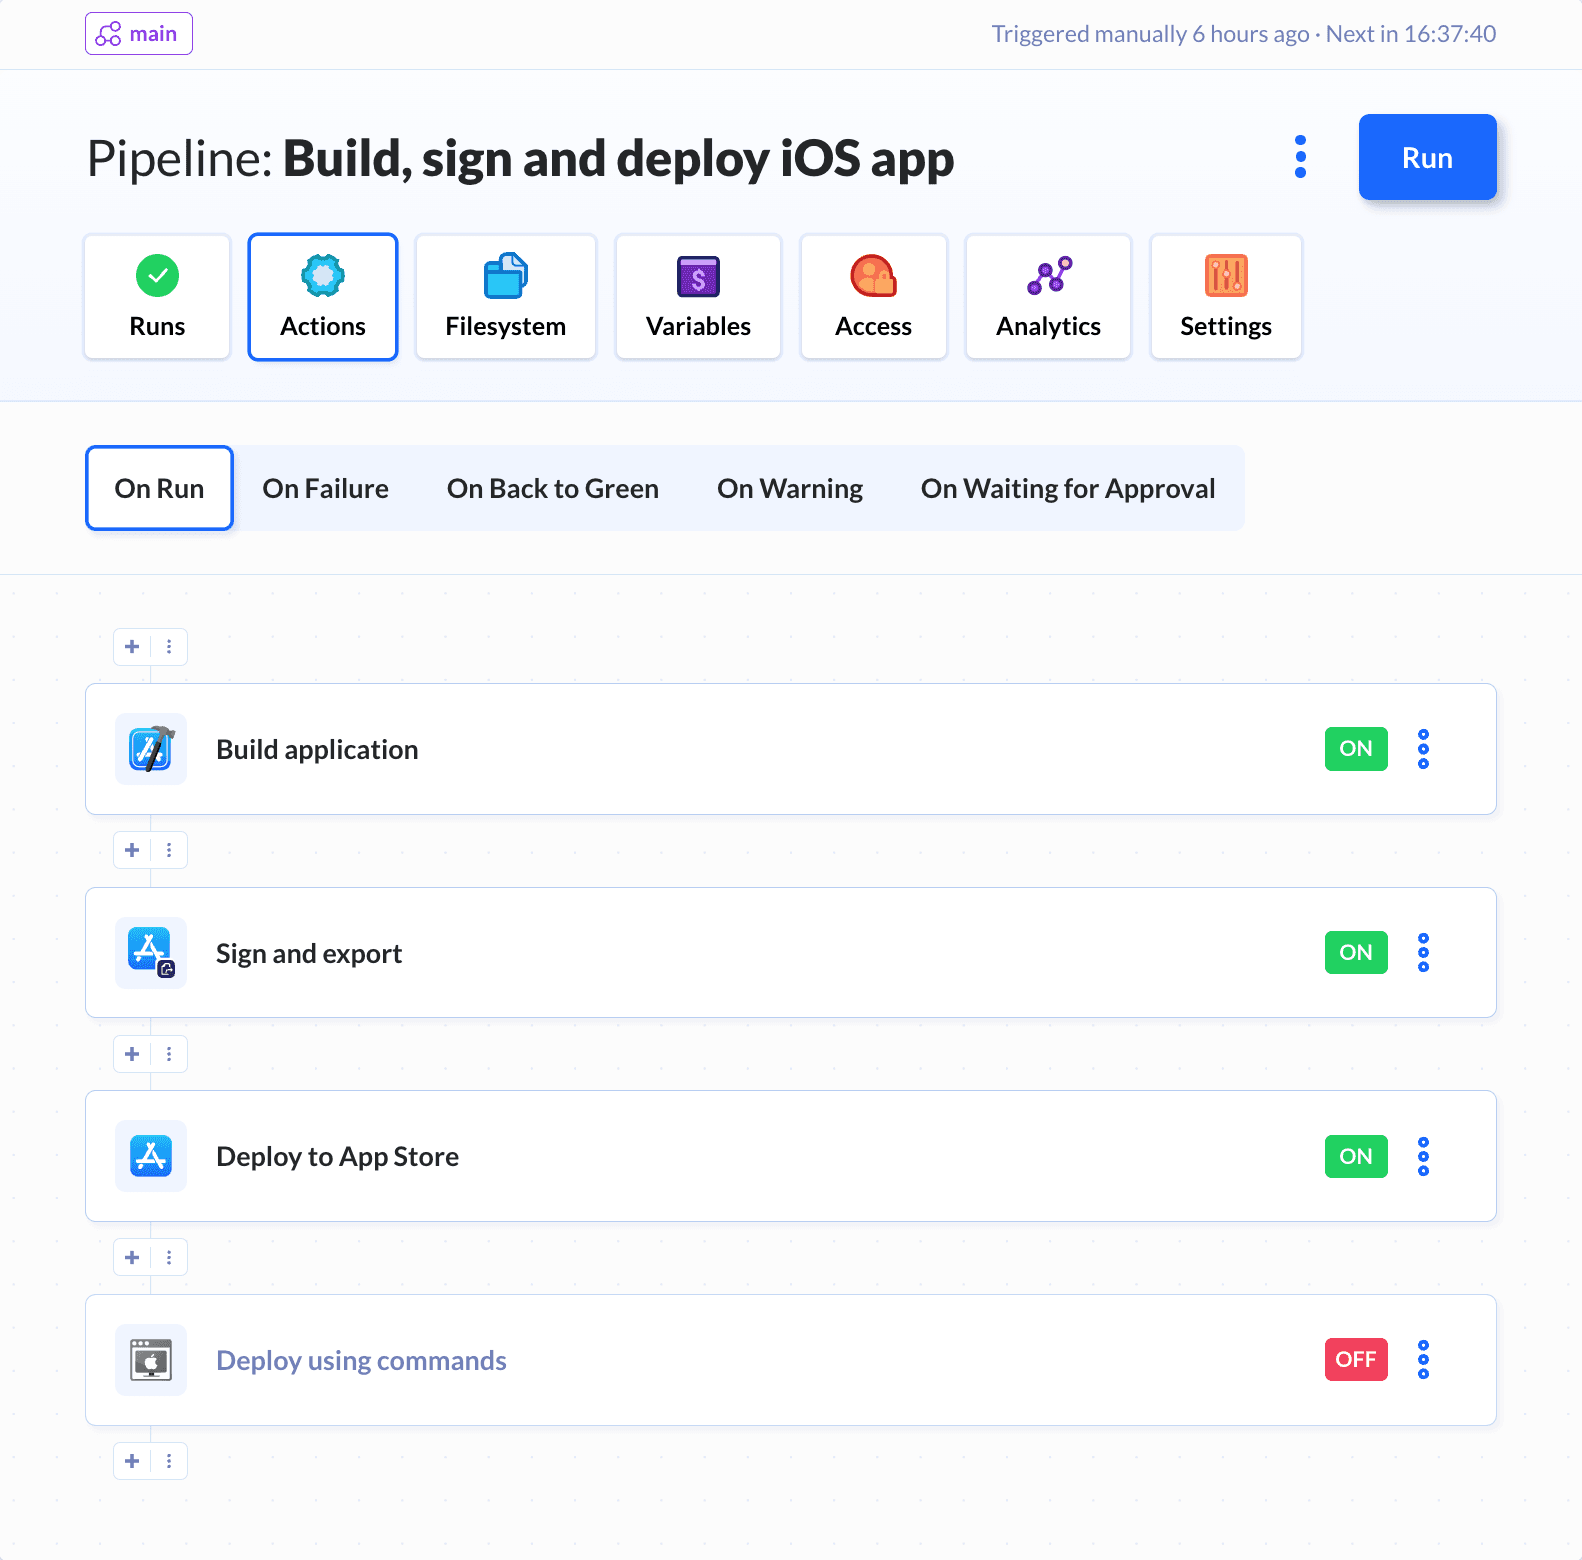
Create a new project
Go to Projects and click Create new project. Select your Git hosting provider (Buddy, GitHub, Bitbucket, GitLab, or Private Server) and enter your project name.
Image loading...
Add a new pipeline
Navigate to Pipelines and click New pipeline. In the form, configure the following:
- Name - Enter a descriptive name for your pipeline (e.g., "Deploy to production")
- ID - Optional identifier for the pipeline
- CPU - Select architecture: x64 or ARM64
- Resources per pipeline run - Choose resource allocation (default: Workspace default)
- Definition Location - Optionally check "Store configuration in a Git repository" to use YAML files
Click Add pipeline to create it.
Image loading...
Configure workflow: contexts and triggers
After creating the pipeline, go to the Workflow tab to configure:
Image loading...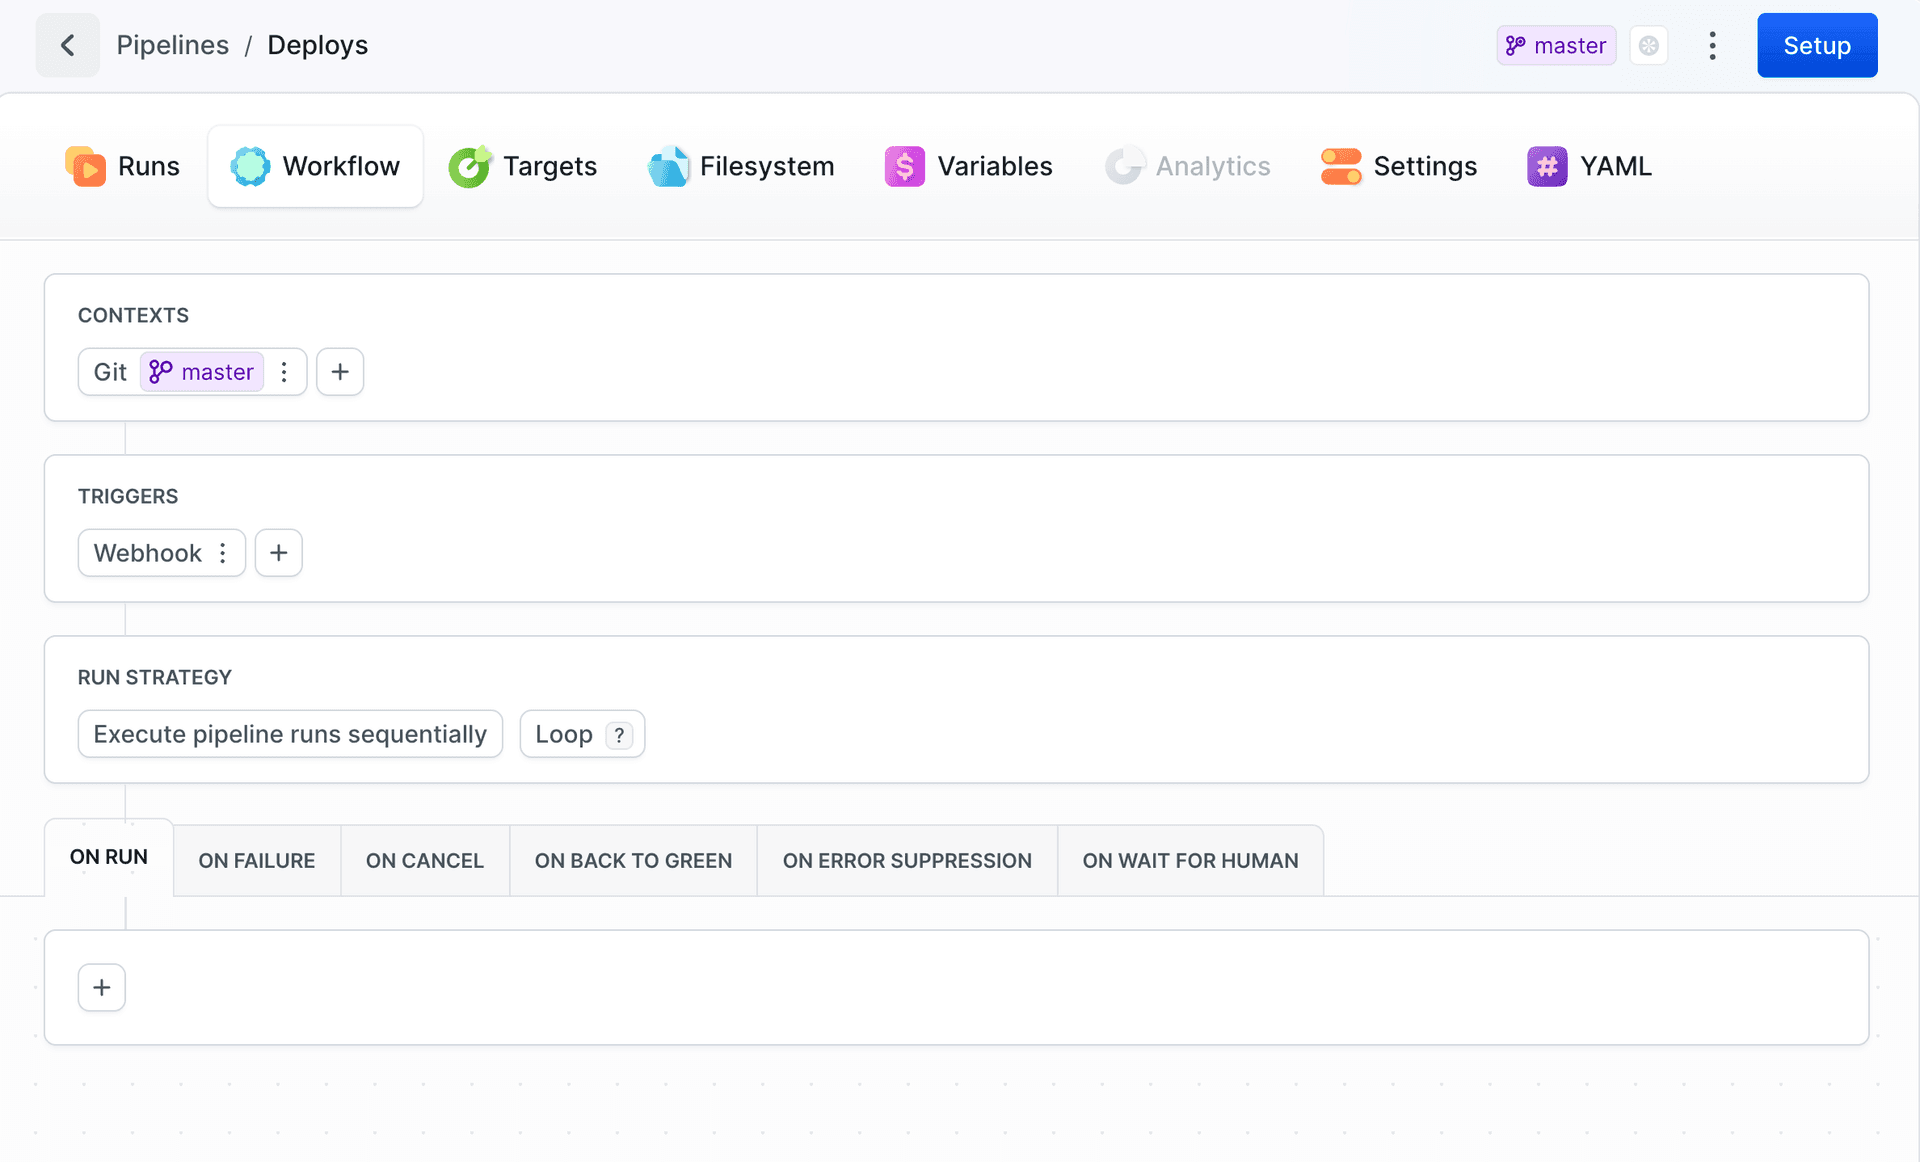
Contexts - Click
+to add Git branch/tag context or Environment. See Contexts.Triggers - Click
+to add Git events, Schedule, or Webhook. See Workflow Configuration.
Add actions
Build
On the action list, switch to the Mobile tab and select the framework in which you develop your application:
Image loading...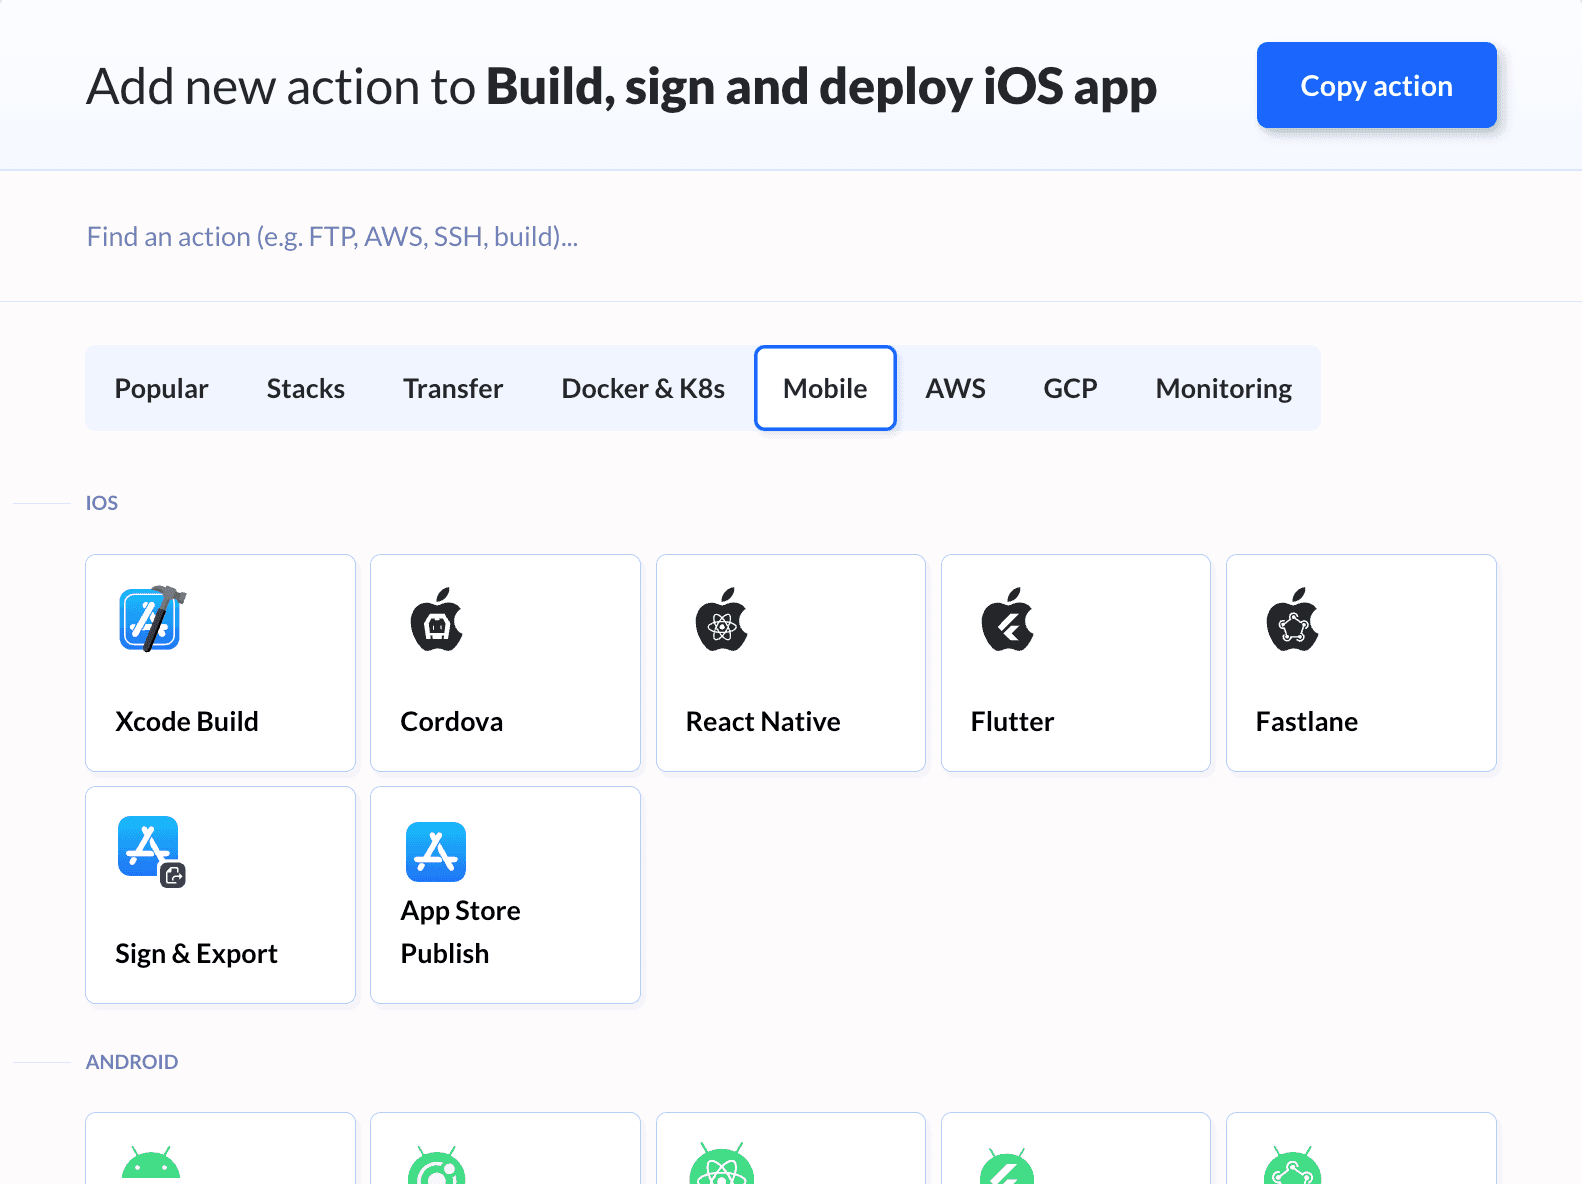
Here we can see an Xcode action which uses Fastlane to build the application:
Image loading...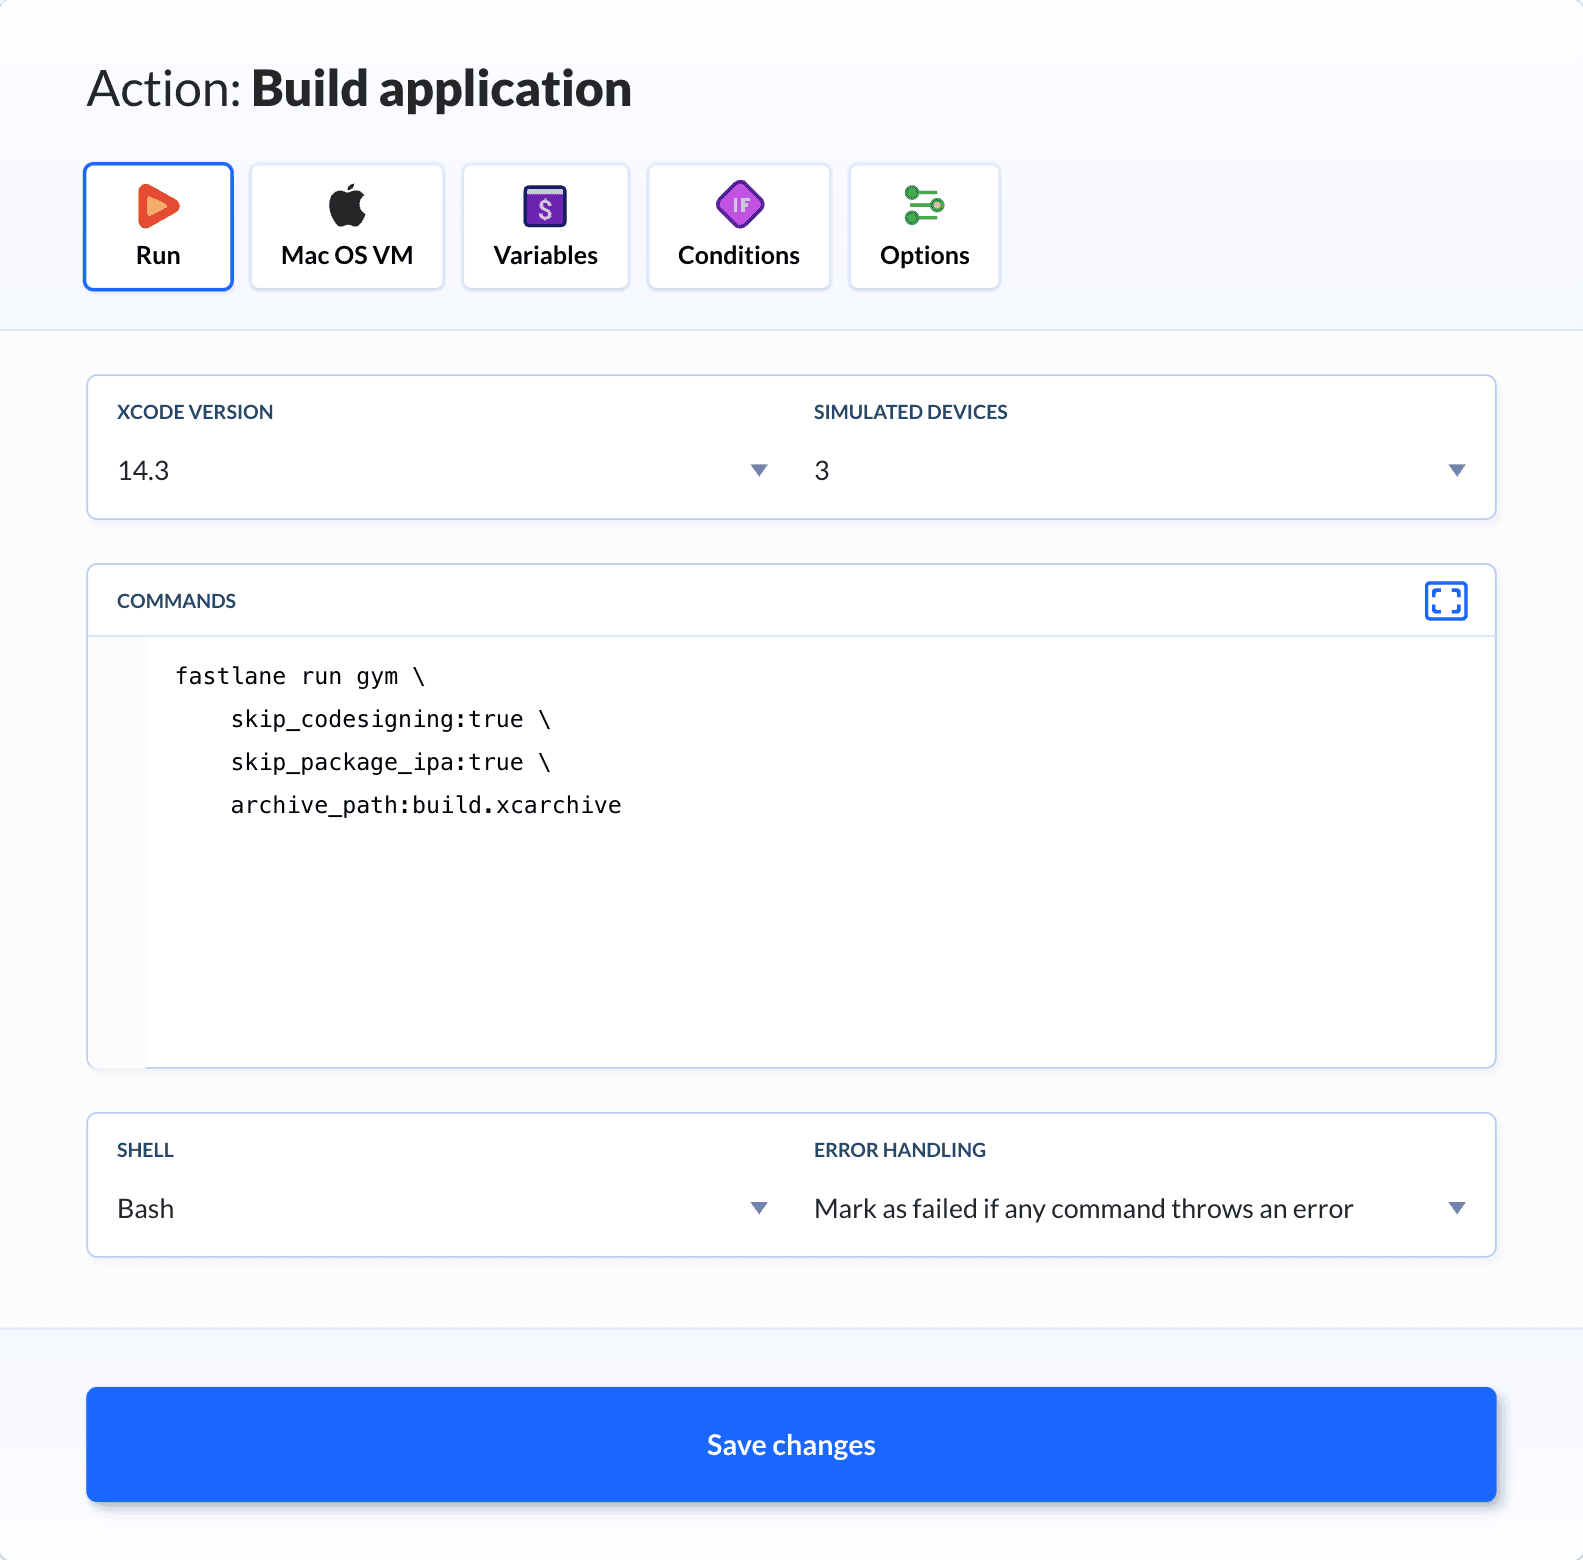
You can use the dropdown menus to change the version of your framework and select the devices to simulate:
Image loading...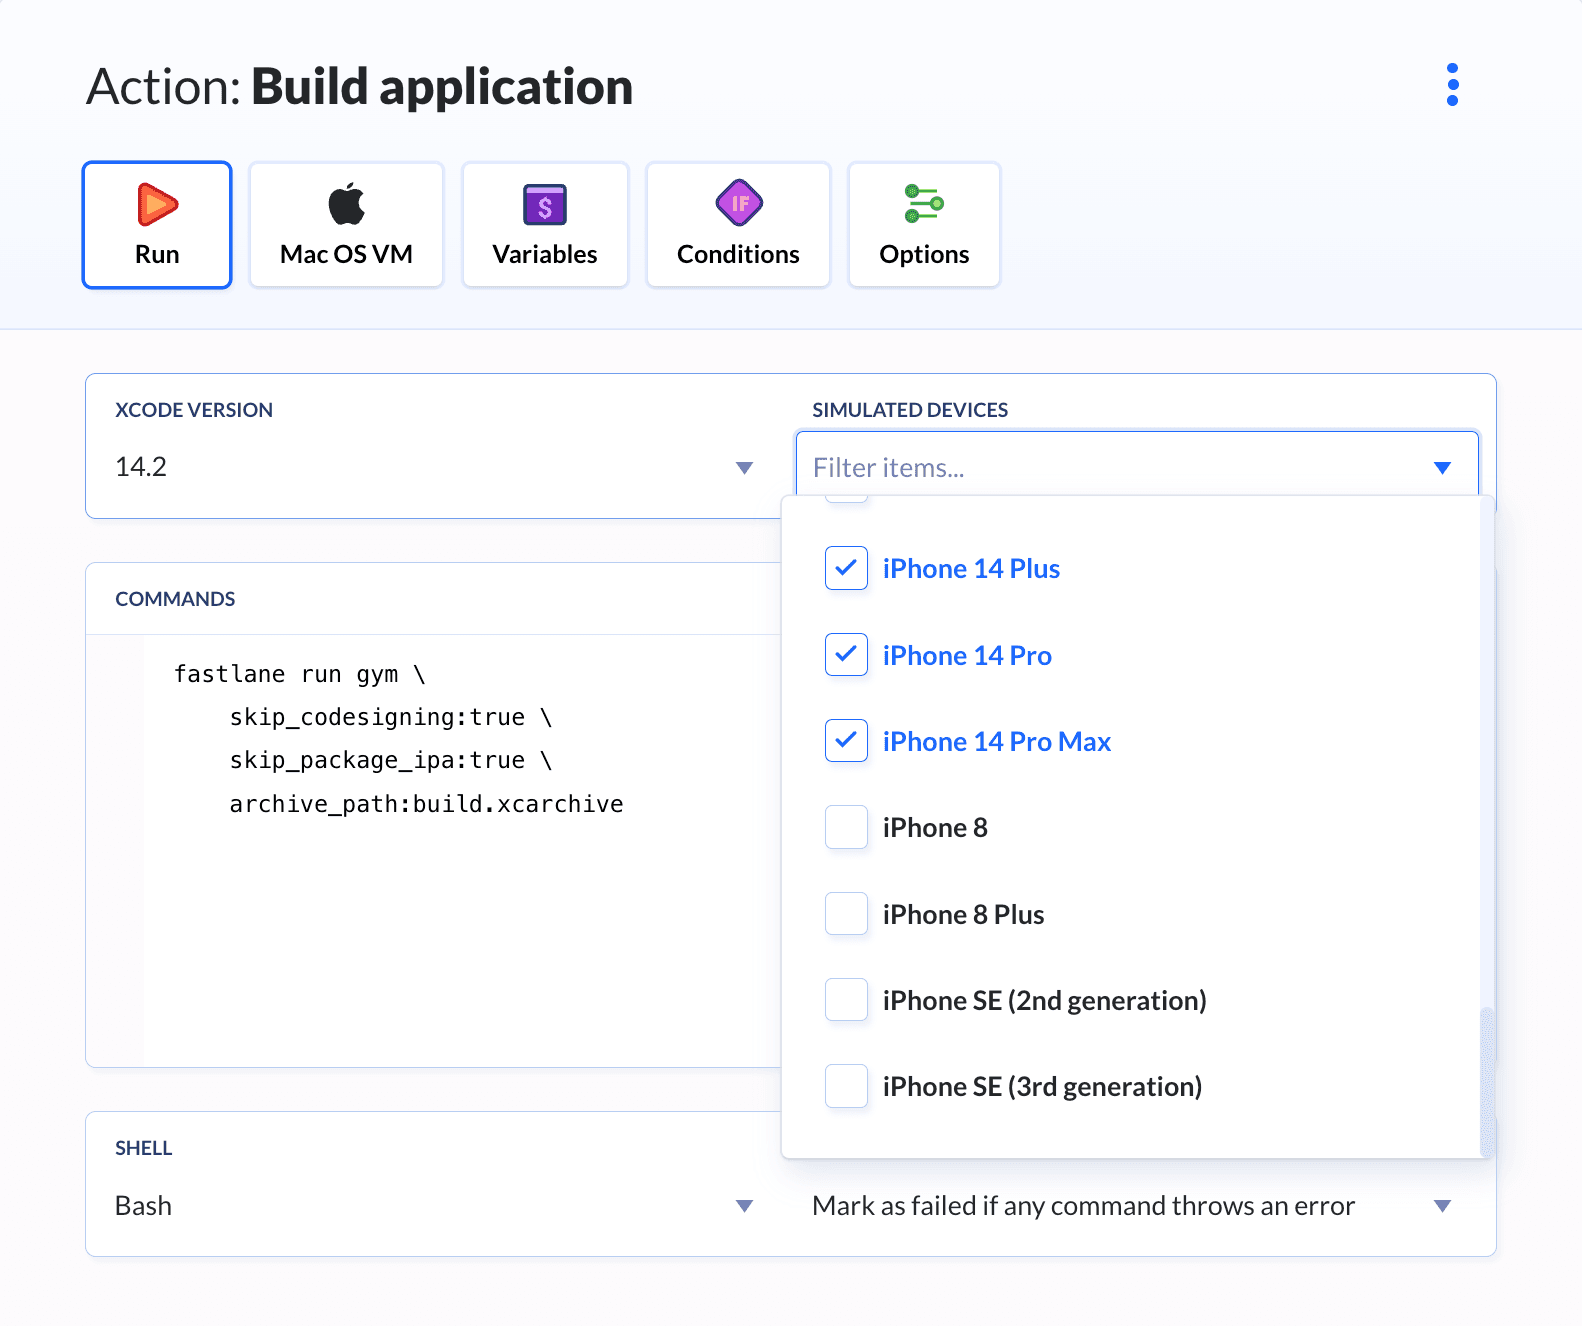
Sign package
Before deploying the package, you first need to sign it. Click the + on the pipeline view and look up the Sign & Export action:
Image loading...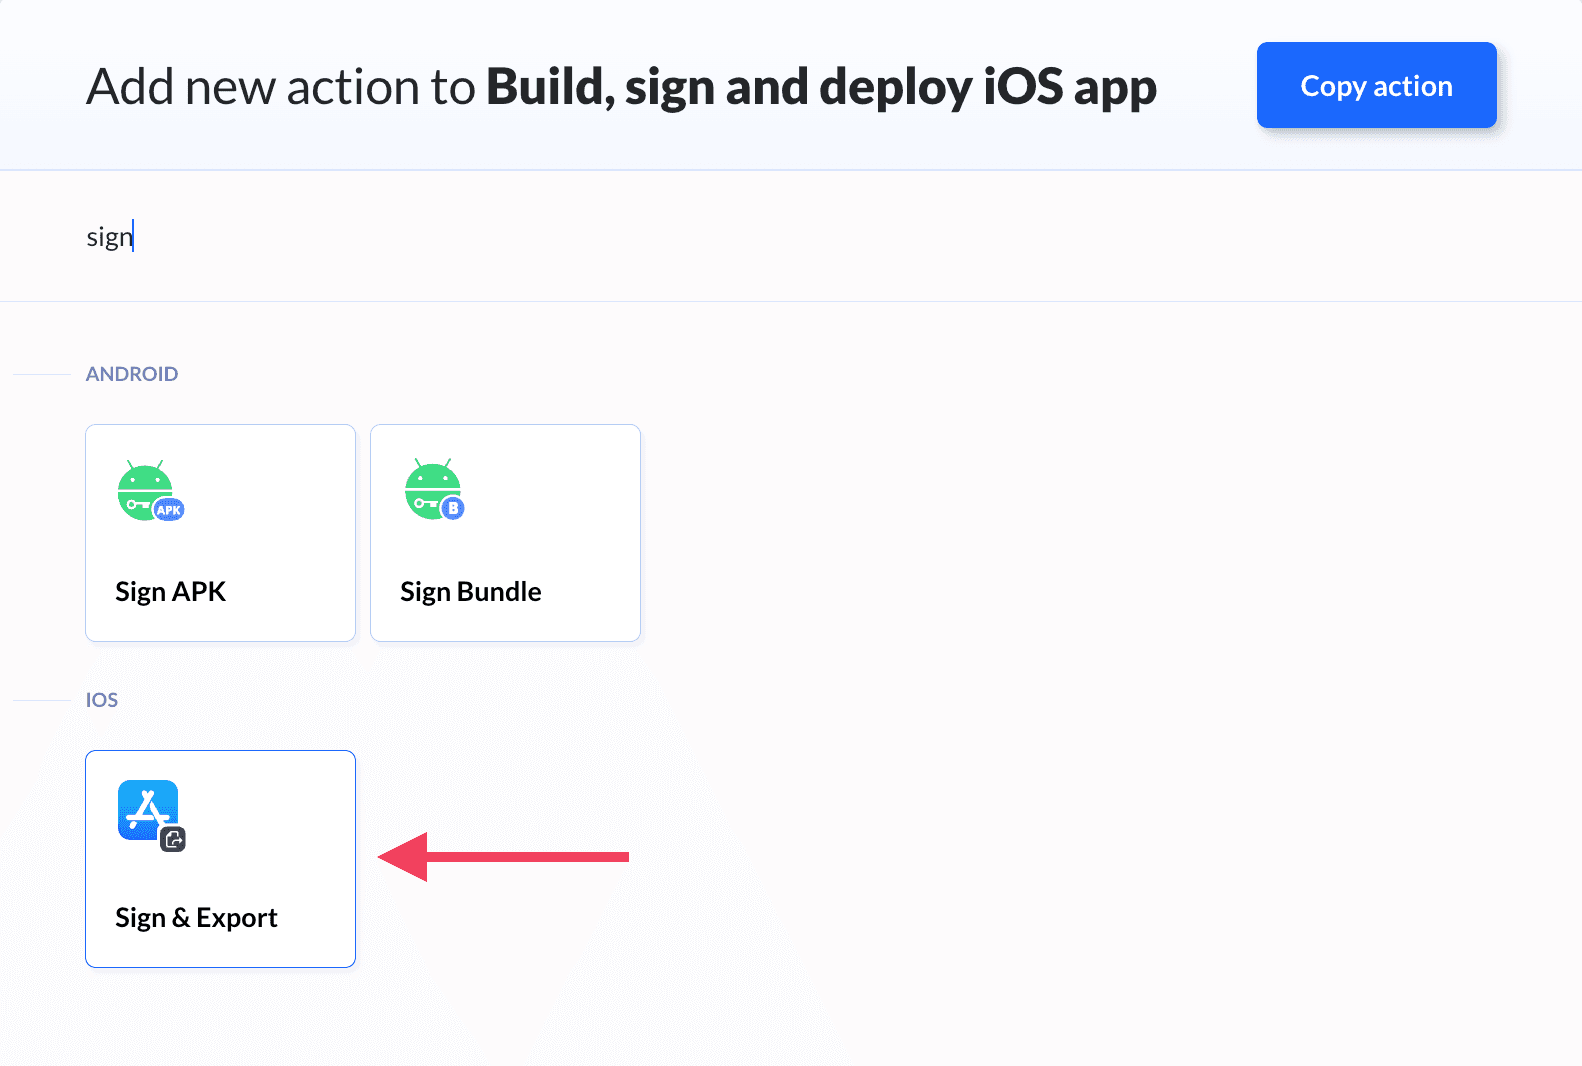
Here you define:
- The path to the archive created by the build action
- The export path to which the signed .ipa file will be saved
- The distribution certificate
- The provisioning profile
Image loading...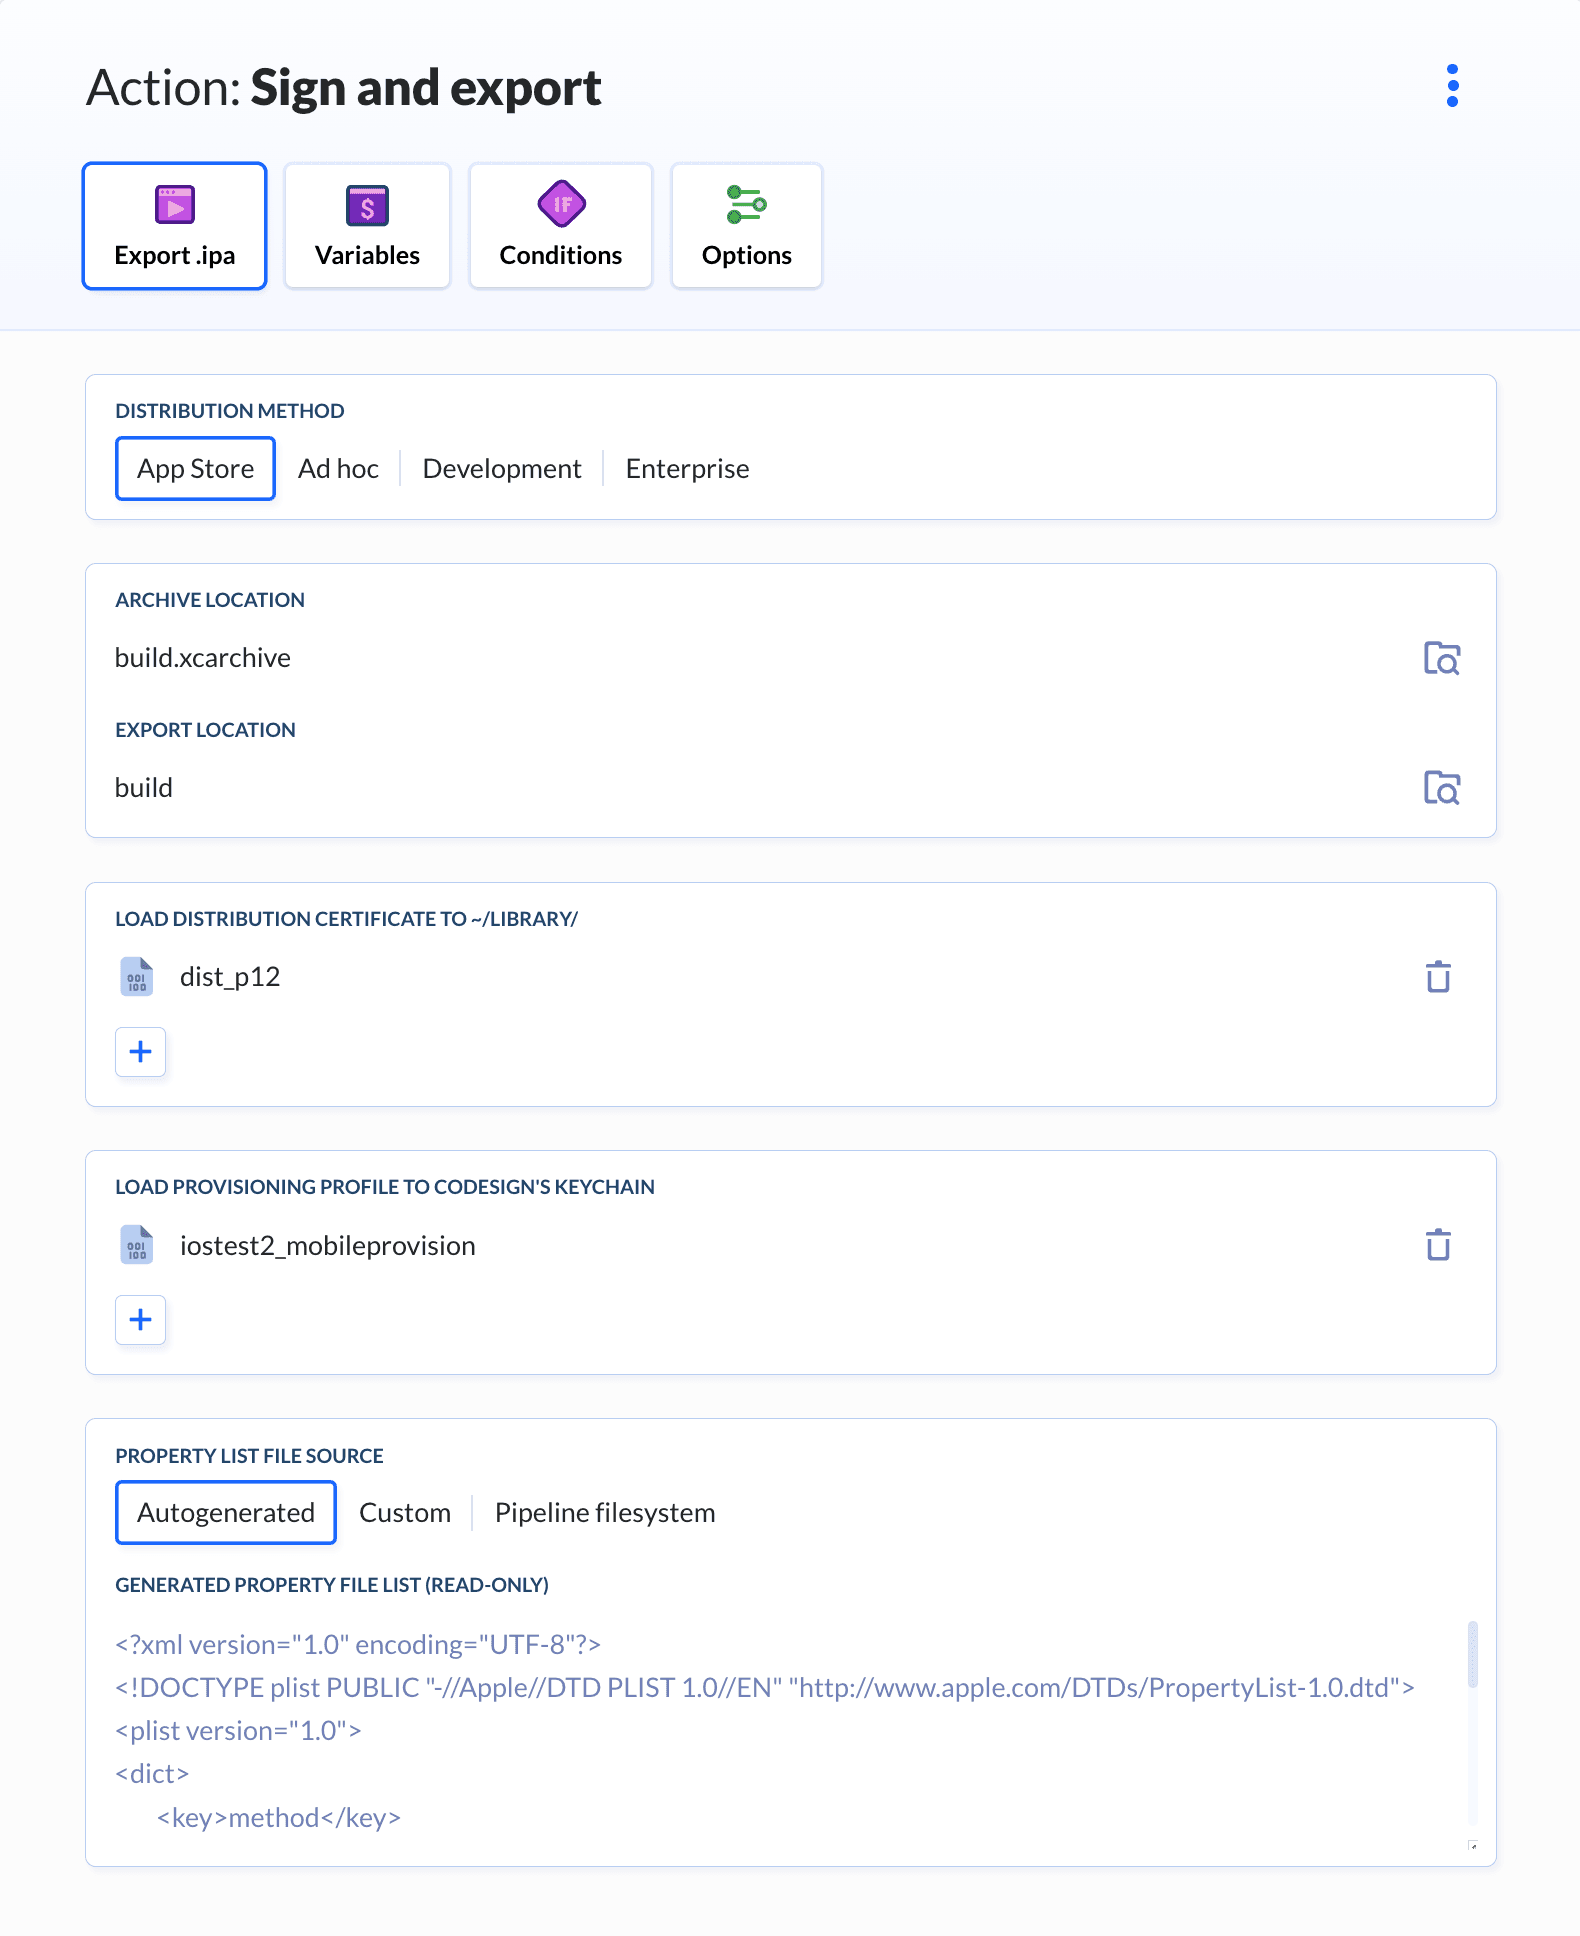
Deploy to App Store Connect
Once signed, the package can be deployed to App Store Connect. Click the + on the pipeline view and look up the App Store Publish action:
Image loading...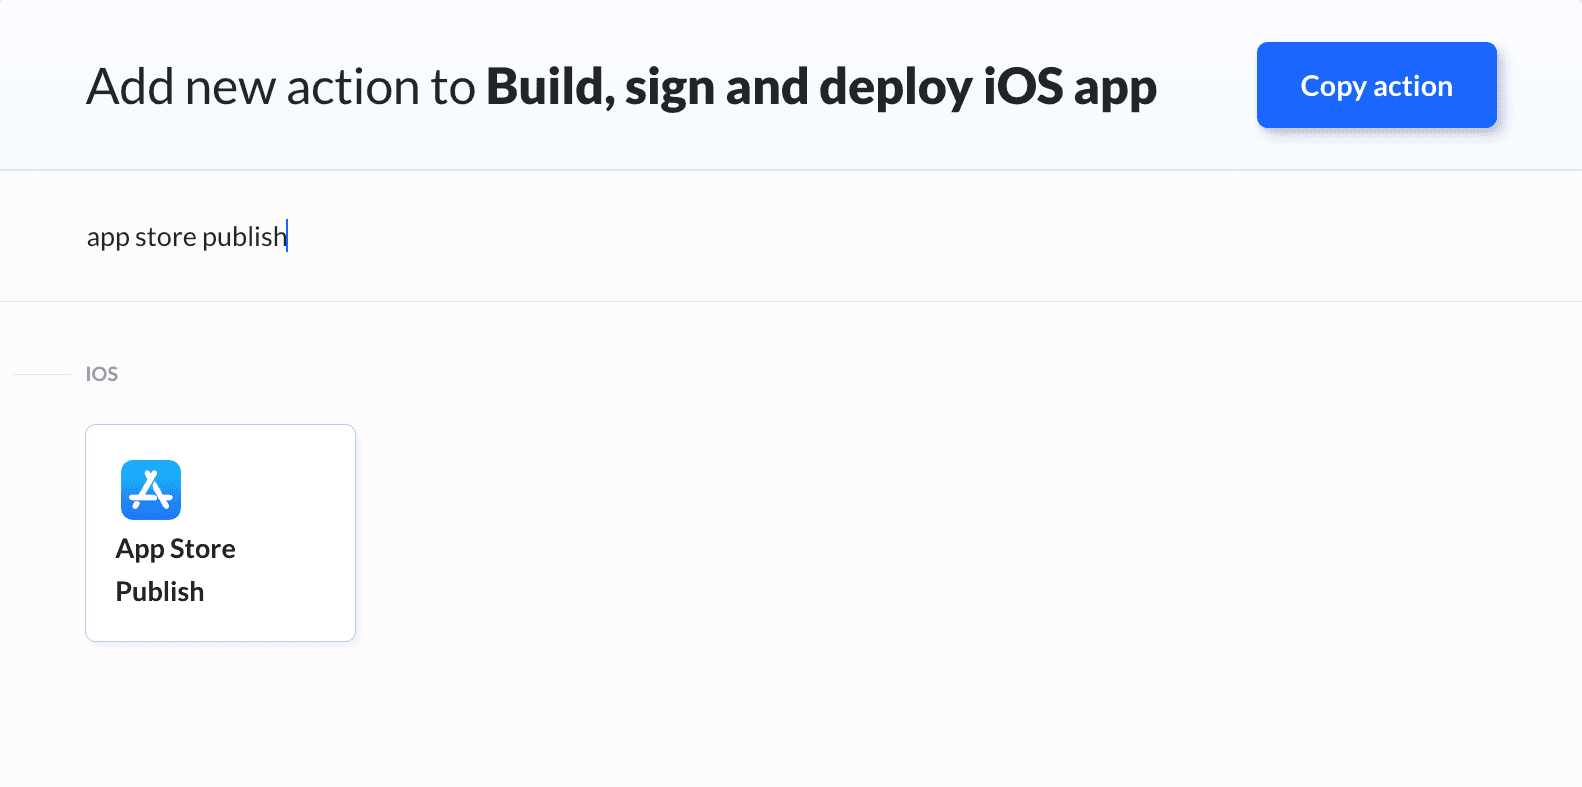
The action automatically detects the signed archive in the pipeline's filesystem. There you can also check the desired deployment flags:
Image loading...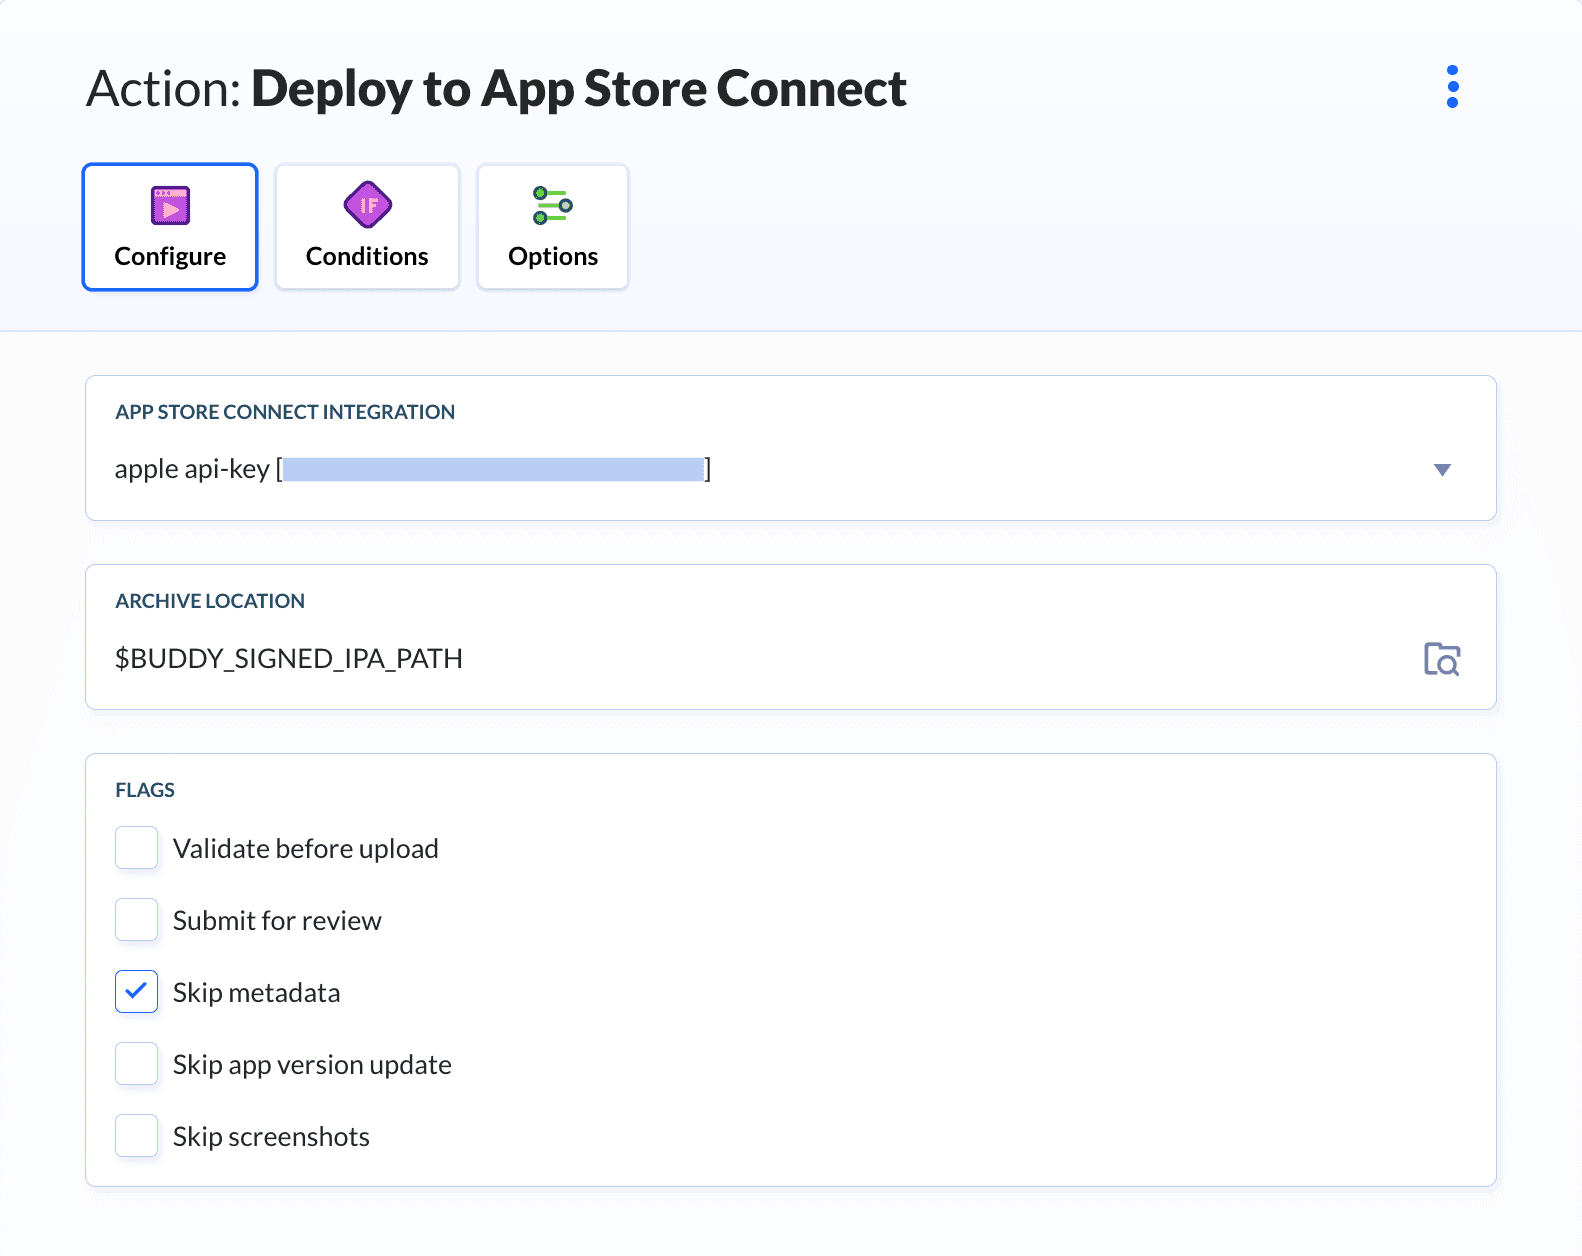
Running the pipeline
With everything configured, make a push to the branch with your project: if you set the pipeline to run on Git events, Buddy will automatically fetch the repository code and trigger the pipeline.
You can check the results in the Runs tab. Here you'll find detailed logs for each action. For example:
Image loading...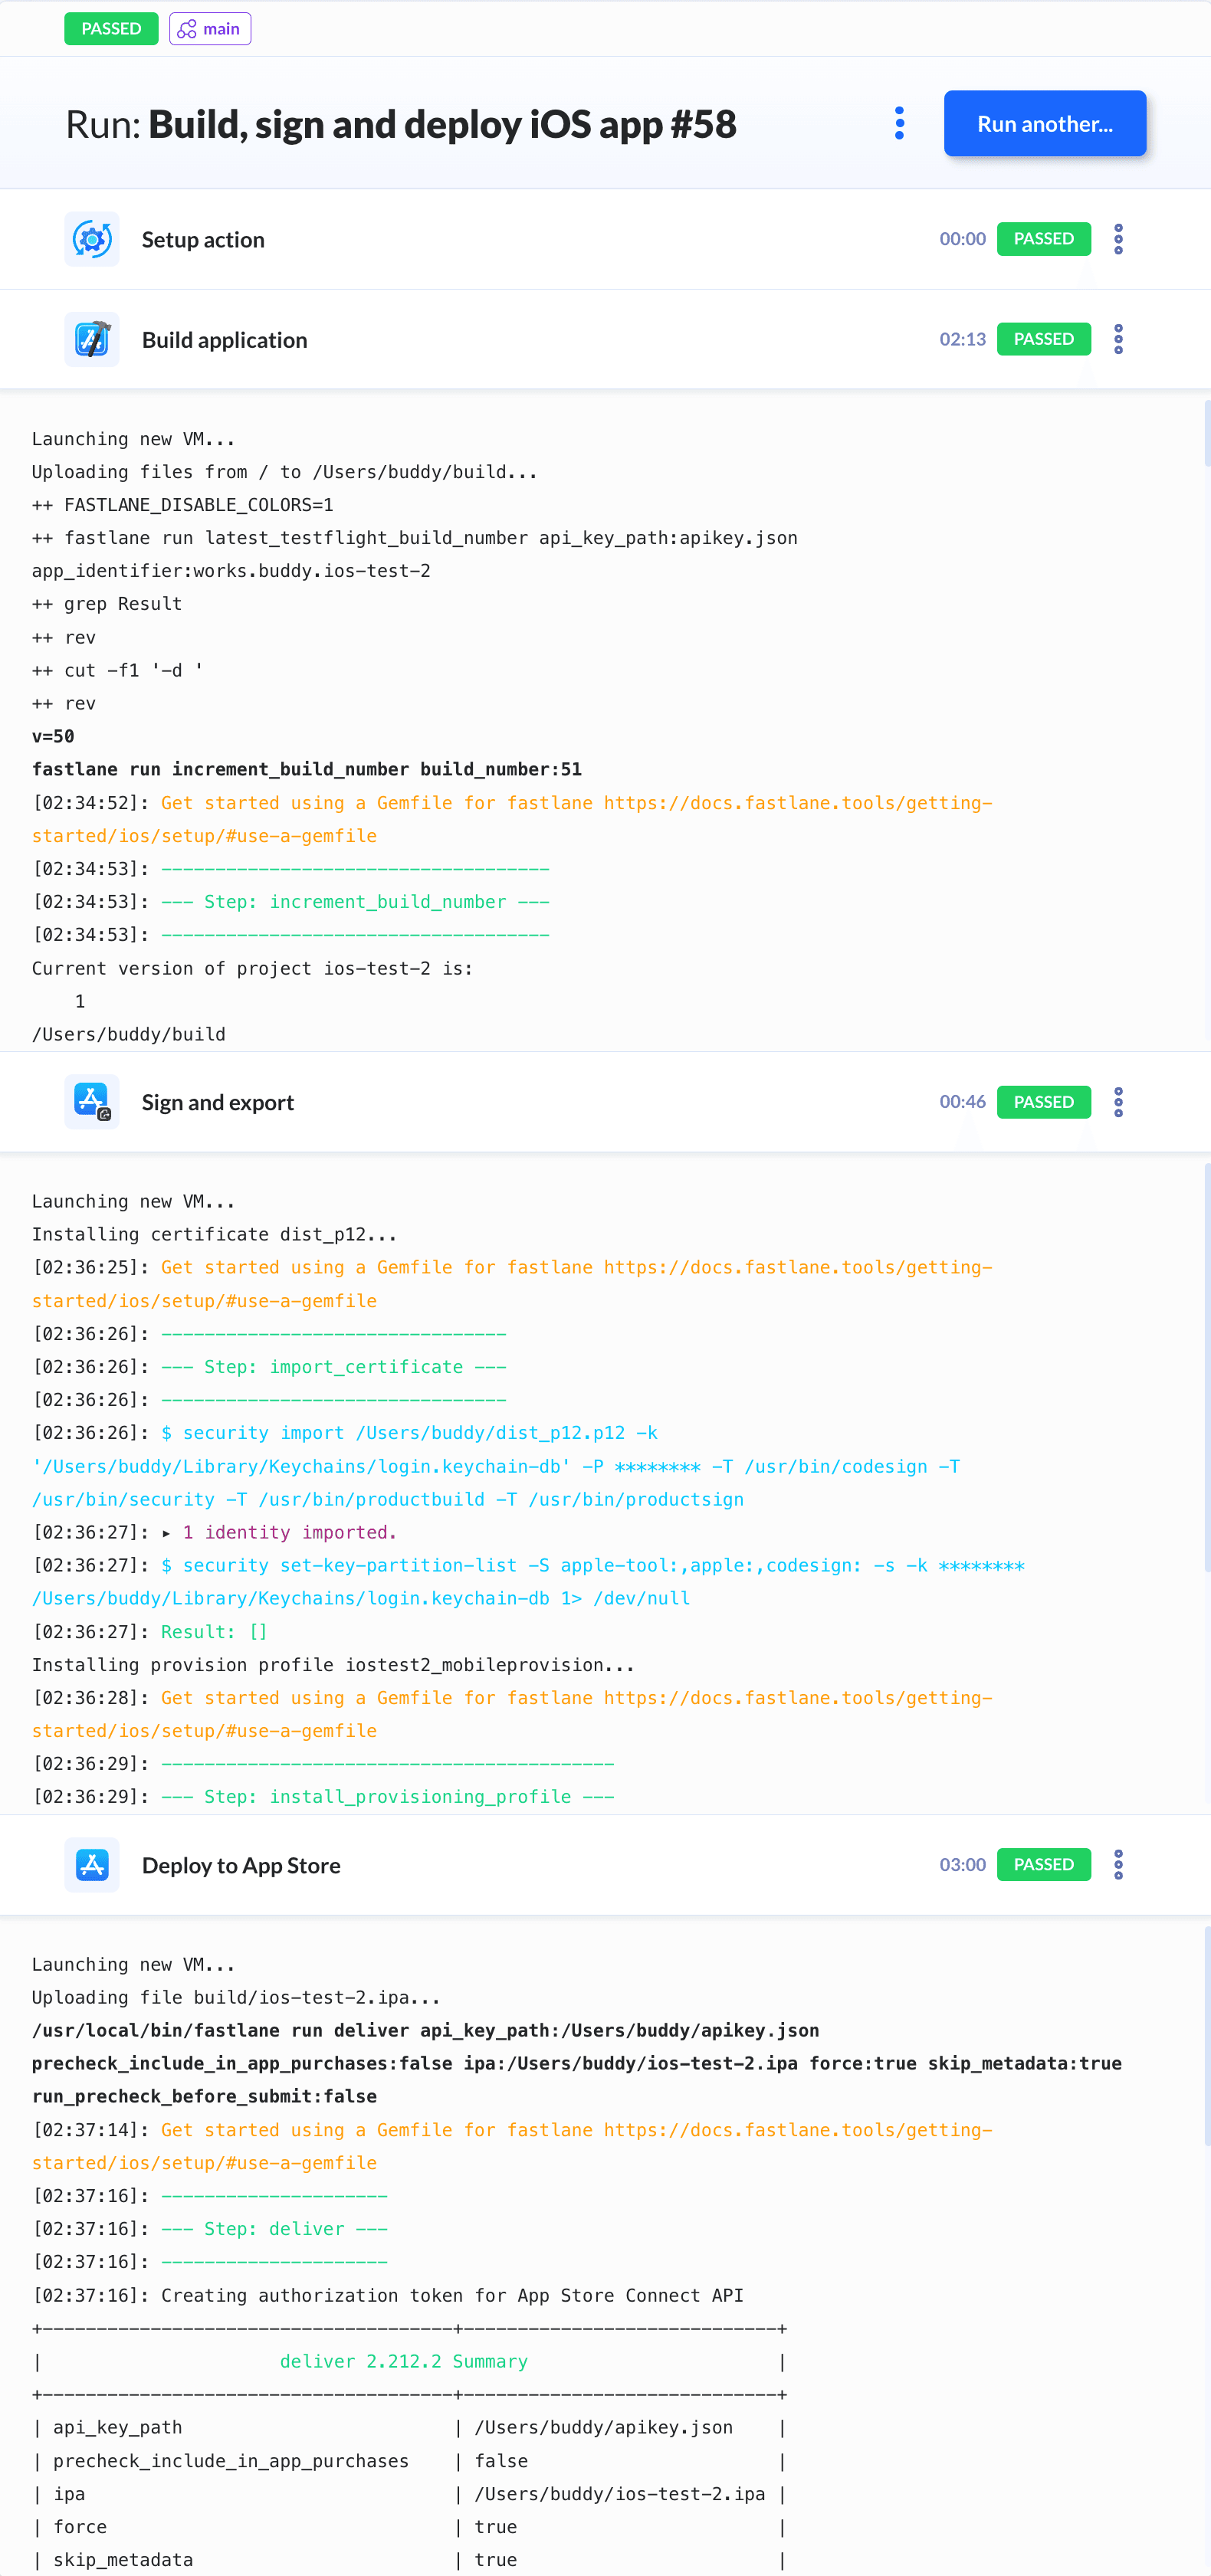
Optional: Deploy using commands
Alternatively, you can deploy the package with commands directly from the build action. Here is an example for Fastlane deployment:
Image loading...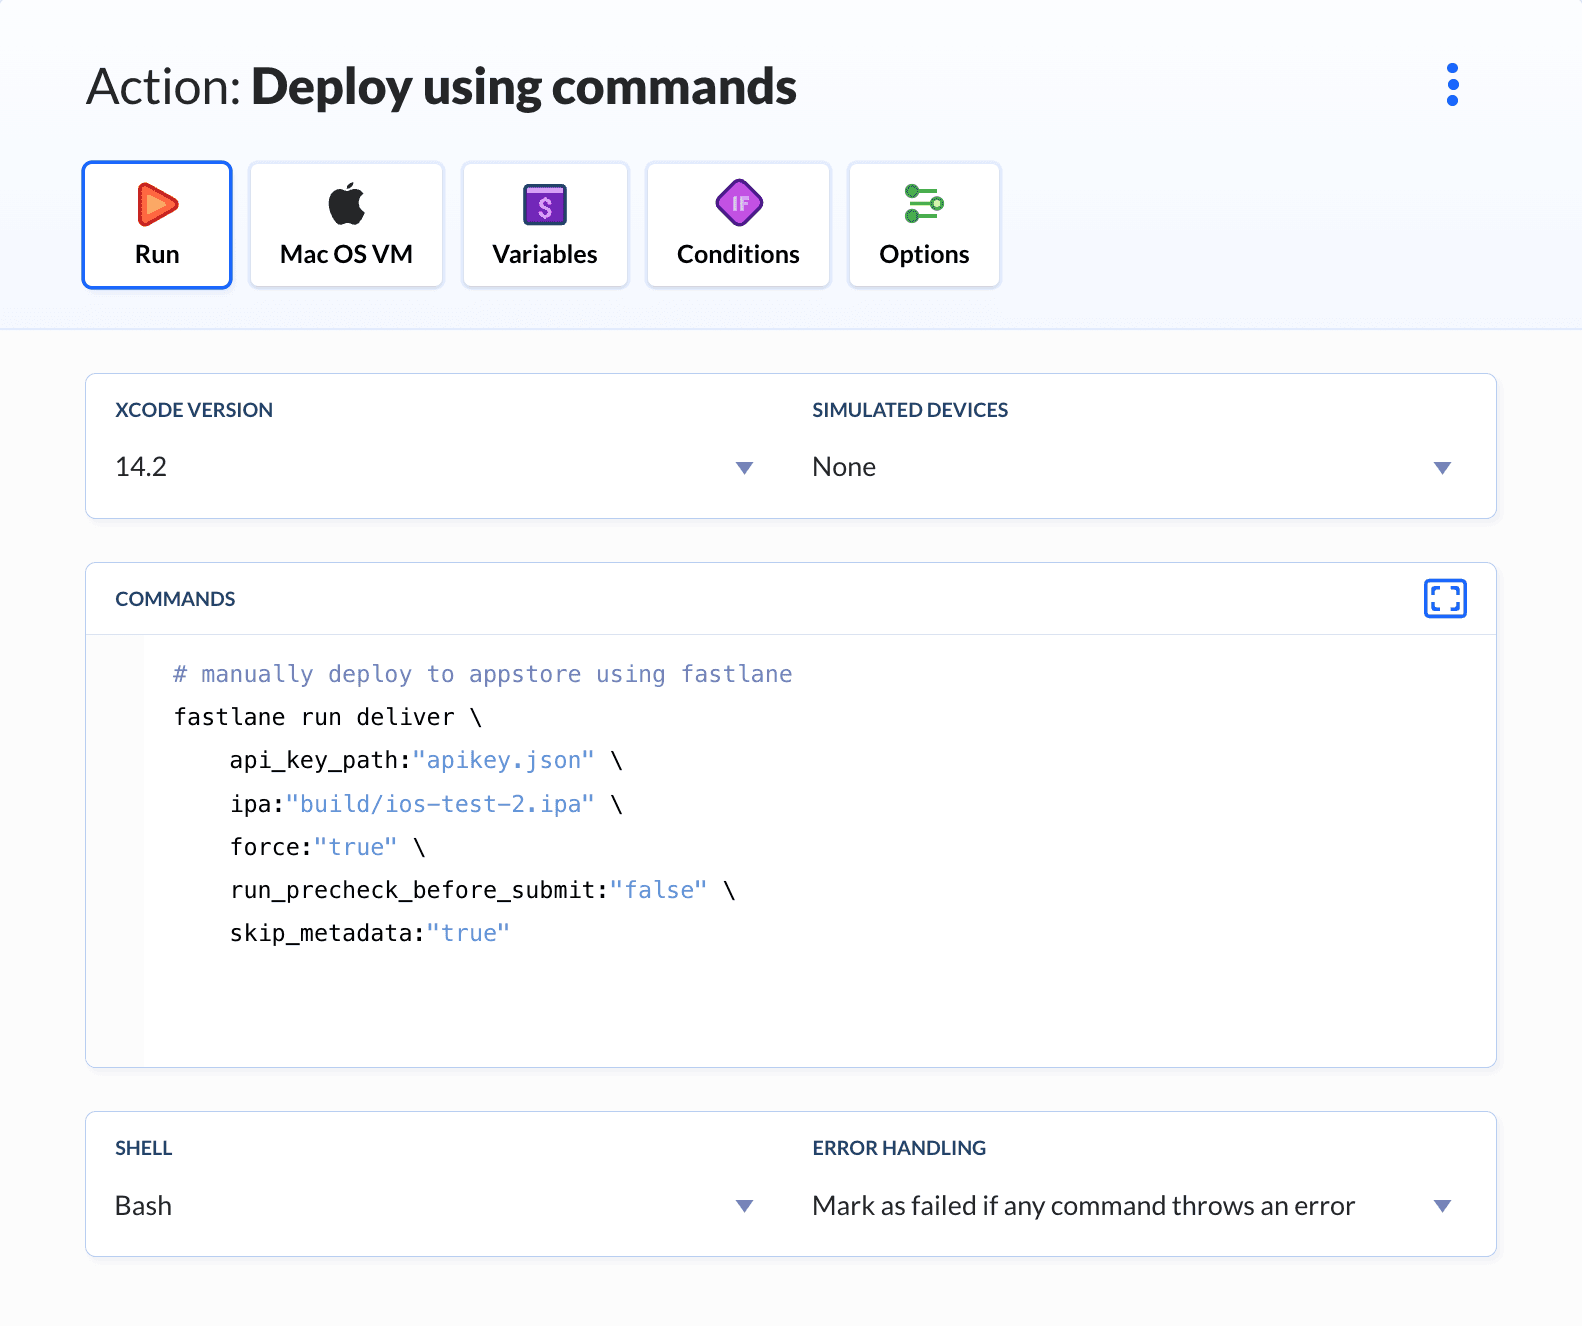
In this case, you need to upload the certificate and profile in the action's Mac OS VM tab:
Image loading...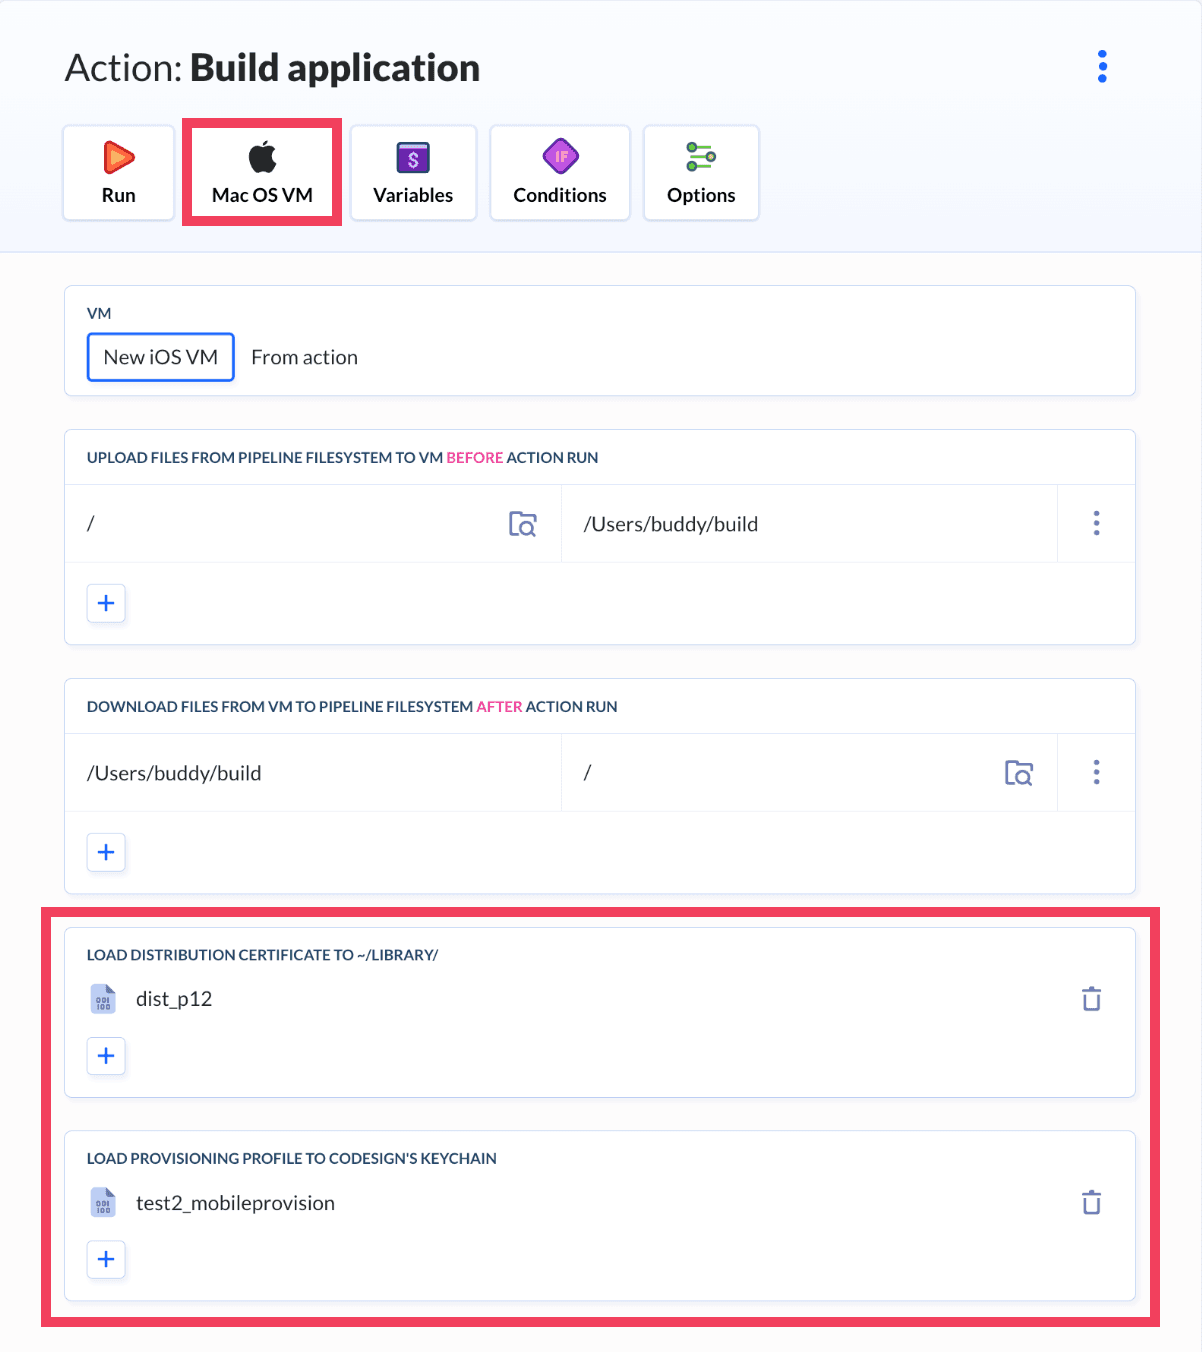
Last modified on Nov 20, 2025