October 22, 2020
Share:
Buddy is a Continuous Integration, Delivery, and Deployment tool that takes advantage of Git to provide a comfortable and customizable experience when setting up pipelines to automate your repository tasks.
Buddy's pipelines consist of a set of actions defined by the developer that are run in a specific order and can be executed either manually or automatically when executing a Git push. The visual approach also makes it easy for beginners as well as DevOps experts to set up fully functional pipelines in the shortest amount of time possible.
In this article, we will set up a Continuous Delivery pipeline for a Golang application. The pipeline will help us achieve two things:
- Quicker development process by providing a standardized development feedback loop
- Safer deployment by reducing the risk of manual errors.
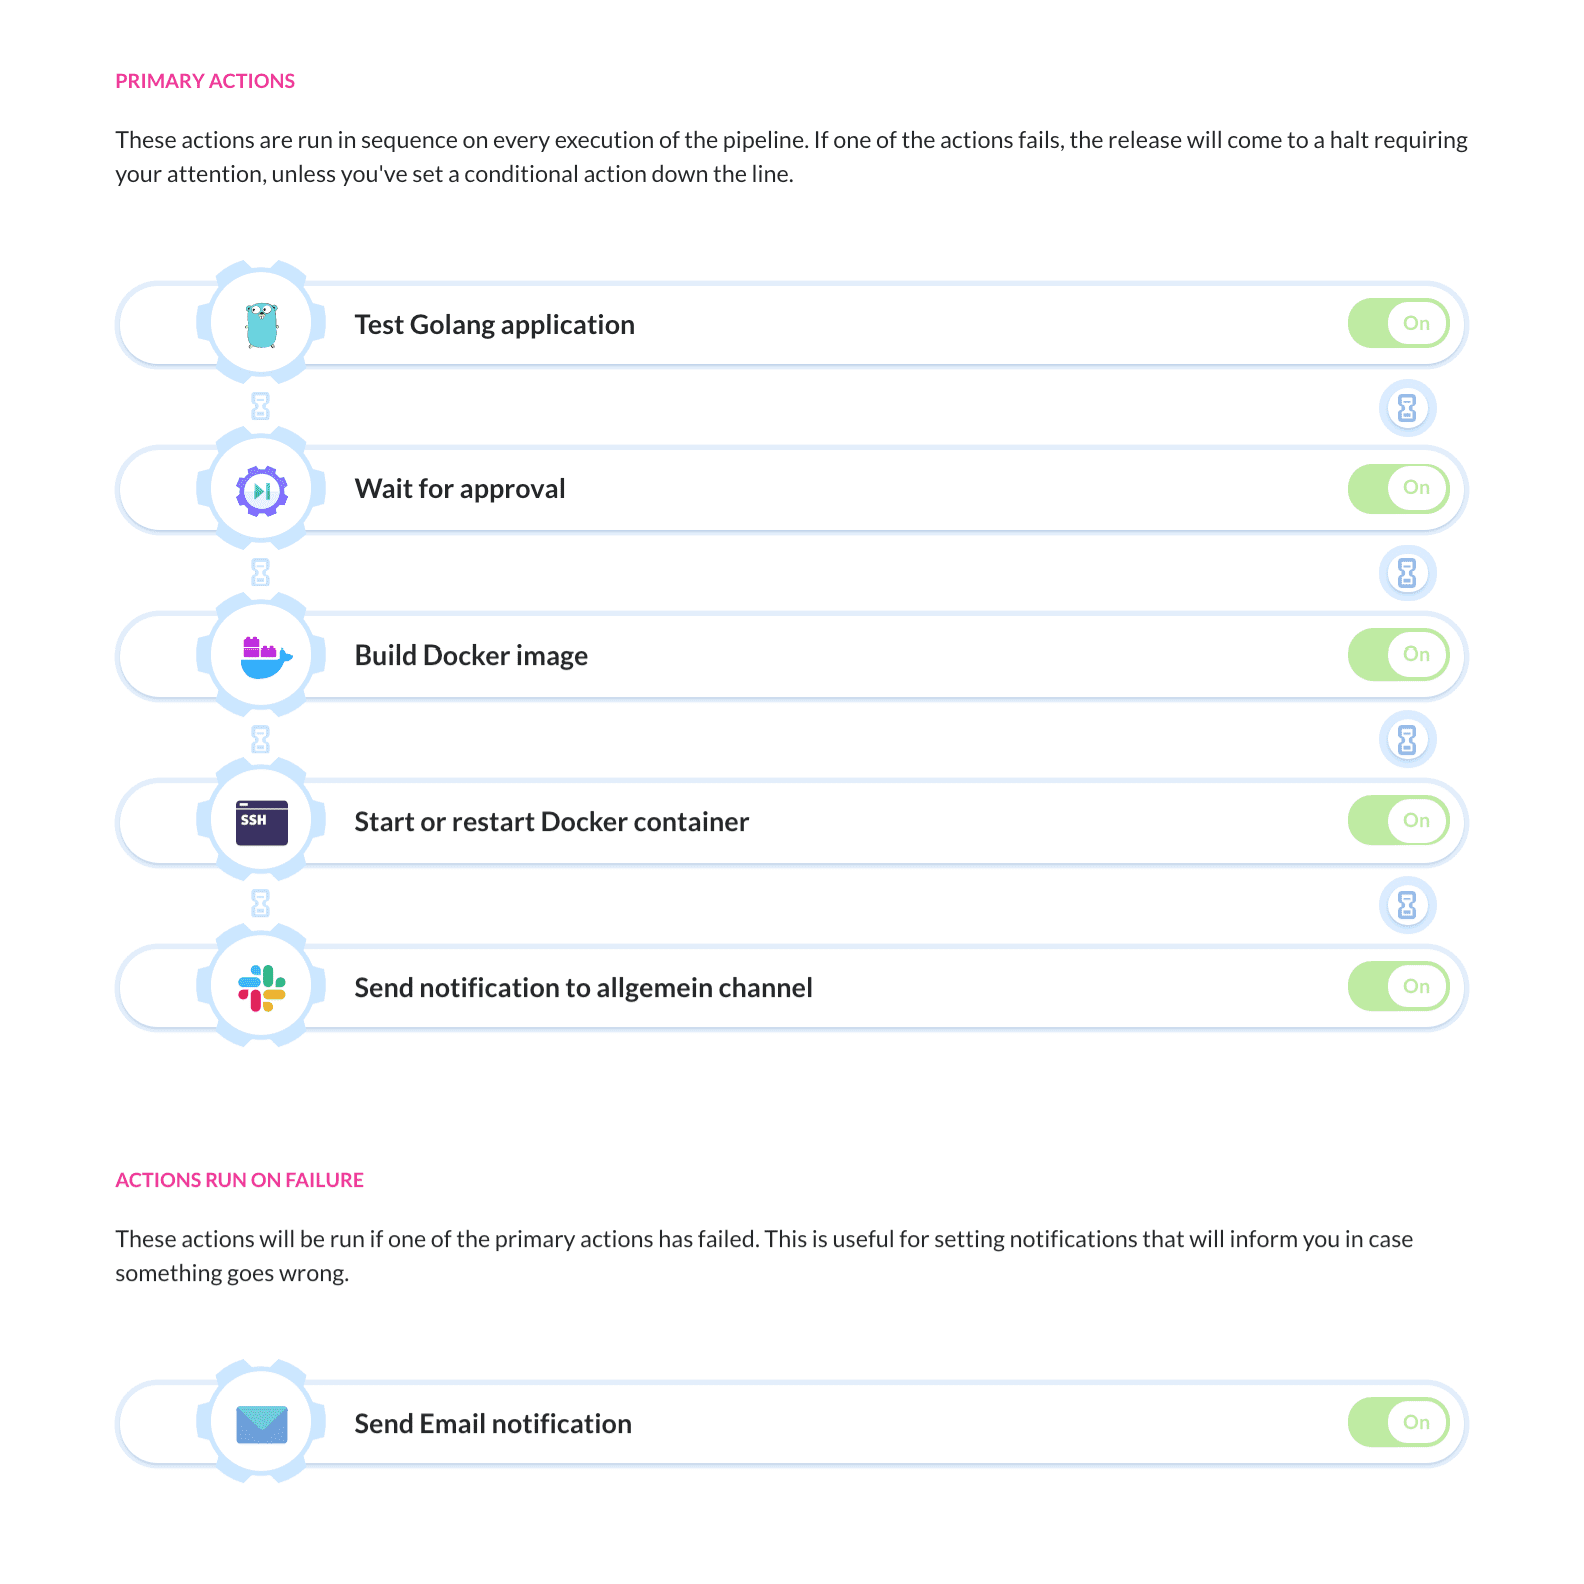 Finished pipeline
We will do this by building a pipeline that first tests the application and then builds a Docker container image (if the tests were successful). The Docker image will then be pulled and run on a DigitalOcean droplet. We will also send out notifications with the latest build status to the members working on the project over Slack and email.
Step 1: Getting started
To follow along with this tutorial, make sure you have the following tools installed:
- Golang – so that you can run and test the application locally.
- DigitalOcean CLI – so that you can set up all DigitalOcean resources required for the pipeline (can also be done using the GUI).
- Docker – installed on a local developer machine to containerize and run our application.
Testing the application
net/http Golang library with two GET endpoints that display some hardcoded text.
Let's start by cloning the application from Github and running it locally:
git clone https://github.com/buddy-works/learning-go.git
cd learning-go/beginner-programs/HttpServer/$$
The application can now be started using the go run command:
go run main.go$Now you can access the application at localhost:8080. You should see a basic web page printing "Hello World!".
Dockerizing the application
To deploy the application as a container, we need to create a Dockerfile that contains the definitions of our Docker image.
I have included the Dockerfile in the root directory of the HttpServer project. Here are the contents:
FROM golang:1.15.0

# Set the Current Working Directory inside the container
WORKDIR /app

RUN export GO111MODULE=on

# Copy go mod and sum files
COPY go.mod go.sum ./

# Download all dependencies. Dependencies will be cached if the go.mod and go.sum files are not changed
RUN go mod download

COPY . .

# Build the application
RUN go build -o main .

# Expose port 8080 to the outside world
EXPOSE 8080

# Command to run the executable
CMD ["./main"]
Each line in the file equals one step in the process of building a Docker image. Let's walk it through for a better understanding:
- The first line defines the base image from which the container is starting using the
FROMkeyword, followed by the wanted image and version (Version 1.15.0 of the official Golang image in this case). - After that, we set the current working directory using the
WORKDIRkeyword and enable Go modules by setting theGO111MODULEvariable toon. - The
COPYkeyword lets us copy files from the host system into the container. Here we use it to copy thego.modandgo.sumfile into the container so we can install all the needed dependencies using thego mod downloadcommand. - With all the dependencies installed, we can continue by copying the remaining files into the container and building the application using the
go buildcommand. This will give us an executable file that we can execute using theCMDkeyword.
Launching the Docker image
The Docker image can now be built and run using the following command:
docker build -t httpserver .
docker run -p 8080:8080 httpserver$$
The build command will create the Docker image by executing the steps we defined in the Dockerfile. The -t flag is used to give the Docker image a specific tag.
Once the image is successfully built, the run command can be used to start the container. The -p flag is used to publish port 8080 of the container to port 8080 of the host
machine. Open http://localhost:8080 in the browser and validate that the application is functioning correctly.
Step 2: Setting up the DigitalOcean resources
Before we start building the CI/CD pipeline, let's start with setting up the required DigitalOcean resources and installing the necessary tools. To create the resources we will use the DigitalOcean CLI also known as doctl.
doctl auth init command if you haven't already.
Use the command below to create a droplet to host our application. We are using the DigitaloOean Docker image because we'll deploy the application using Docker in the final step of the tutorial.
doctl compute droplet create buddy-golang --region fra1 --image docker-18-04 --size s-1vcpu-2gb$Wait until the droplet ready for use by checking the current status:
doctl compute droplet list buddy-golang$With the droplet created, it is time to install Golang on the system. For that you can follow this installation guide from DigitalOcean.
Step 3: Continuous Integration pipeline
Now that we have all the resources set up, it is time to create a pipeline that will automatically test, build, and deploy our application whenever we make changes to the codebase.
Project configuration
Sign in to your Buddy account and create a new project where you choose GitHub for the Git hosting provider and select learning-go as the repository:
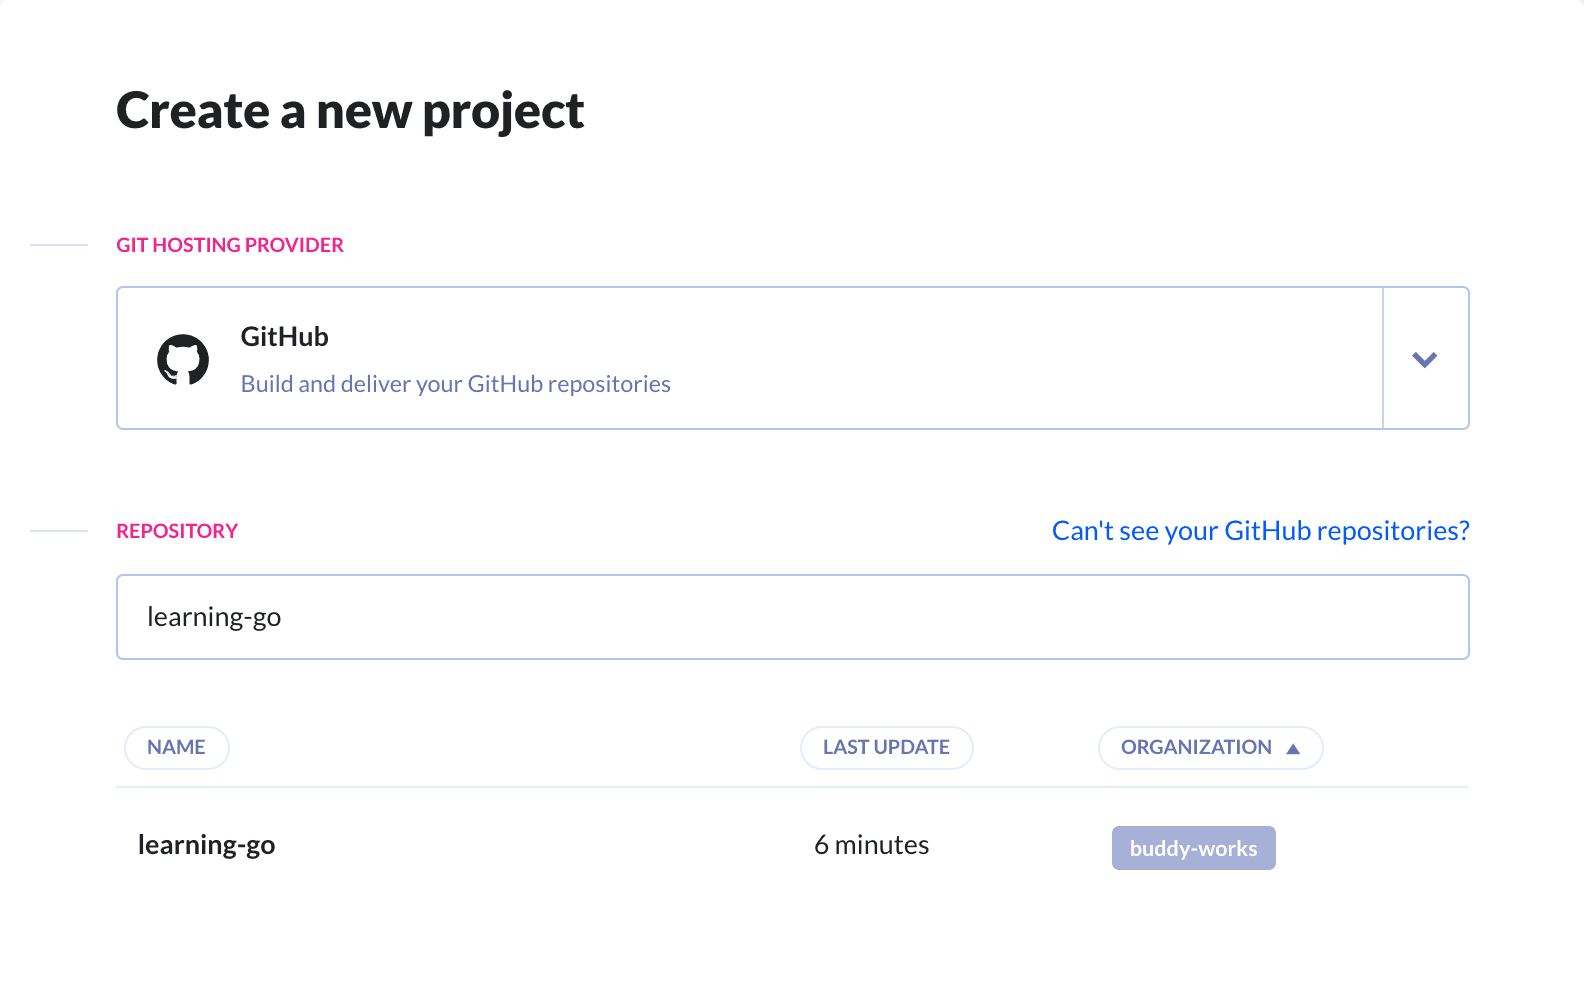 Creating a new project in Buddy
Pipeline configuration
Add a new pipeline to the project and set the trigger to On push to execute the pipeline whenever something is pushed to the Github repository. The second step is selecting the branch from which Buddy will deploy. When it comes to the name, you can call the pipeline however you want:
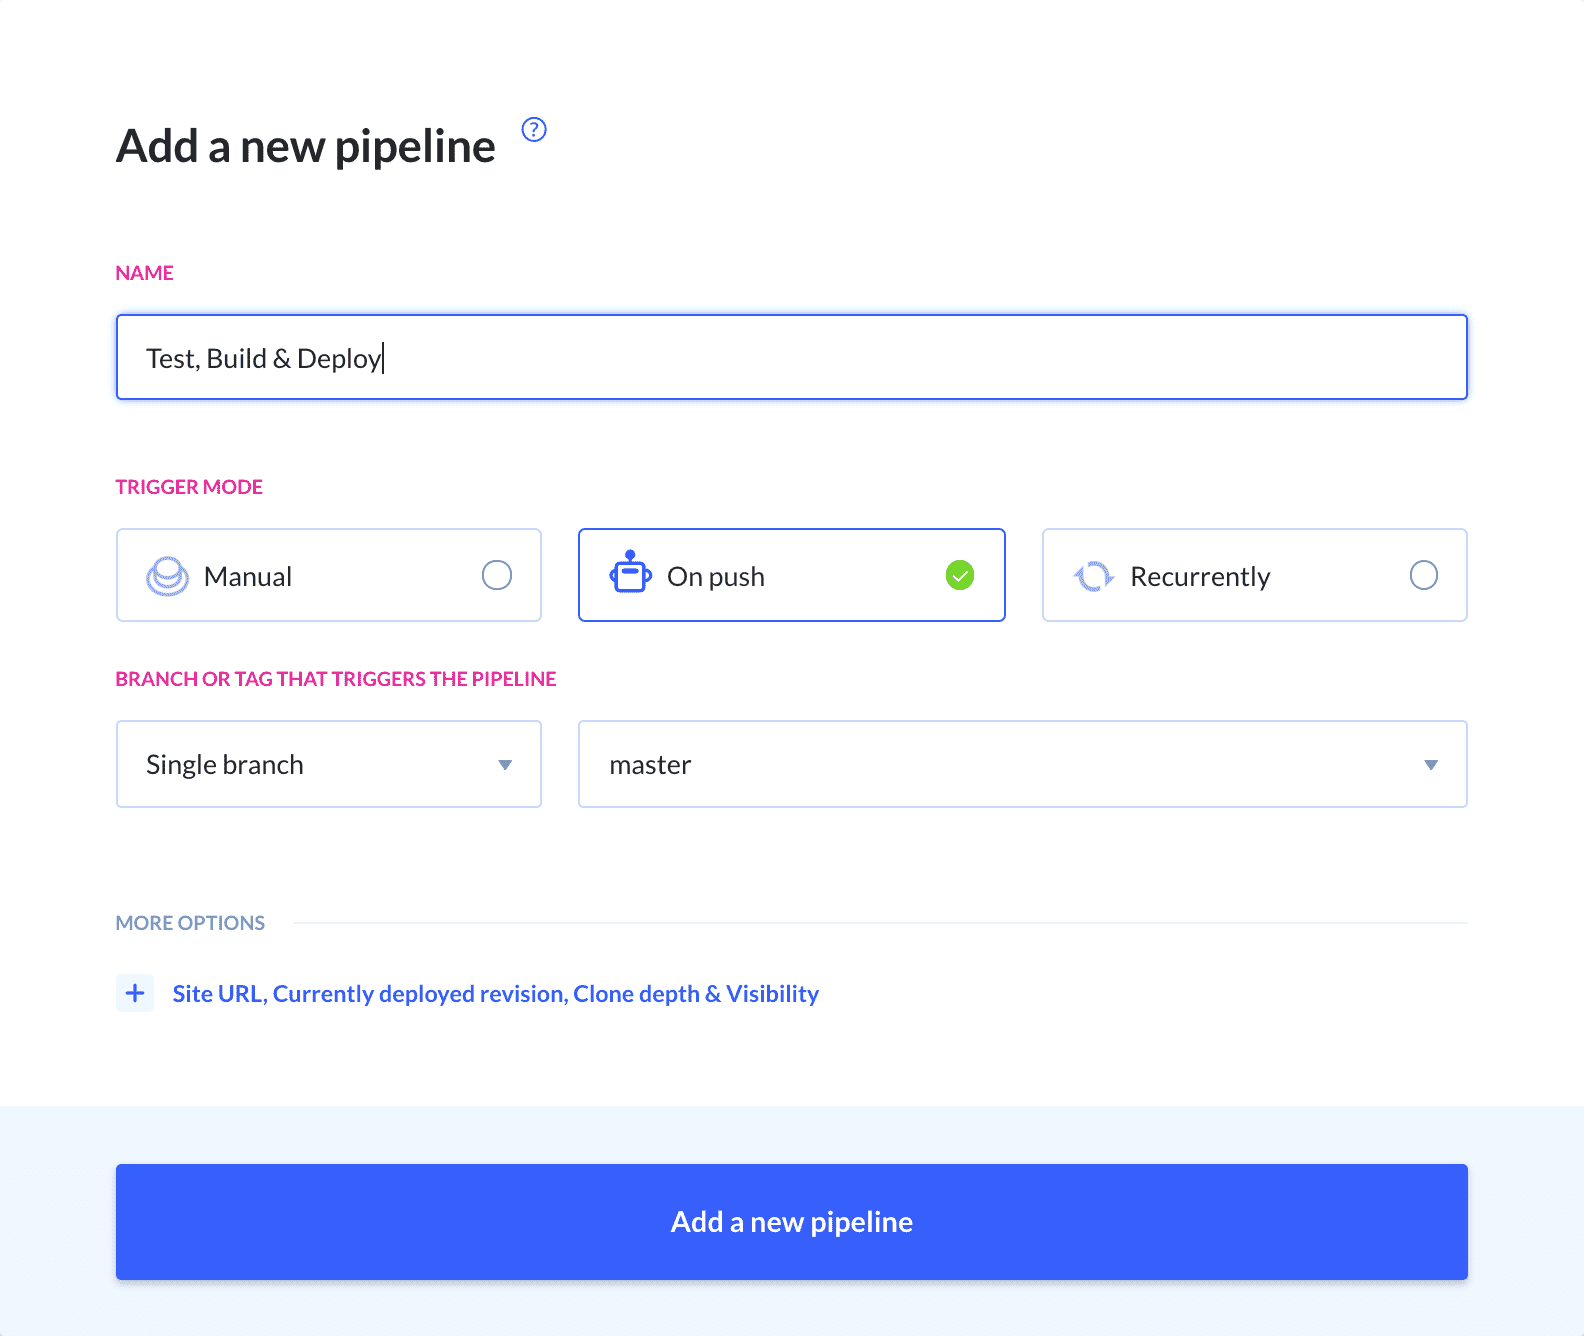 Creating a new pipeline in Buddy
On the next screen you can select the first action that will be added to the pipeline. Since we have an application written in Go and want to test and build it using Golang tools, we need to add the Go action:
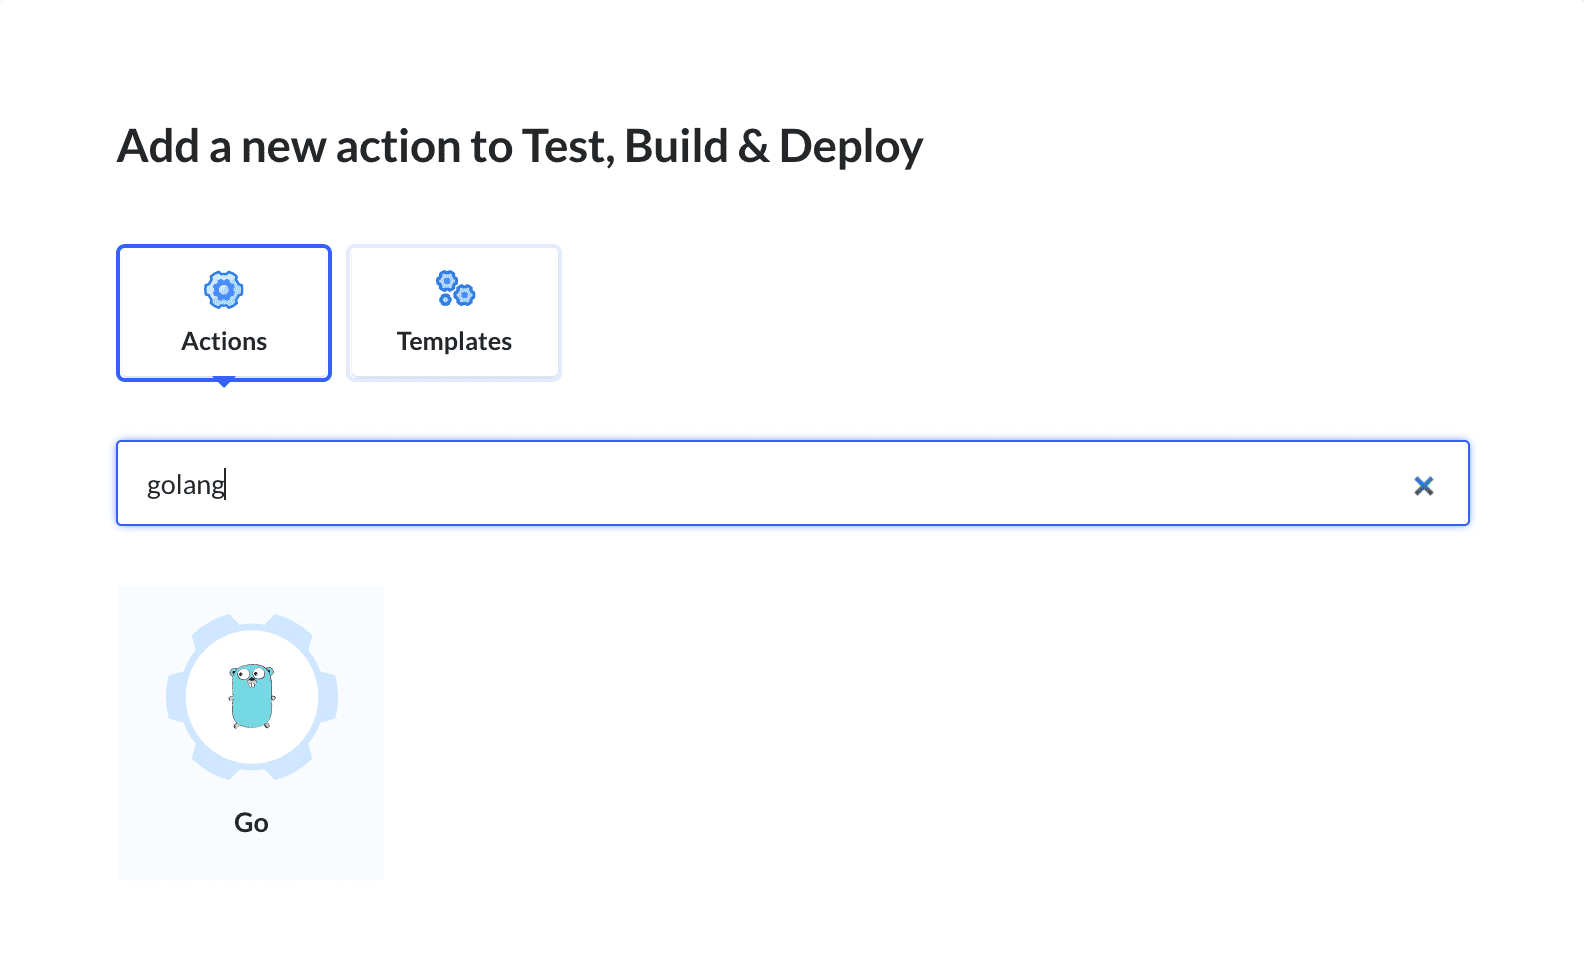 Adding Golang action to Buddy pipeline
Add the following commands in the action details:
# Download dependencies
go mod download

# Execute Golang test files
go test ./... -v$$$$$
Here's how it looks in the action:
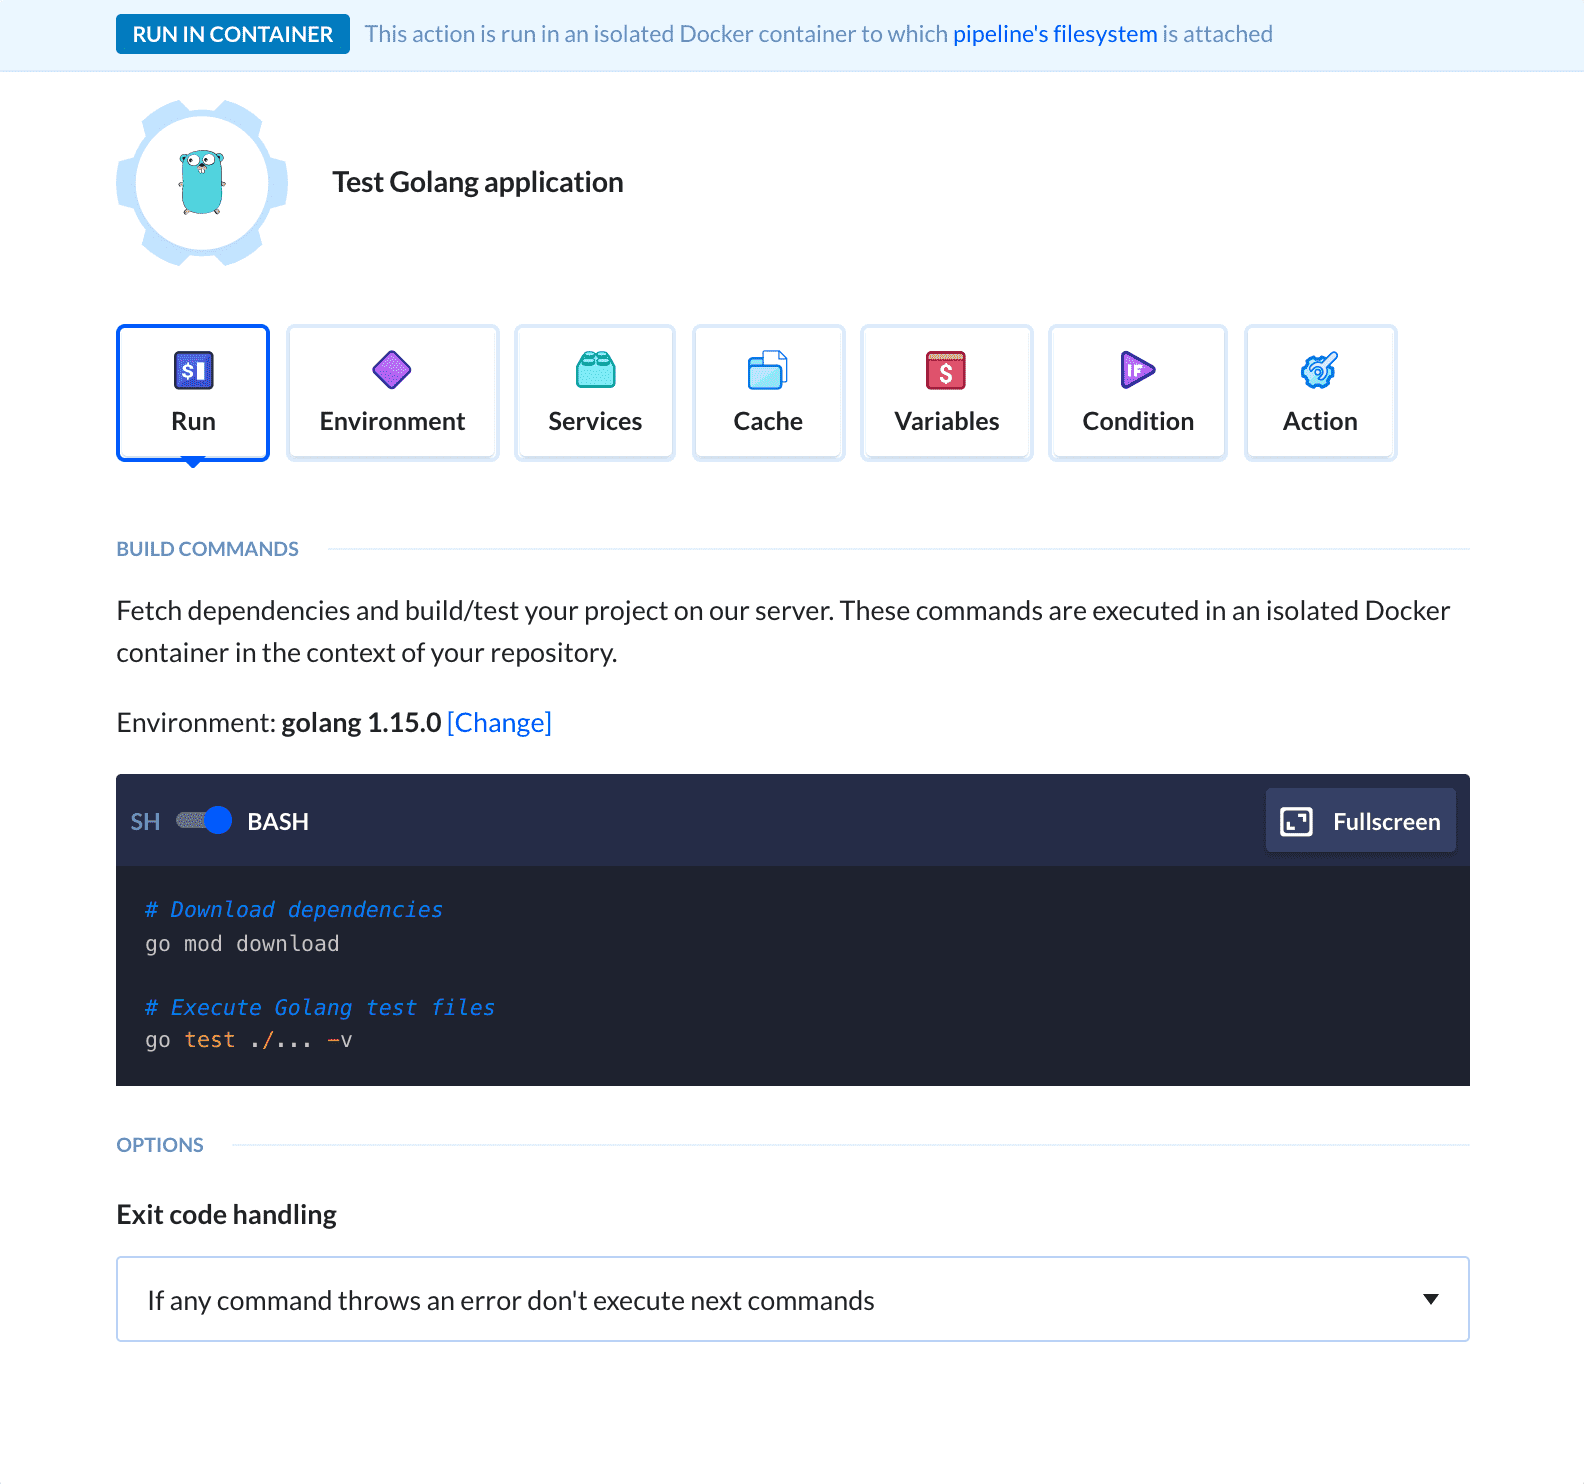 Confugiring Golang commands
Let's walk through these commands:
- The
go mod downloadcommand is used to install all the needed dependencies of the application. - The
go test ./... -vcommand runs all the Golang tests in the directory and prints the results. The-vflag, also known as verbose, is used to print the test results in more detail, making them easier to debug if they fail.
Next, you need to select the working directory of the action in the cache window. If you are following along using the example application, this needs to be /src/github.com/TannerGabriel/learning-go/beginner-programs/HttpServer.
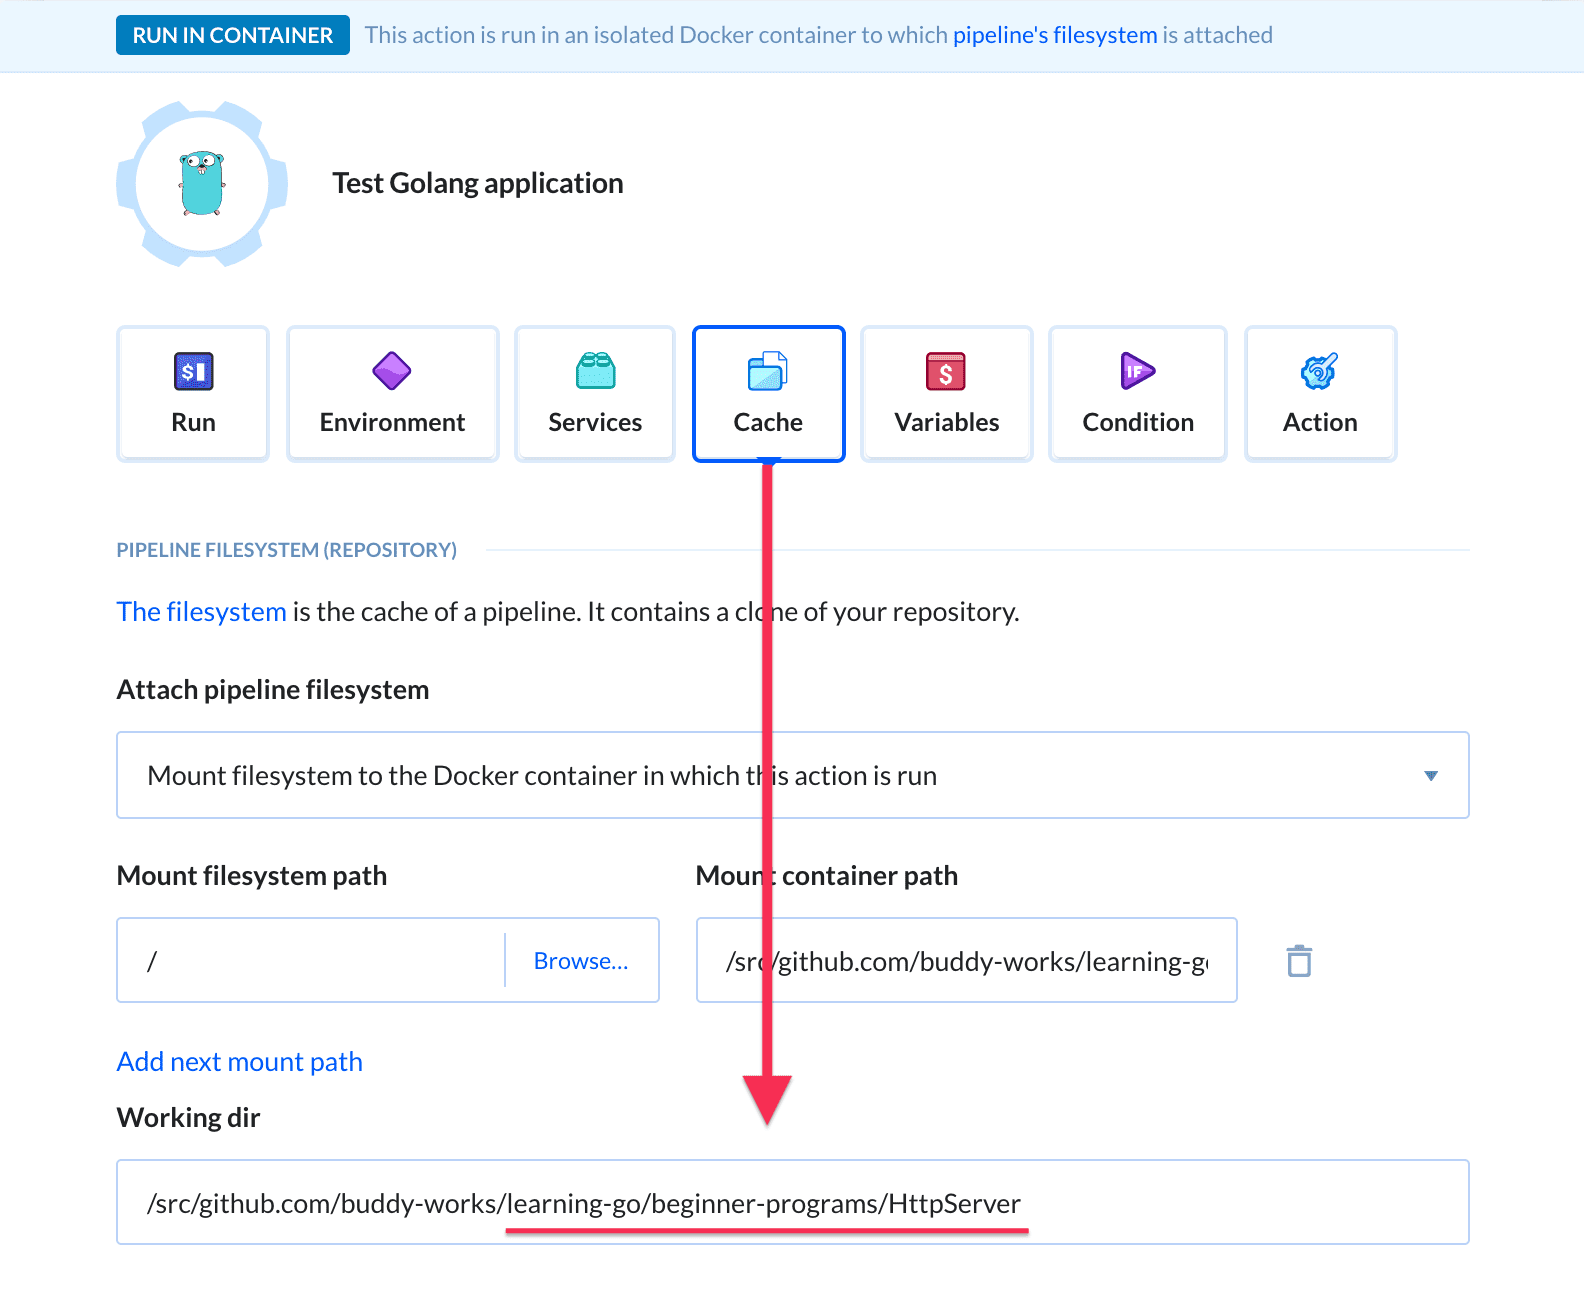 Golang action workdir
Lastly we need to change the Golang version the action uses from the current standard value to 1.15.0 since Golang modules are not supported in the older versions (Version 1.11 and below):
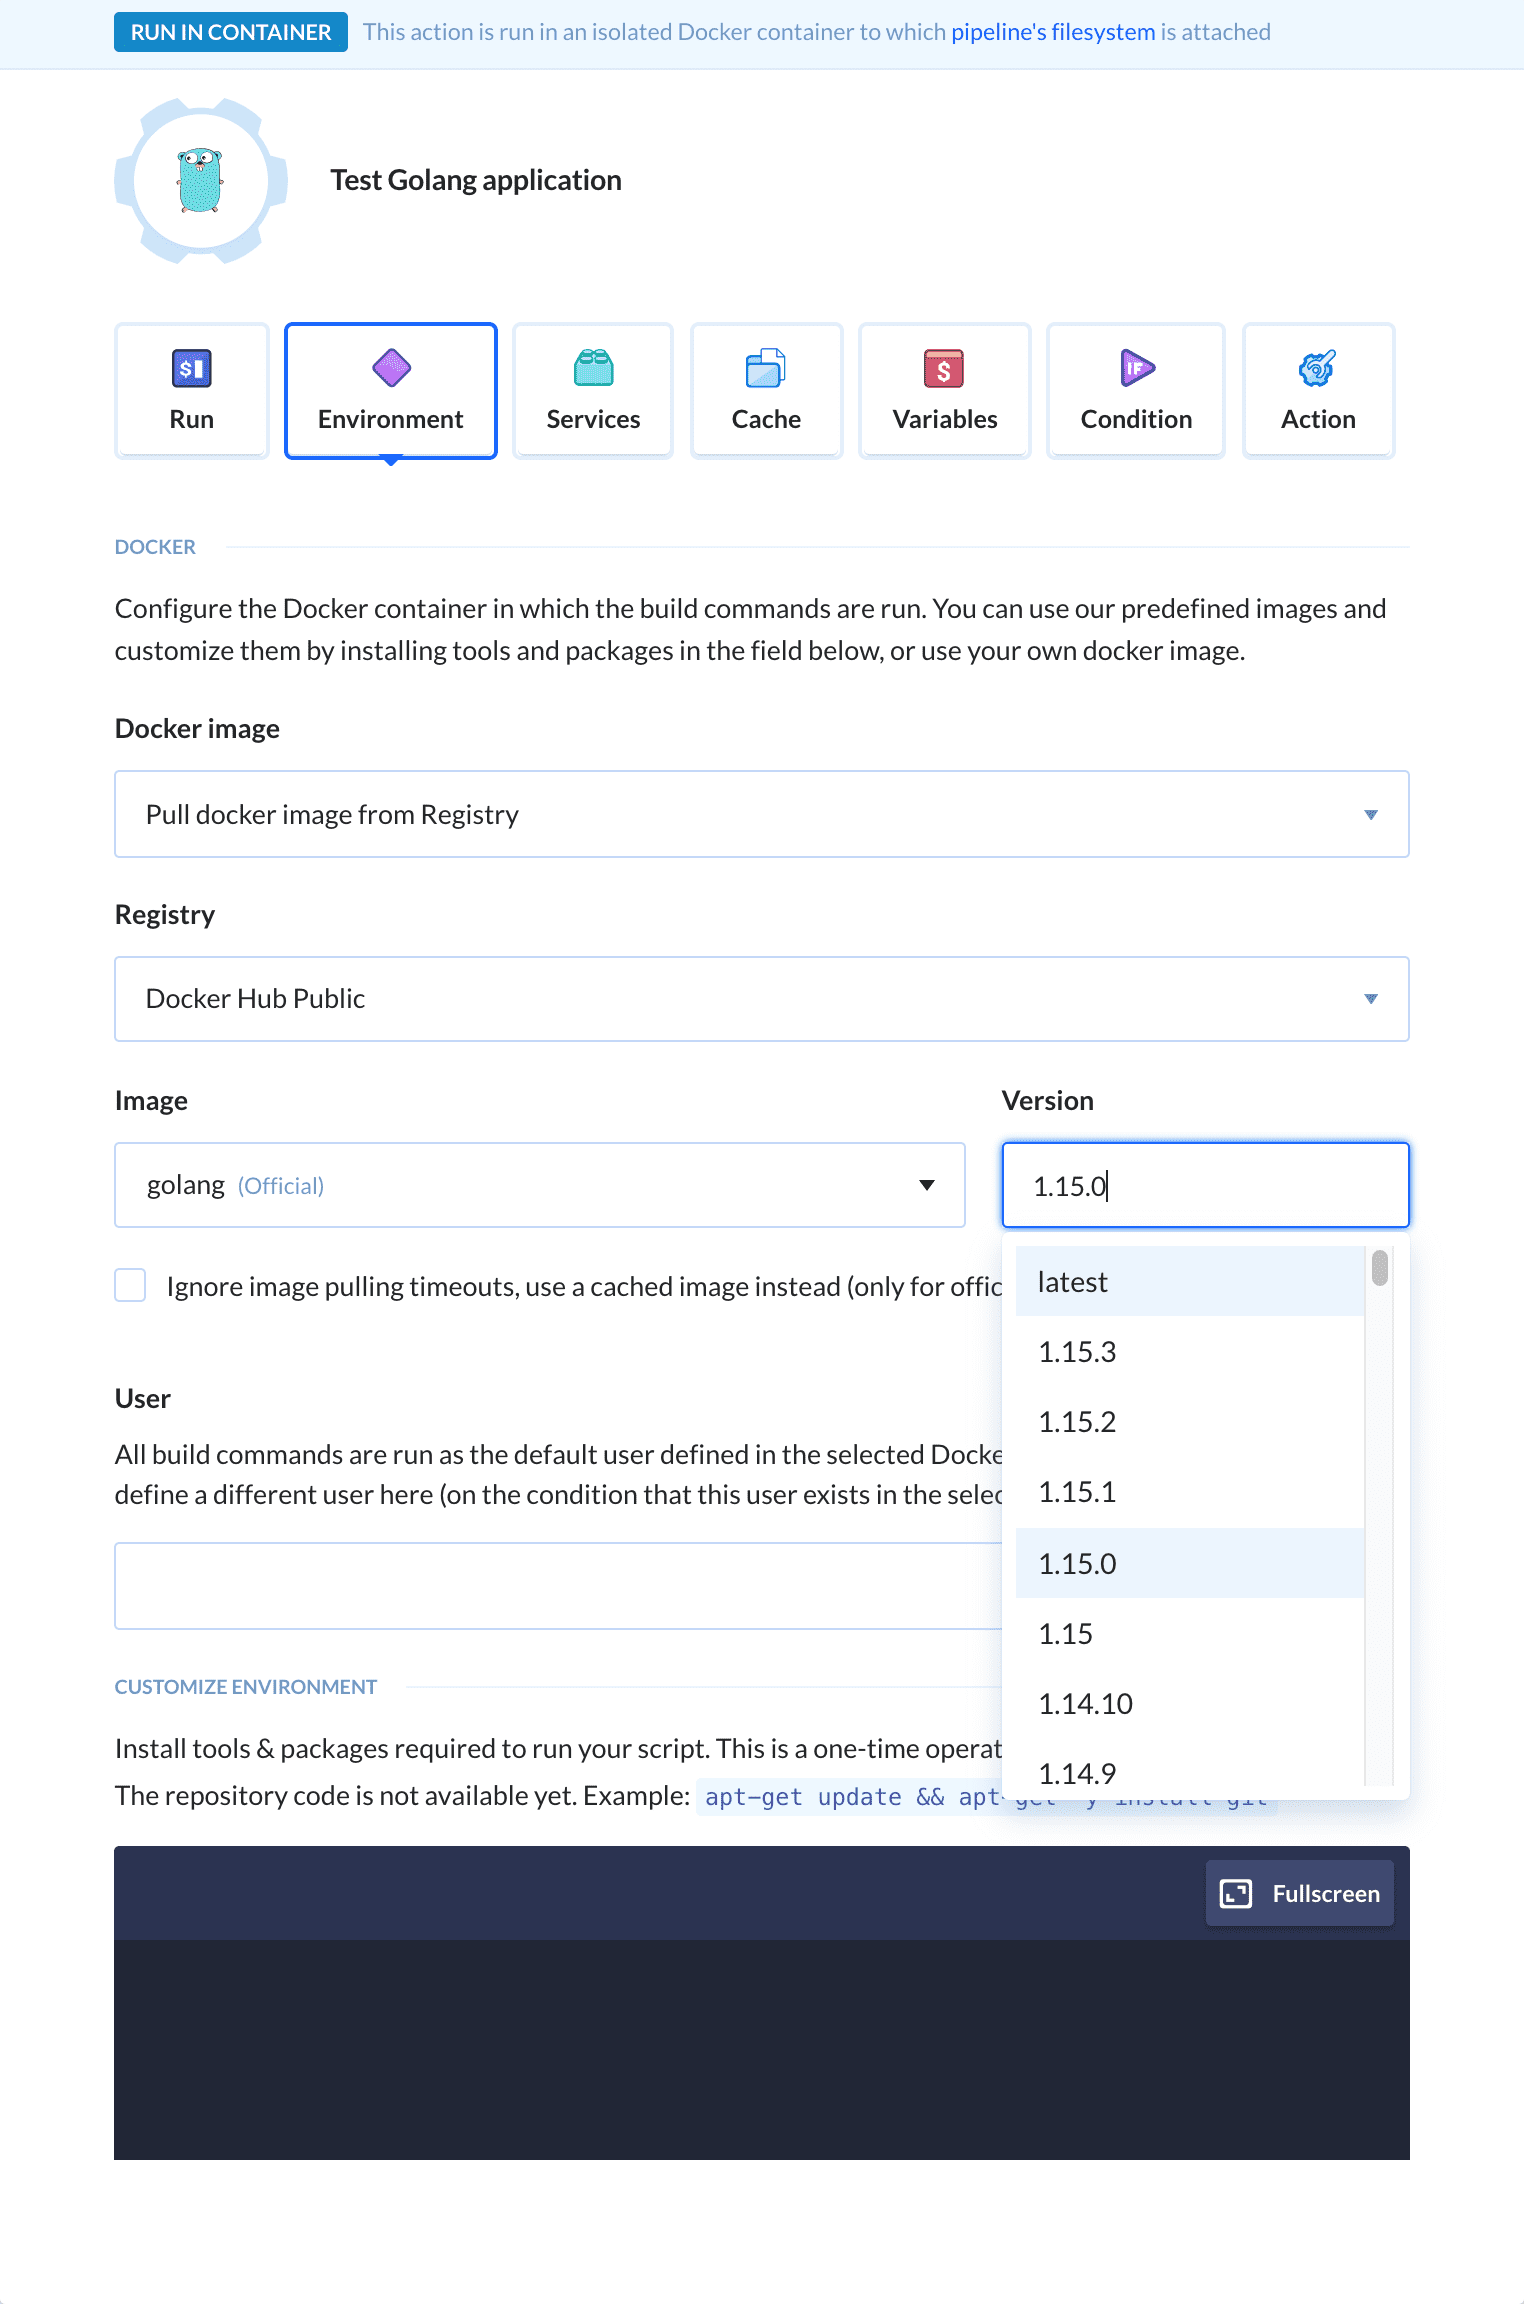 Changing Golang version in action details
Testing the pipeline
Once you are finished configuring the Golang action, you can test the pipeline by manually clicking the Run pipeline button at the top right corner of the screen. You can then click the pipeline for execution details:
 Running testing pipeline
Step 4: Continuous Delivery pipeline
Now that the tests are successfully running, it is time to build and deploy the application on our DigitalOcean droplet. Since we want our application to be deployed using Docker, we first need to build the image and push it to some kind of a container registry before using it on our droplet.
Building the application
In this step we'll build a Docker image of our application and push it to a container registry. We'll use Docker Hub as the registry, as it's the most popular and free to use for public images (plus one private image is free).
Start by adding the Build image action from the Docker section of the action roster:
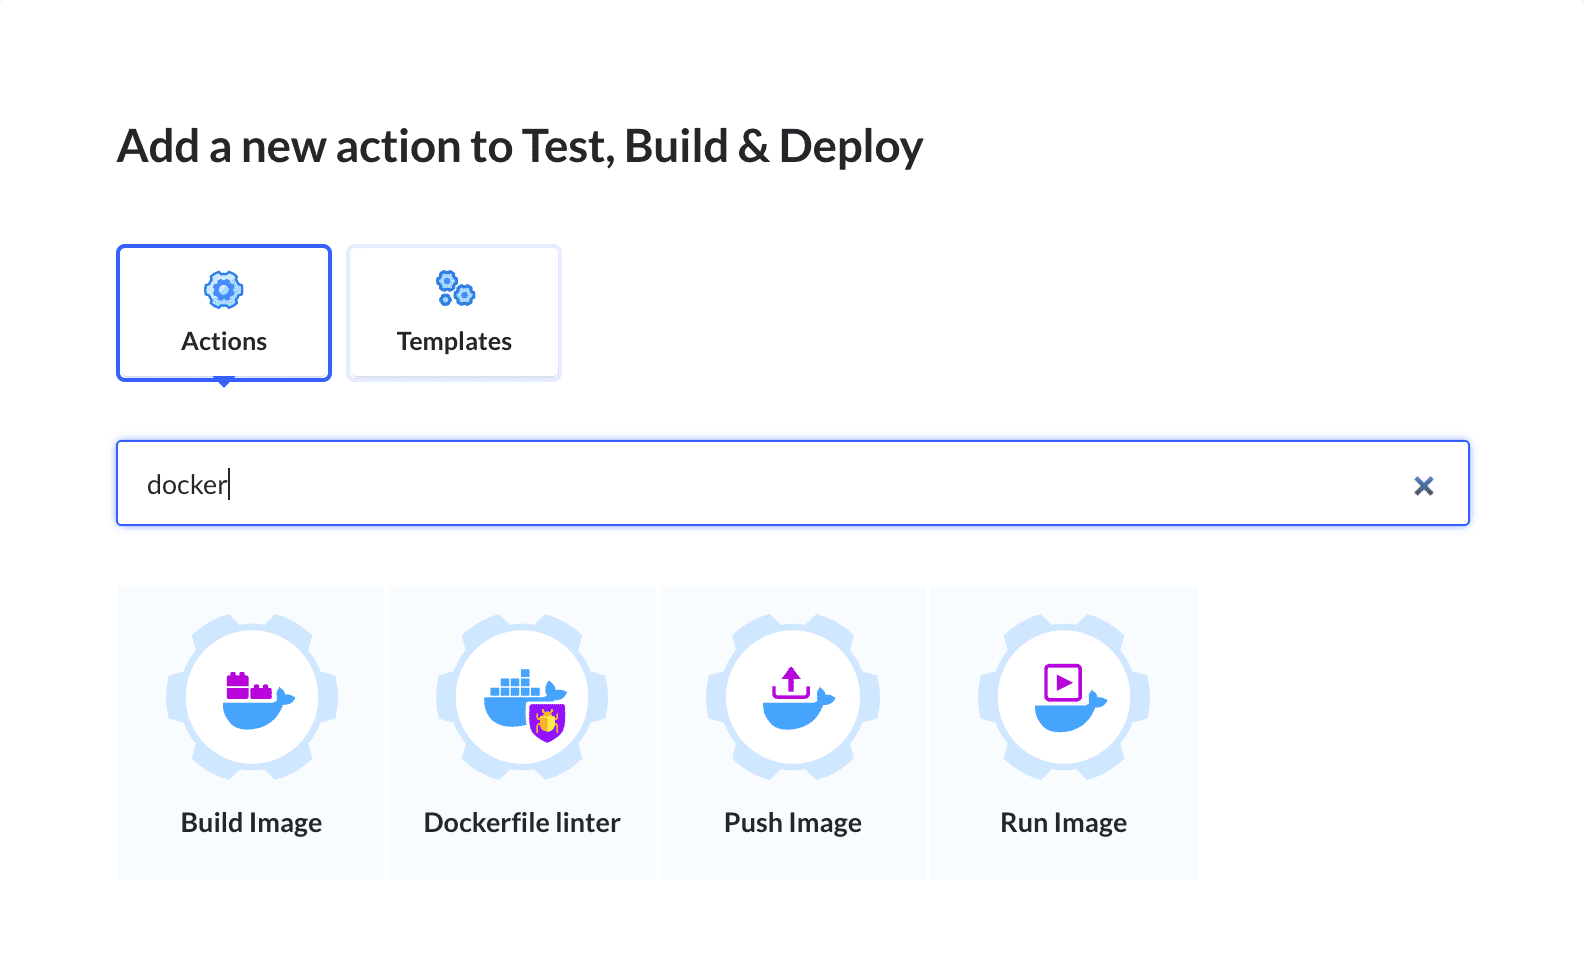 Adding Build Image action to the pipeline
Next, we need to select the Dockerfile that will serve as the basis of our image, alongside the context in which the build command will be executed. Here we choose the directory to the project:
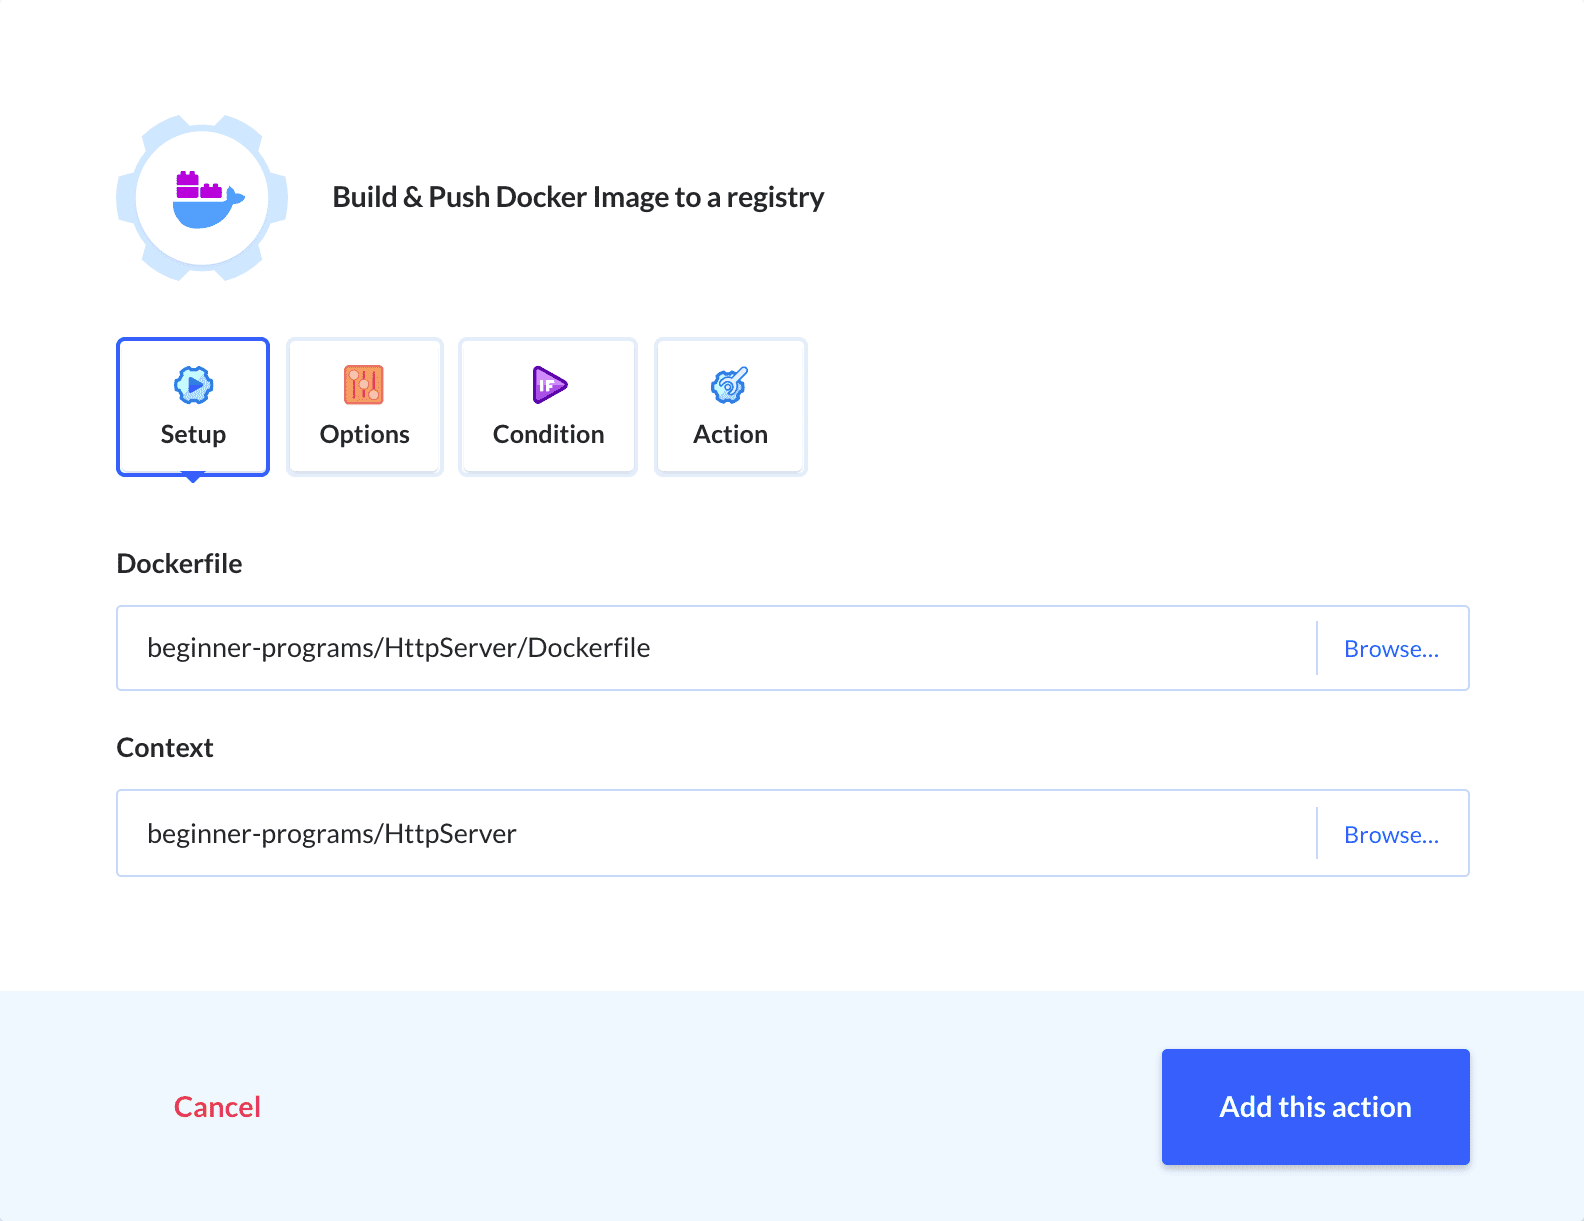 Configuring directory for Docker Build action
Now you only need to select a registry and provide the necessary credentials for pushing the image to your account in the Options window. You can also set the repository and tag of the image:
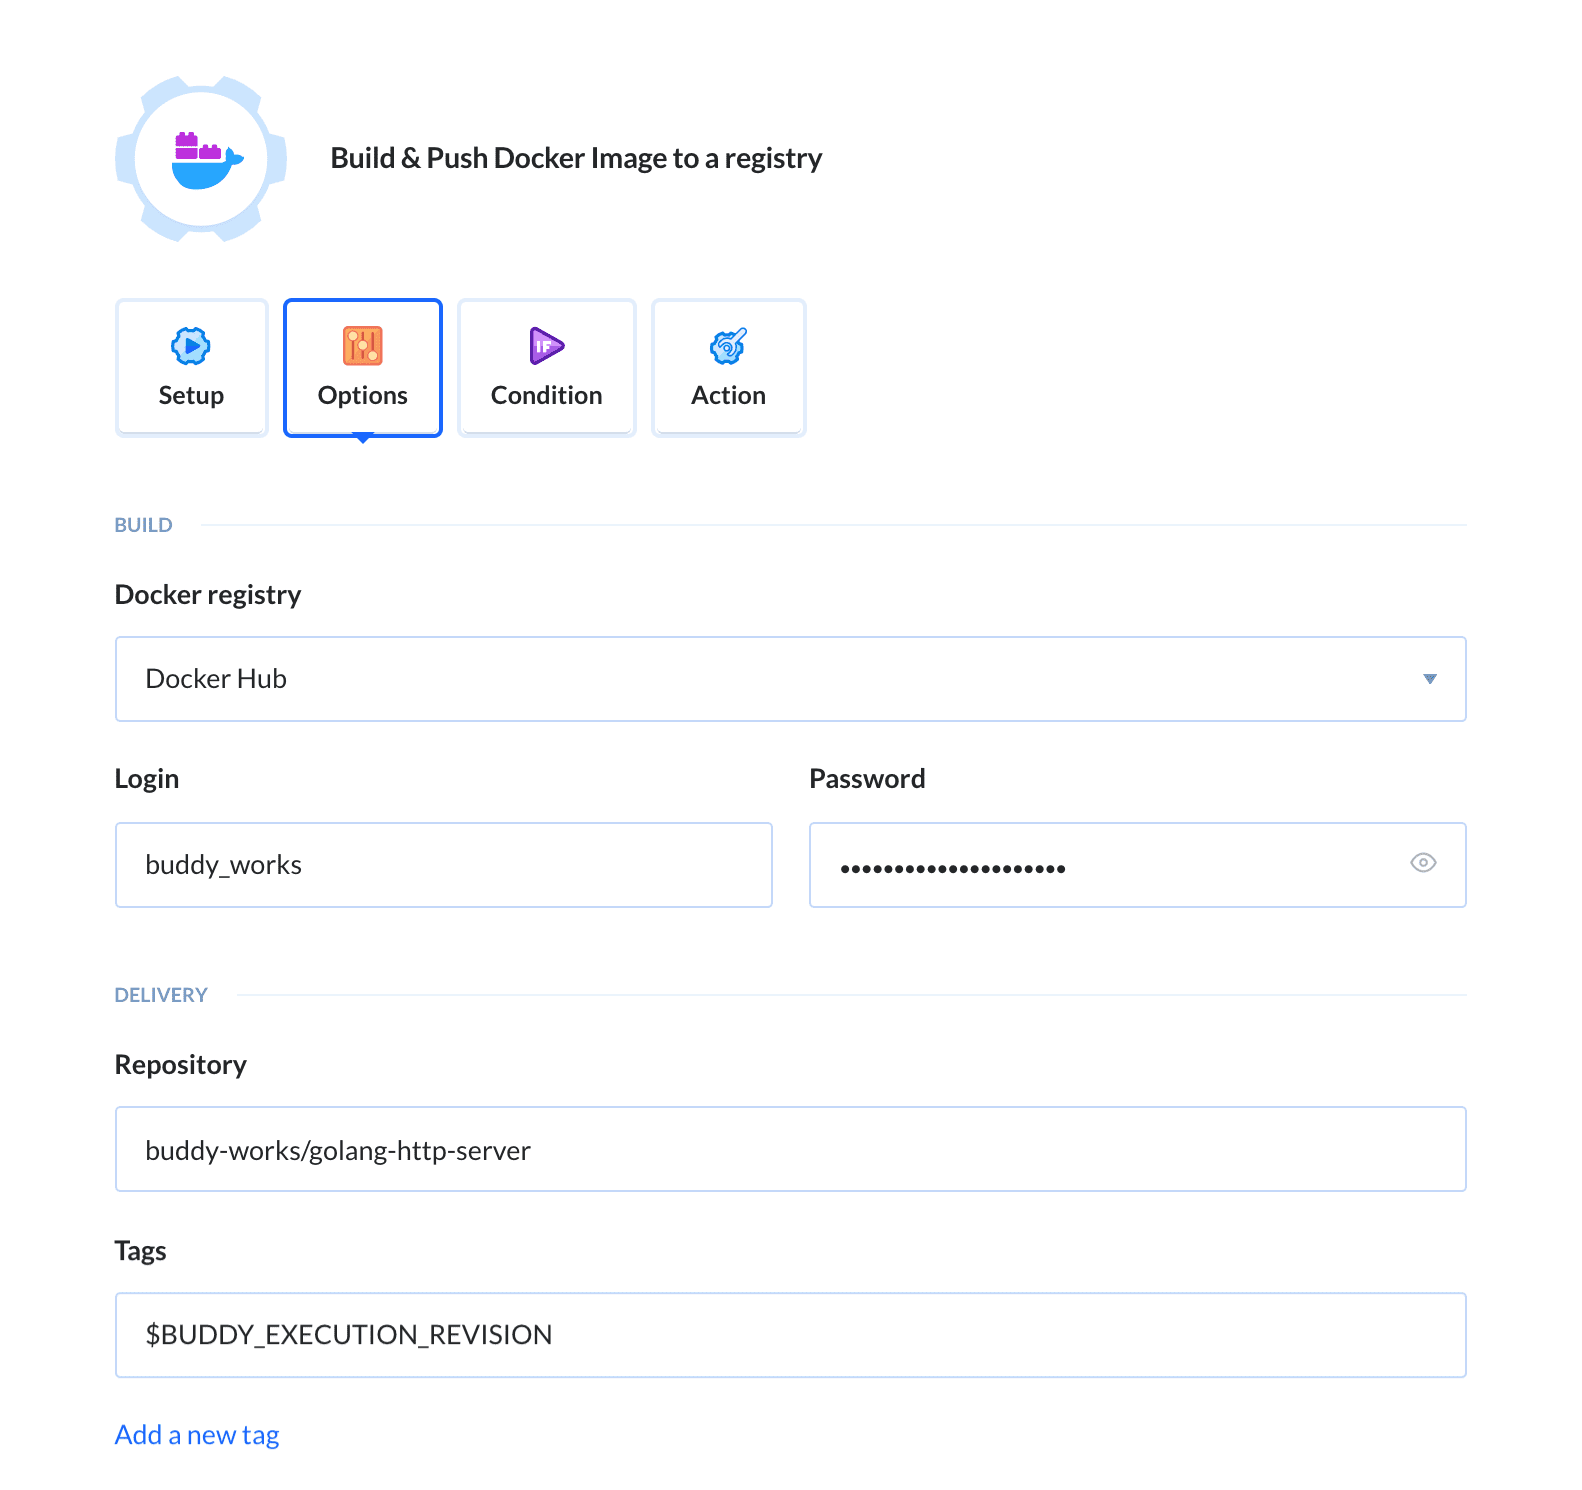 Selecing registry for the Docker image
Running the Docker image
The next step is deploying and running the image on our DigitalOcean droplet. There is currently no official Buddy action for this (yet), so we're going to use the SSH action instead:
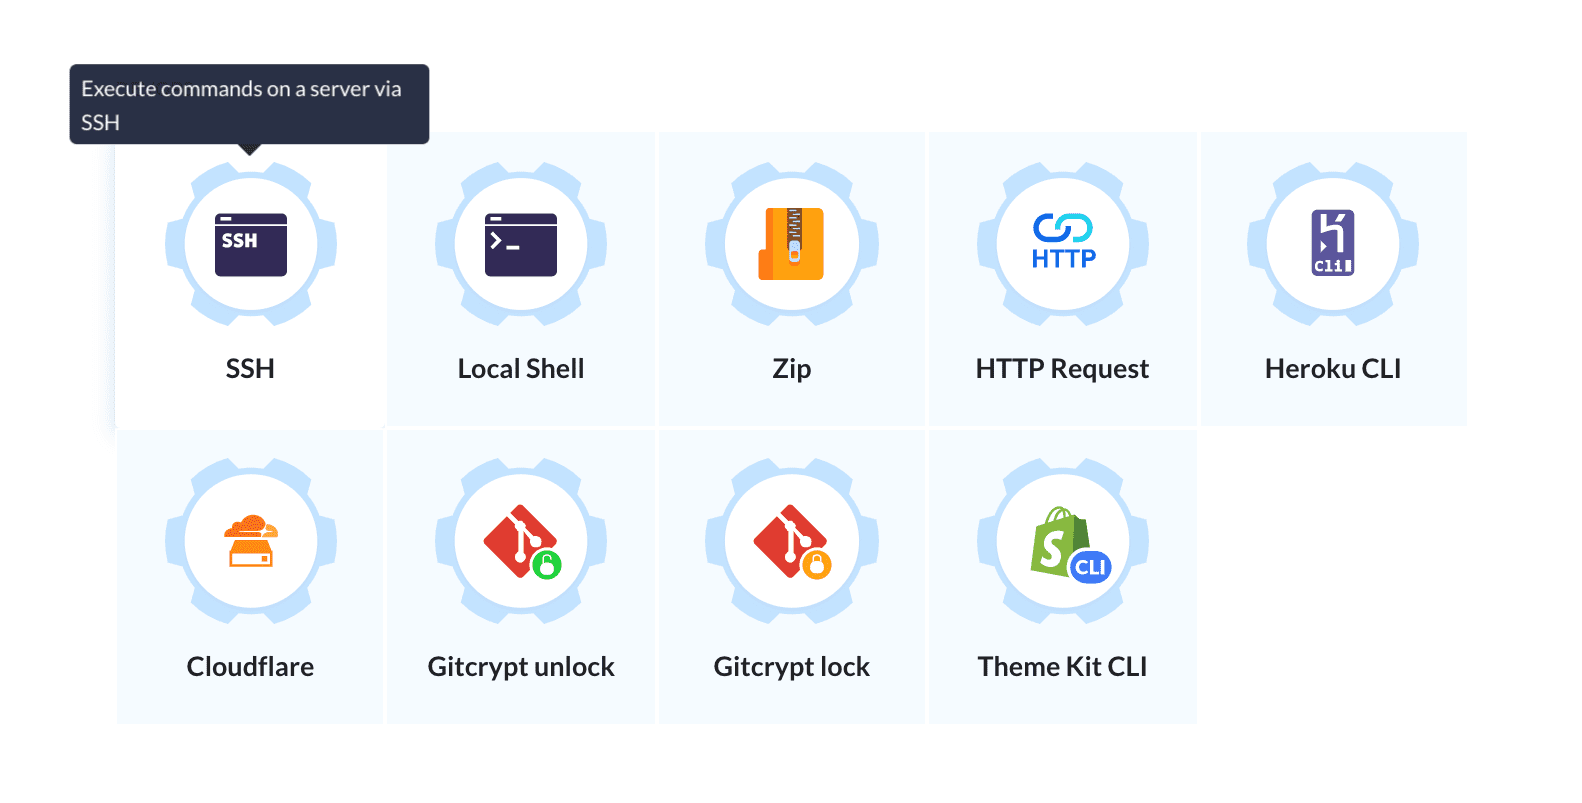 Adding SSH action to Buddy pipeline
After adding the action to the pipeline, we need to configure it to match our droplet settings:
- Set the authentification mode to
Password(if you are using an SSH key then selectPrivate SSH keyorBuddy workspace keyinstead) - Fill in the IP Address, username and password used to sign in to your server
Next add the following commands to the action details:
# Pull Docker image
docker pull gabrieltanner/golang-http-server:latest

# Stop and remove the container if it already exists
docker stop http-server || true && docker rm http-server || true

# Start the new container
docker run -p 8080:8080 -d --name http-server gabrieltanner/golang-http-server$$$$$$$$
Let's walk through these commands:
- The
docker pullcommand is used to pull our image from the container registry on the selected server - The second command is used to stop and remove the existing container. This needs to be done to update the container to the newly built image version. The commands will return an error if the container is not running. This is expected behavior, so we need to ignore it using
... || true. - The
docker runcommand starts the container and publishes port8080to the host system using the-pflag.
A properly configured SSH action will look like this:
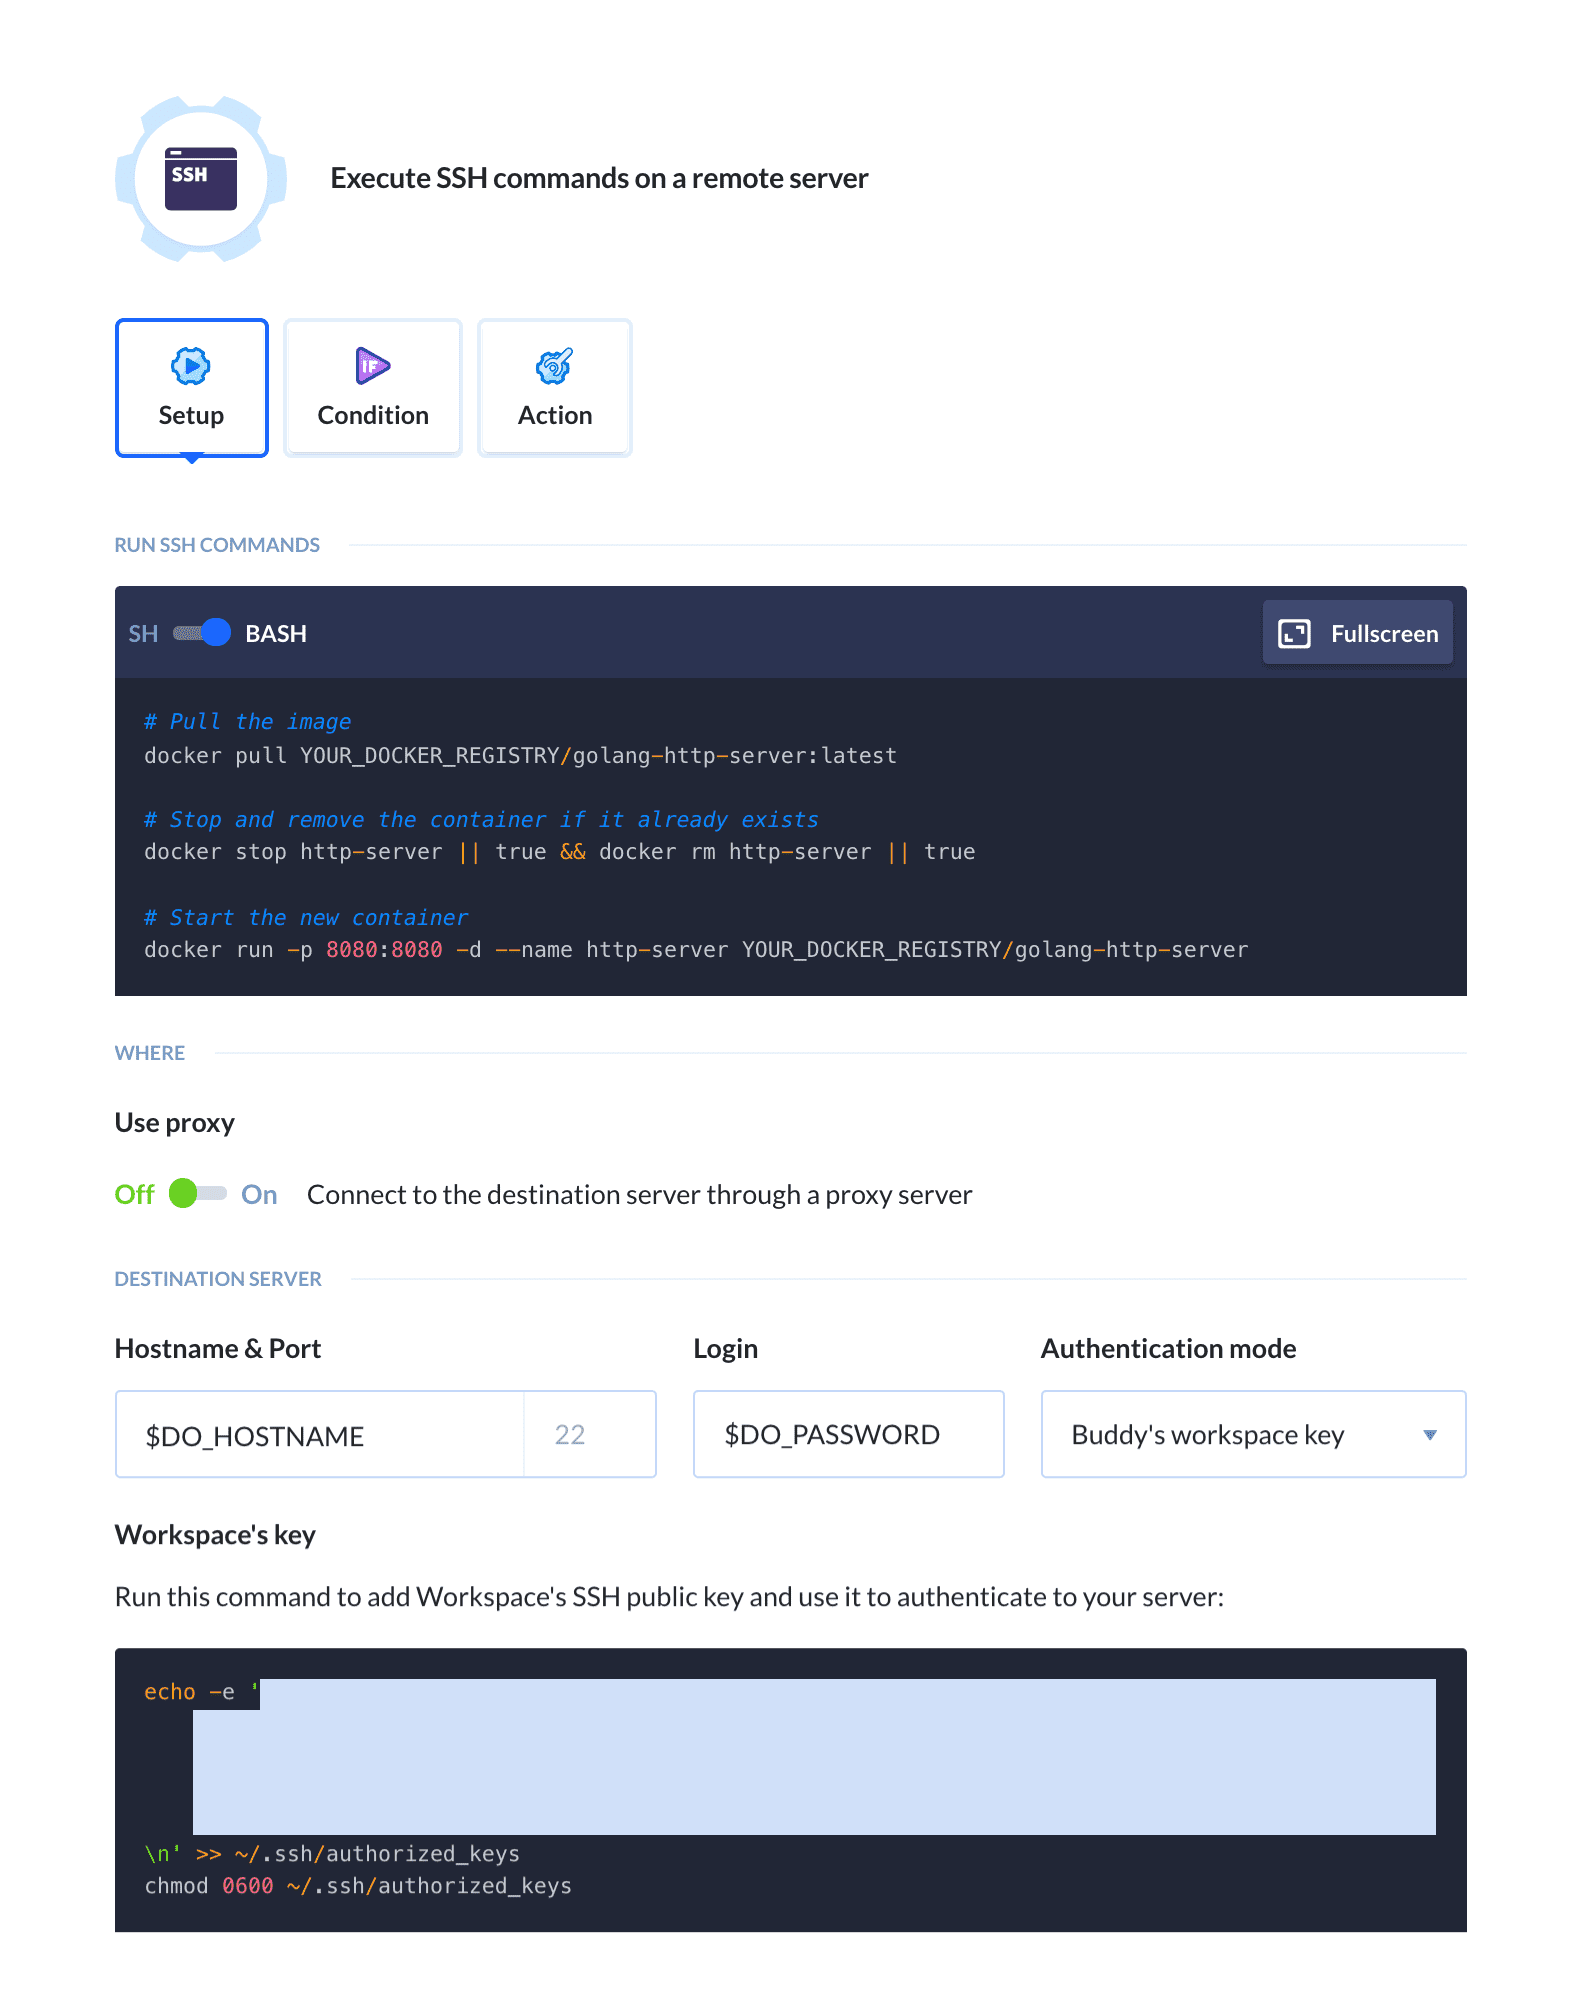 SSH action configuration
Optional: Wait for approval
You can add some kind of manual confirmation to the process before deploying the new version to your production server. This can be done by adding the Wait for approval action to your pipeline:
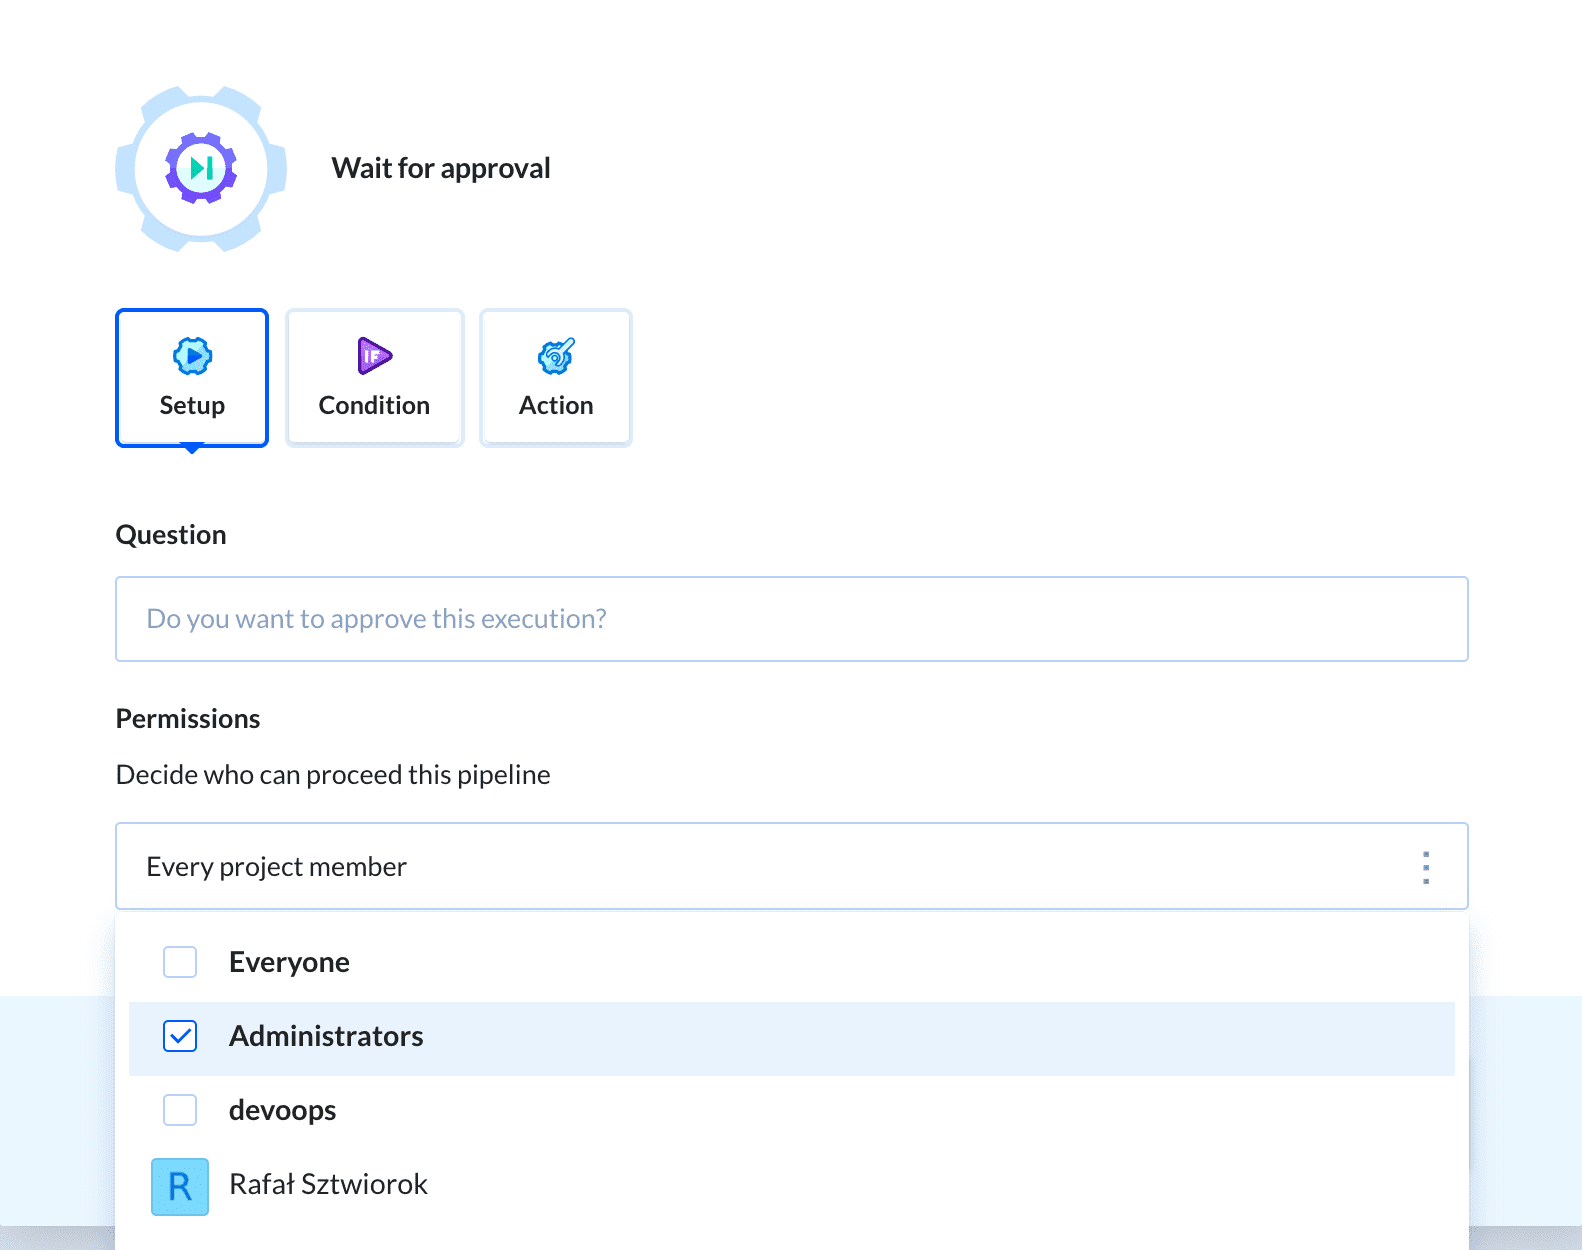 Wait for approval configuration
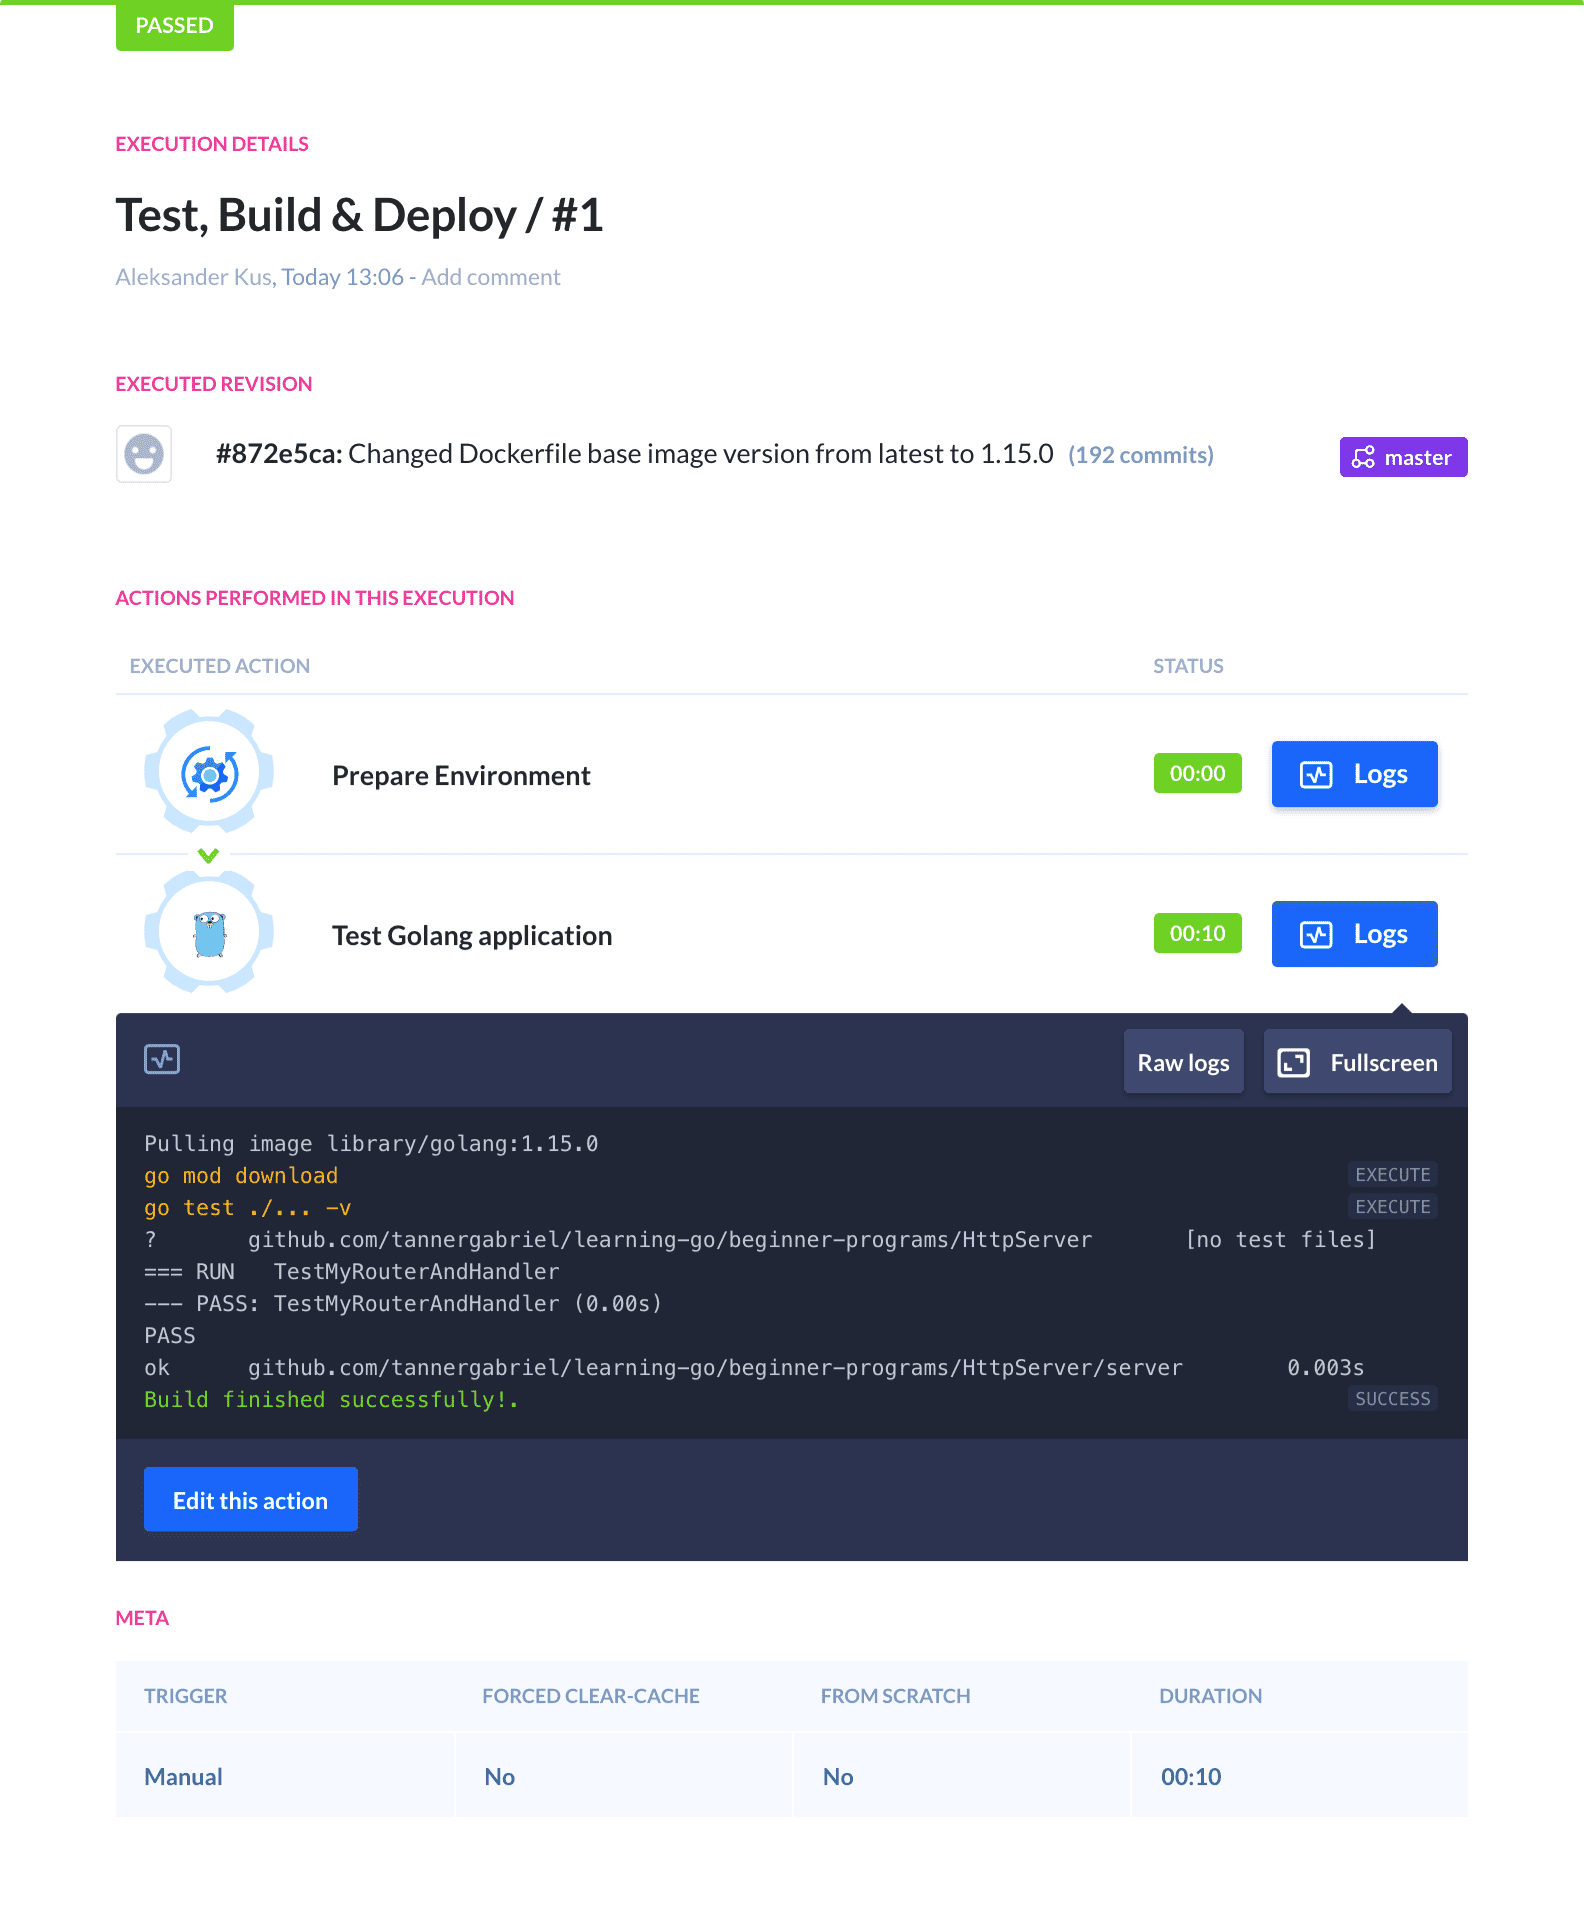
Testing the pipeline
Once you've finished configuring the newly added actions, it's time to rerun the pipeline to test the functionality. For that, you can either push some changes to the Git repository or click on the Run pipeline button to trigger the run manually:
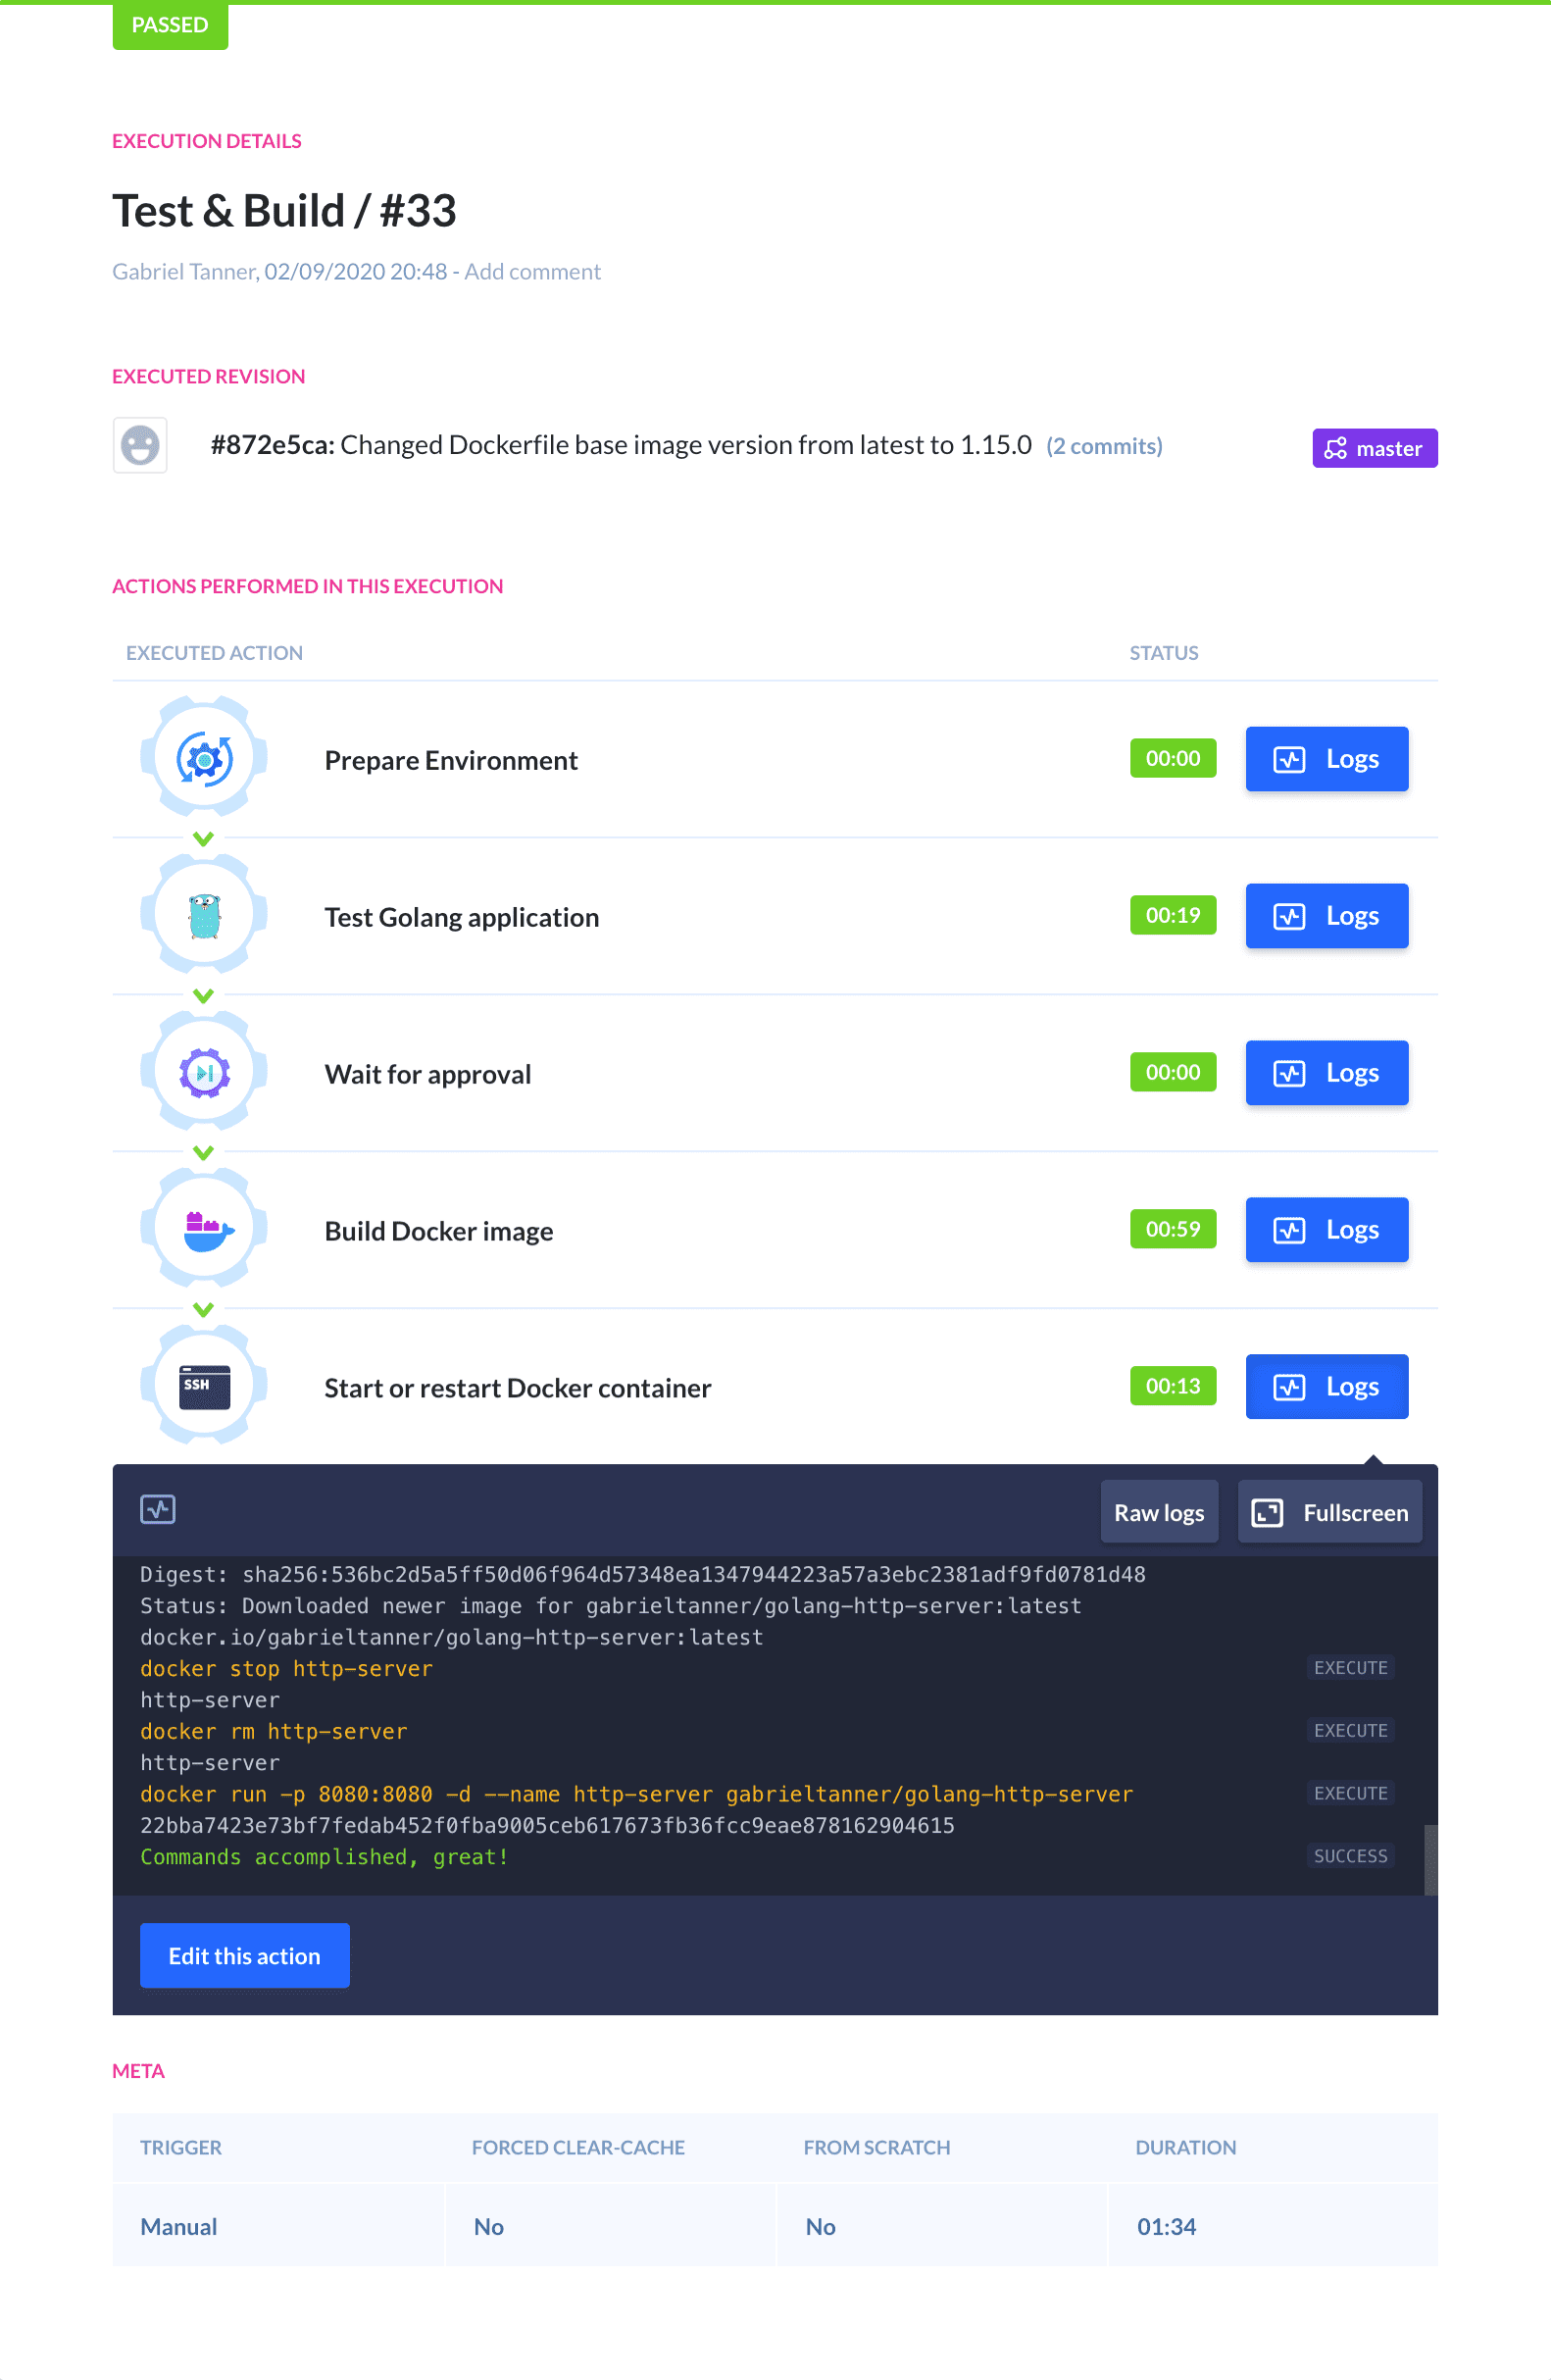 Pipeline post-execution details
You now have a fully functional Continuous Integration/Deployment pipeline for your Golang application. On every push to the selected branch, However, you can still add some useful actions that keep you up to date with your applications' current build status.
Step 5: (Optional) Sending success or failure notifications
In this section, we will look at how we can send a notification to keep yourself and your team updated on the newest build status.
Here is a list of all available notification actions at the time of publishing this article:
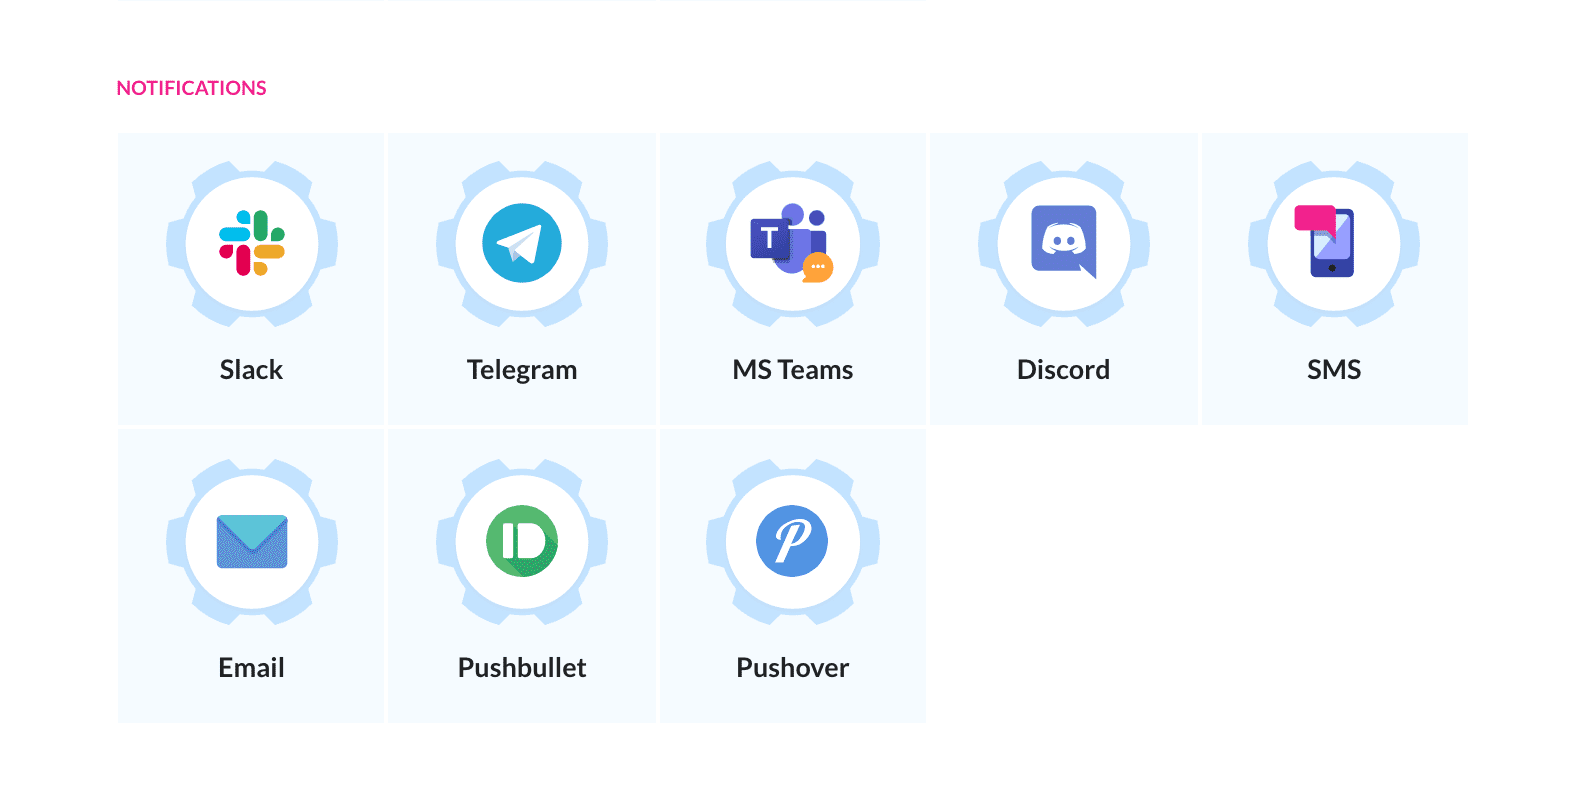 Notification actions
For that, we will utilize the Email action for failing builds and the Slack action for succeeding builds, but you can also use different ones if you, for example don't use Slack.
The notifications for successful builds can be sent by adding another action on the bottom of your pipeline, which will only be executed when all other actions succeed. The failure notification action needs to be added to the ACTIONS RUN ON FAILURE section of the pipeline.
After adding the action to your pipeline, customize it using the environment variables in the action setup page. A sample email configuration could look similar to this:
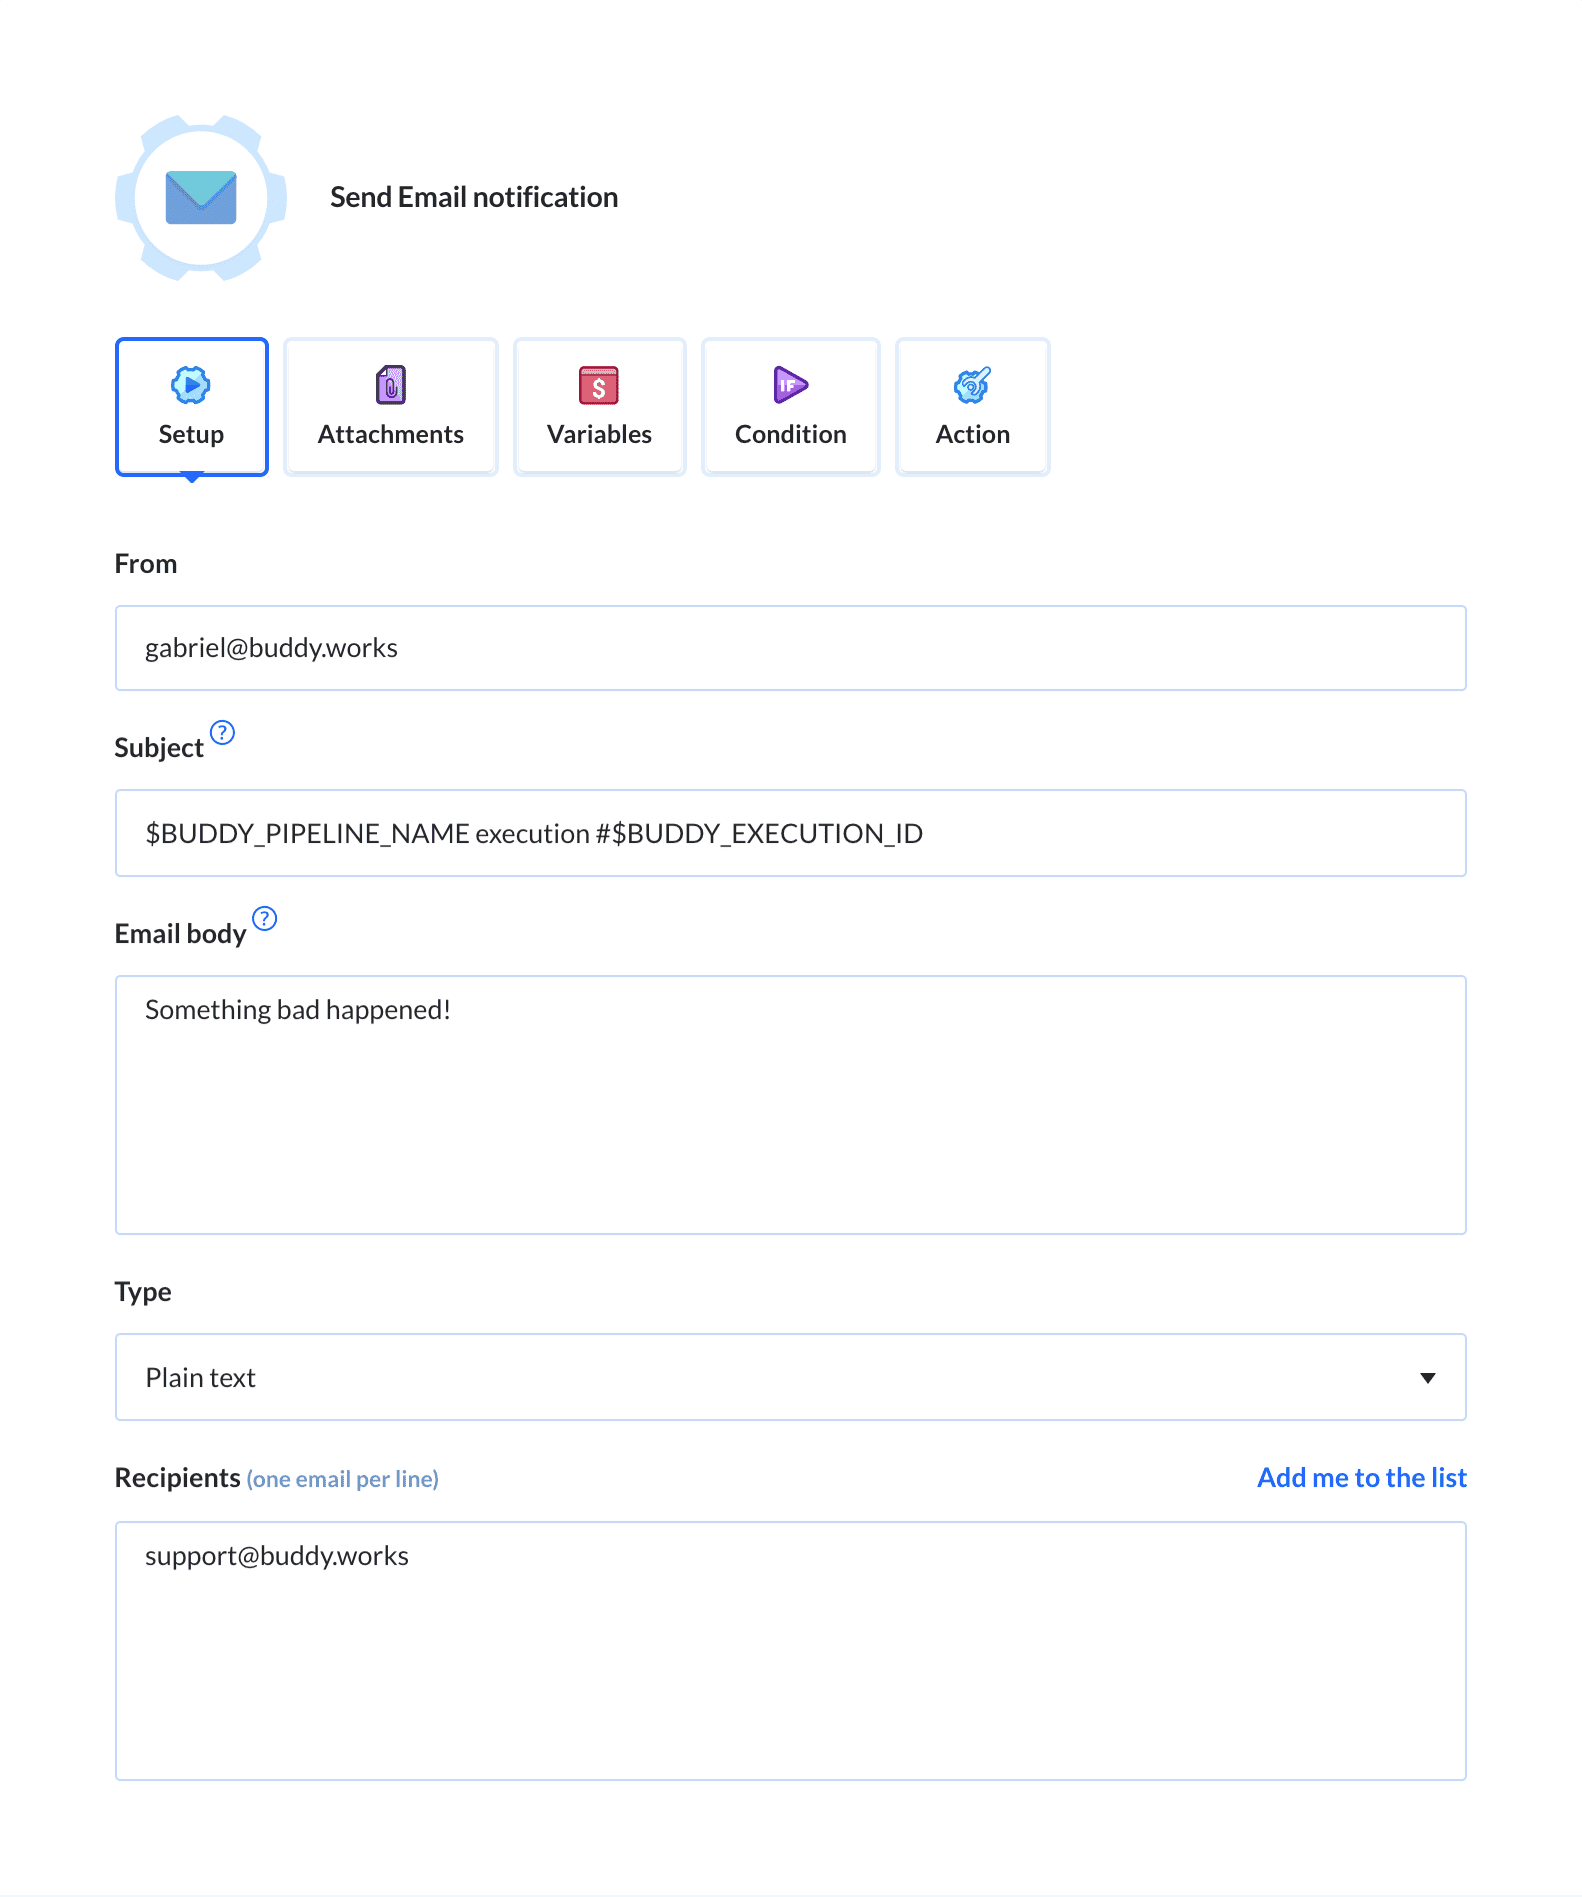 Email notification
Summary
There you have it! You have successfully set up your own CI/CD pipeline for your Golang application that automatically tests and deploys your application whenever you push a change to your Git repository and even sends notifications with the current build status out to you and your colleagues. I suggest that you play around with the different Buddy actions shown in the article and further customize the settings for your purposes. Enjoy!
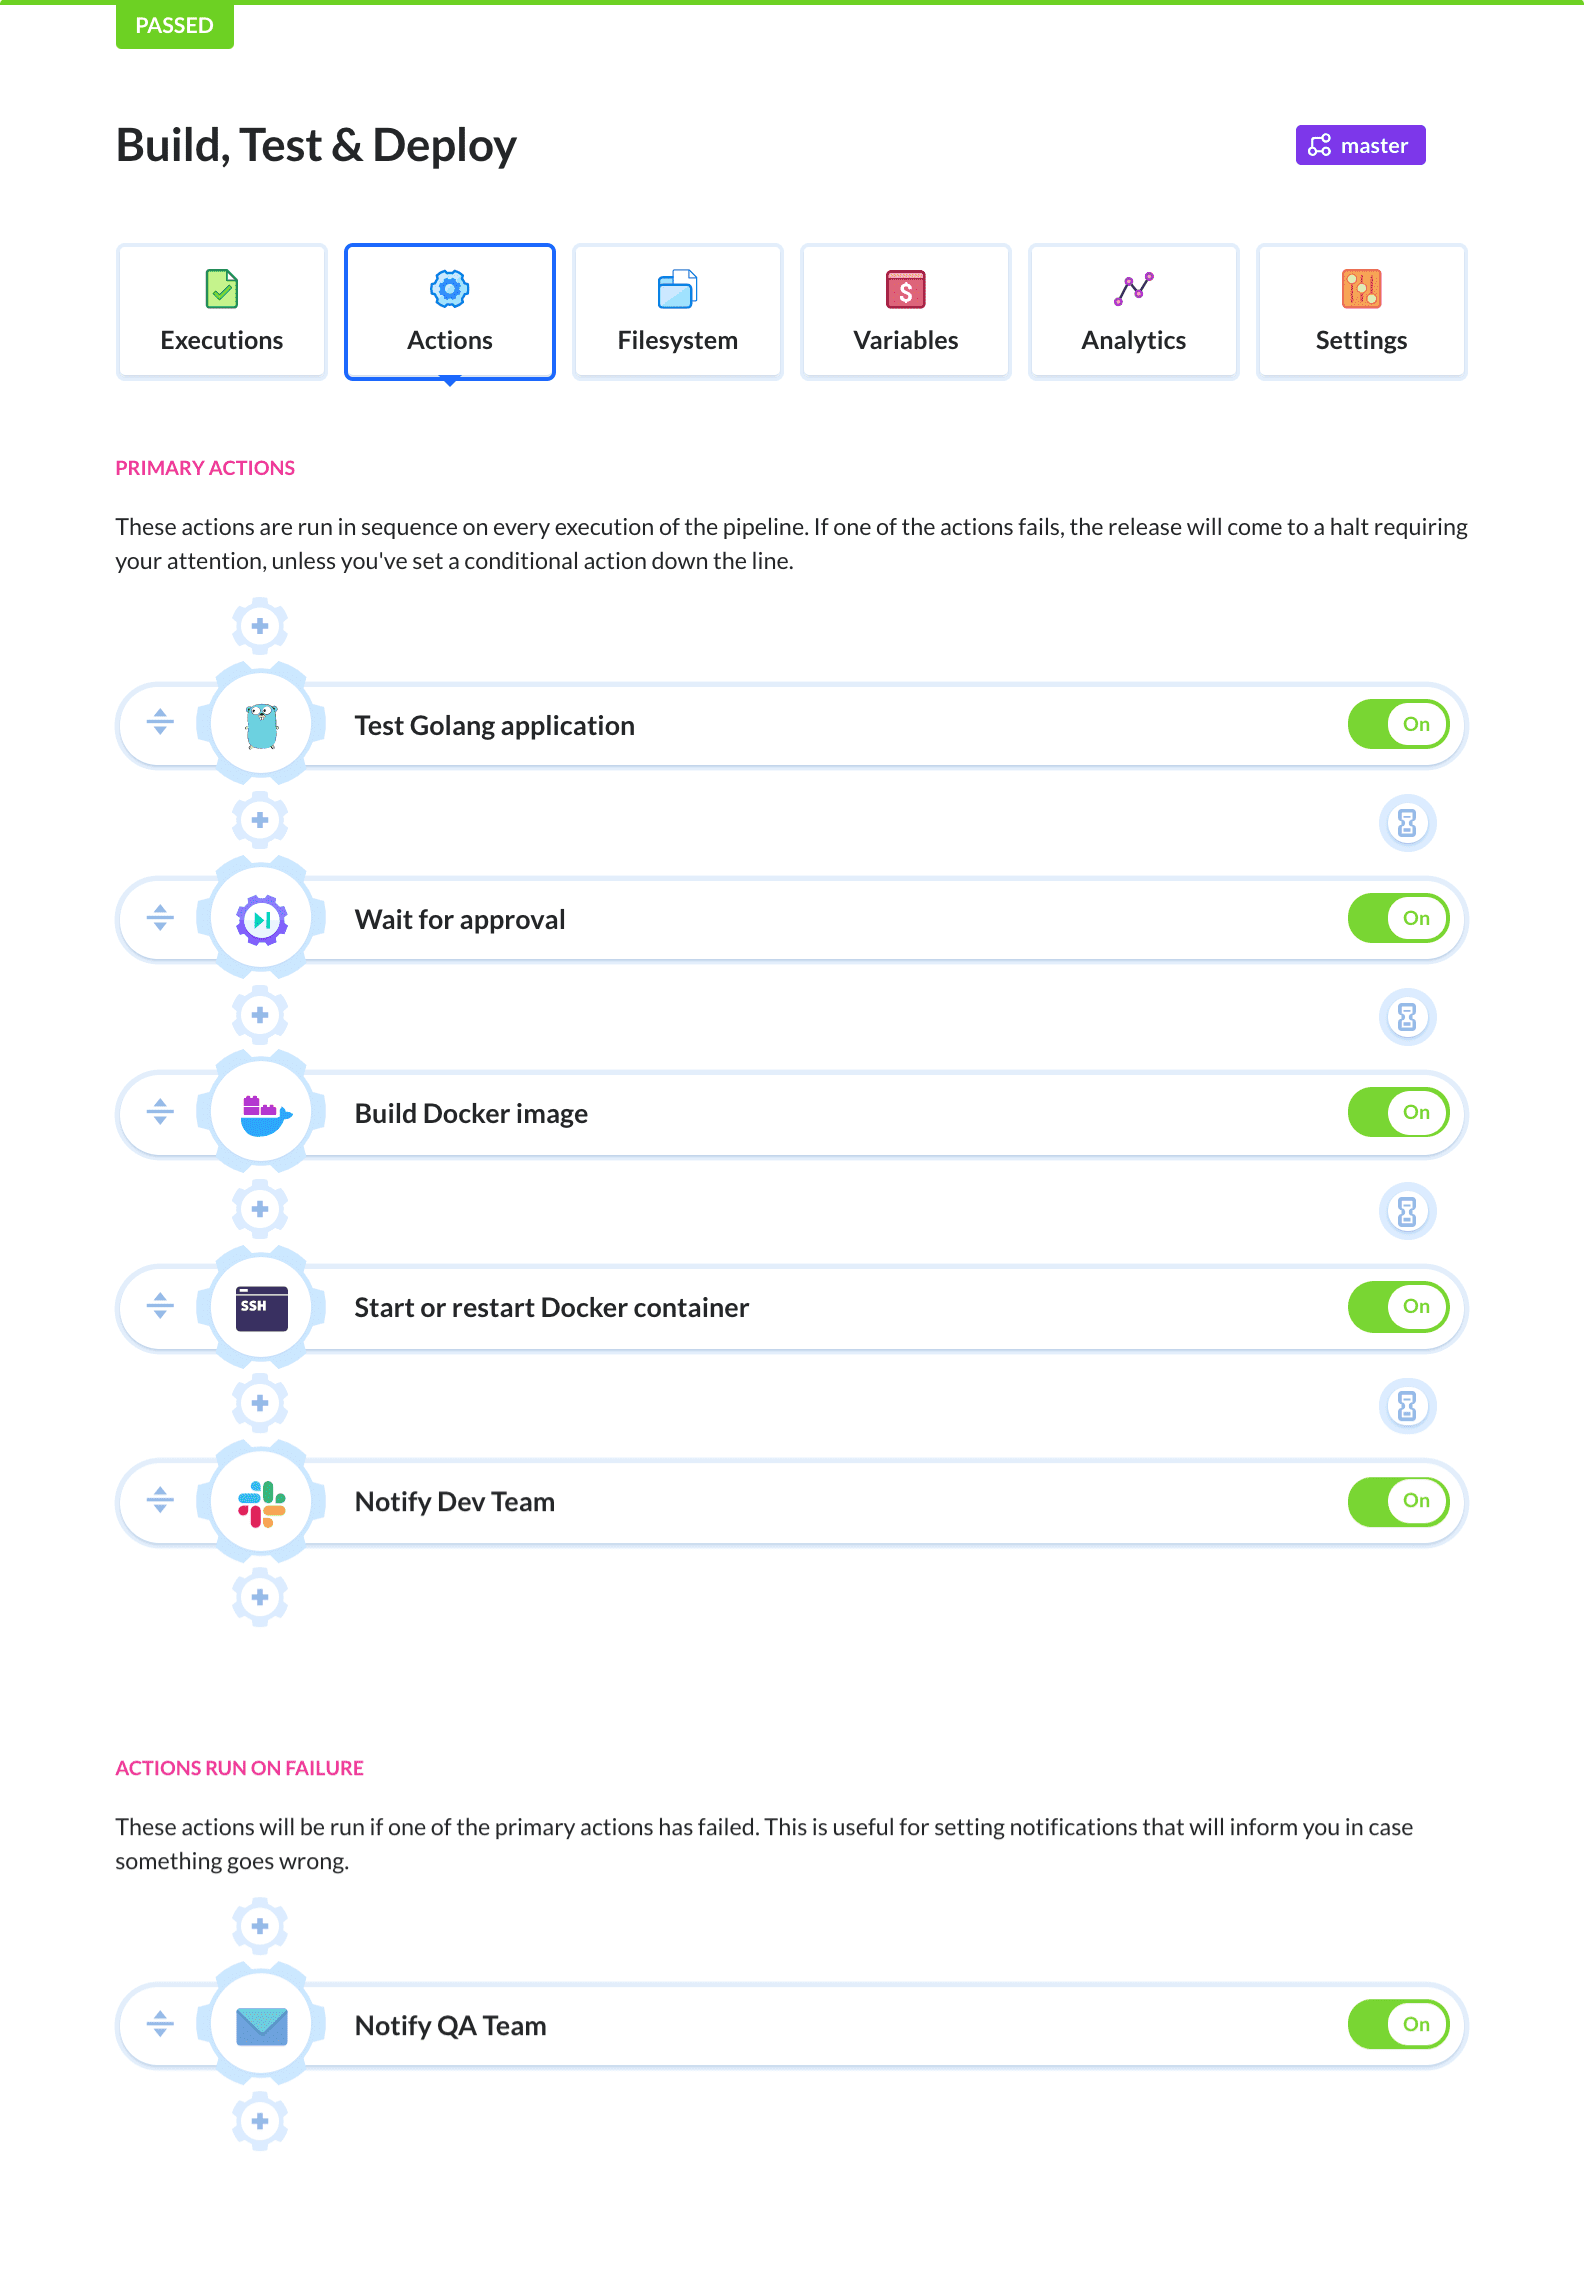 Complete Golang delivery pipeline

Gabriel Tanner
Freelance writer
With Buddy even the most complicated CI/CD workflows take minutes to create
Sign up for Buddy CI/CD
Start a free trial