Bitbucket
Integrating with Bitbucket allows you to use it as a git hosting provider and sign in to the workspace with your Bitbucket profile.
Create an OAuth consumer in Bitbucket
- Sign in to your Buddy self-hosted instance as admin.
- Add a new project and select Bitbucket as the provider.
- Click Configure Bitbucket app and copy the Authorization Callback URL.
Image loading...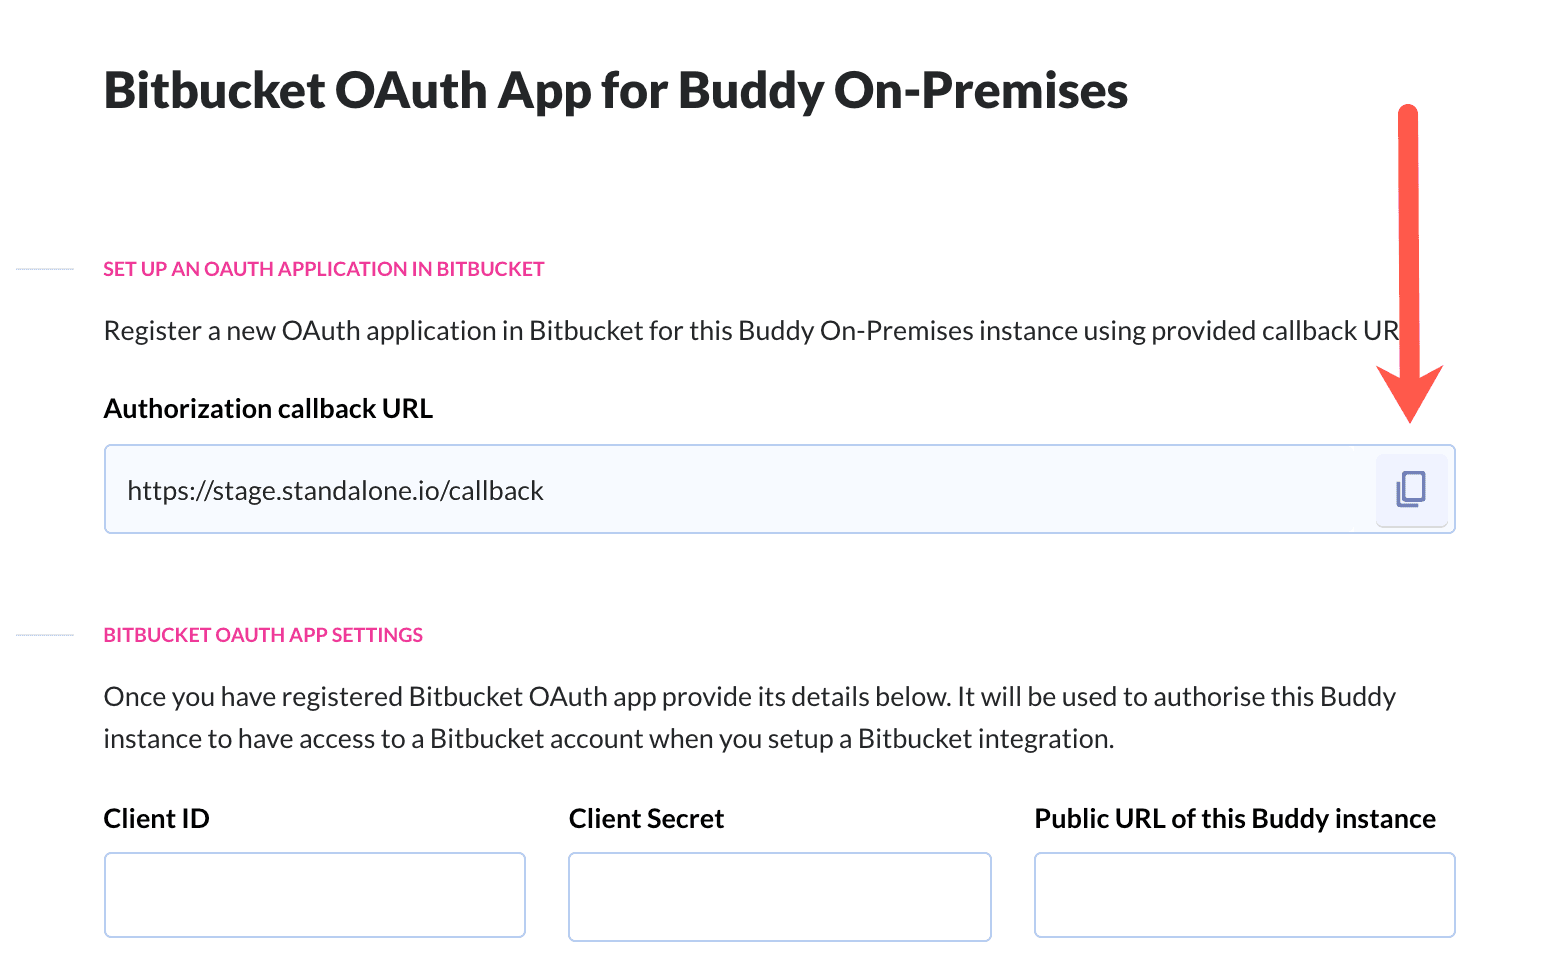
- Sign in to your Bitbucket profile. Click your avatar icon in the bottom left and choose the workspace you want to integrate with Buddy.
- Open the Settings tab and select OAuth consumers
- Click Add a consumer
Configure the Bitbucket OAuth consumer:
- Name → anything, eg.
Buddy self-hosted - Callback URL → paste the callback URL copied from Buddy self-hosted
- This is a private consumer → check this option
Check the required permissions:
- Account → Read
- Repositories → Read
- Webhooks → Read and write
- Name → anything, eg.
Image loading...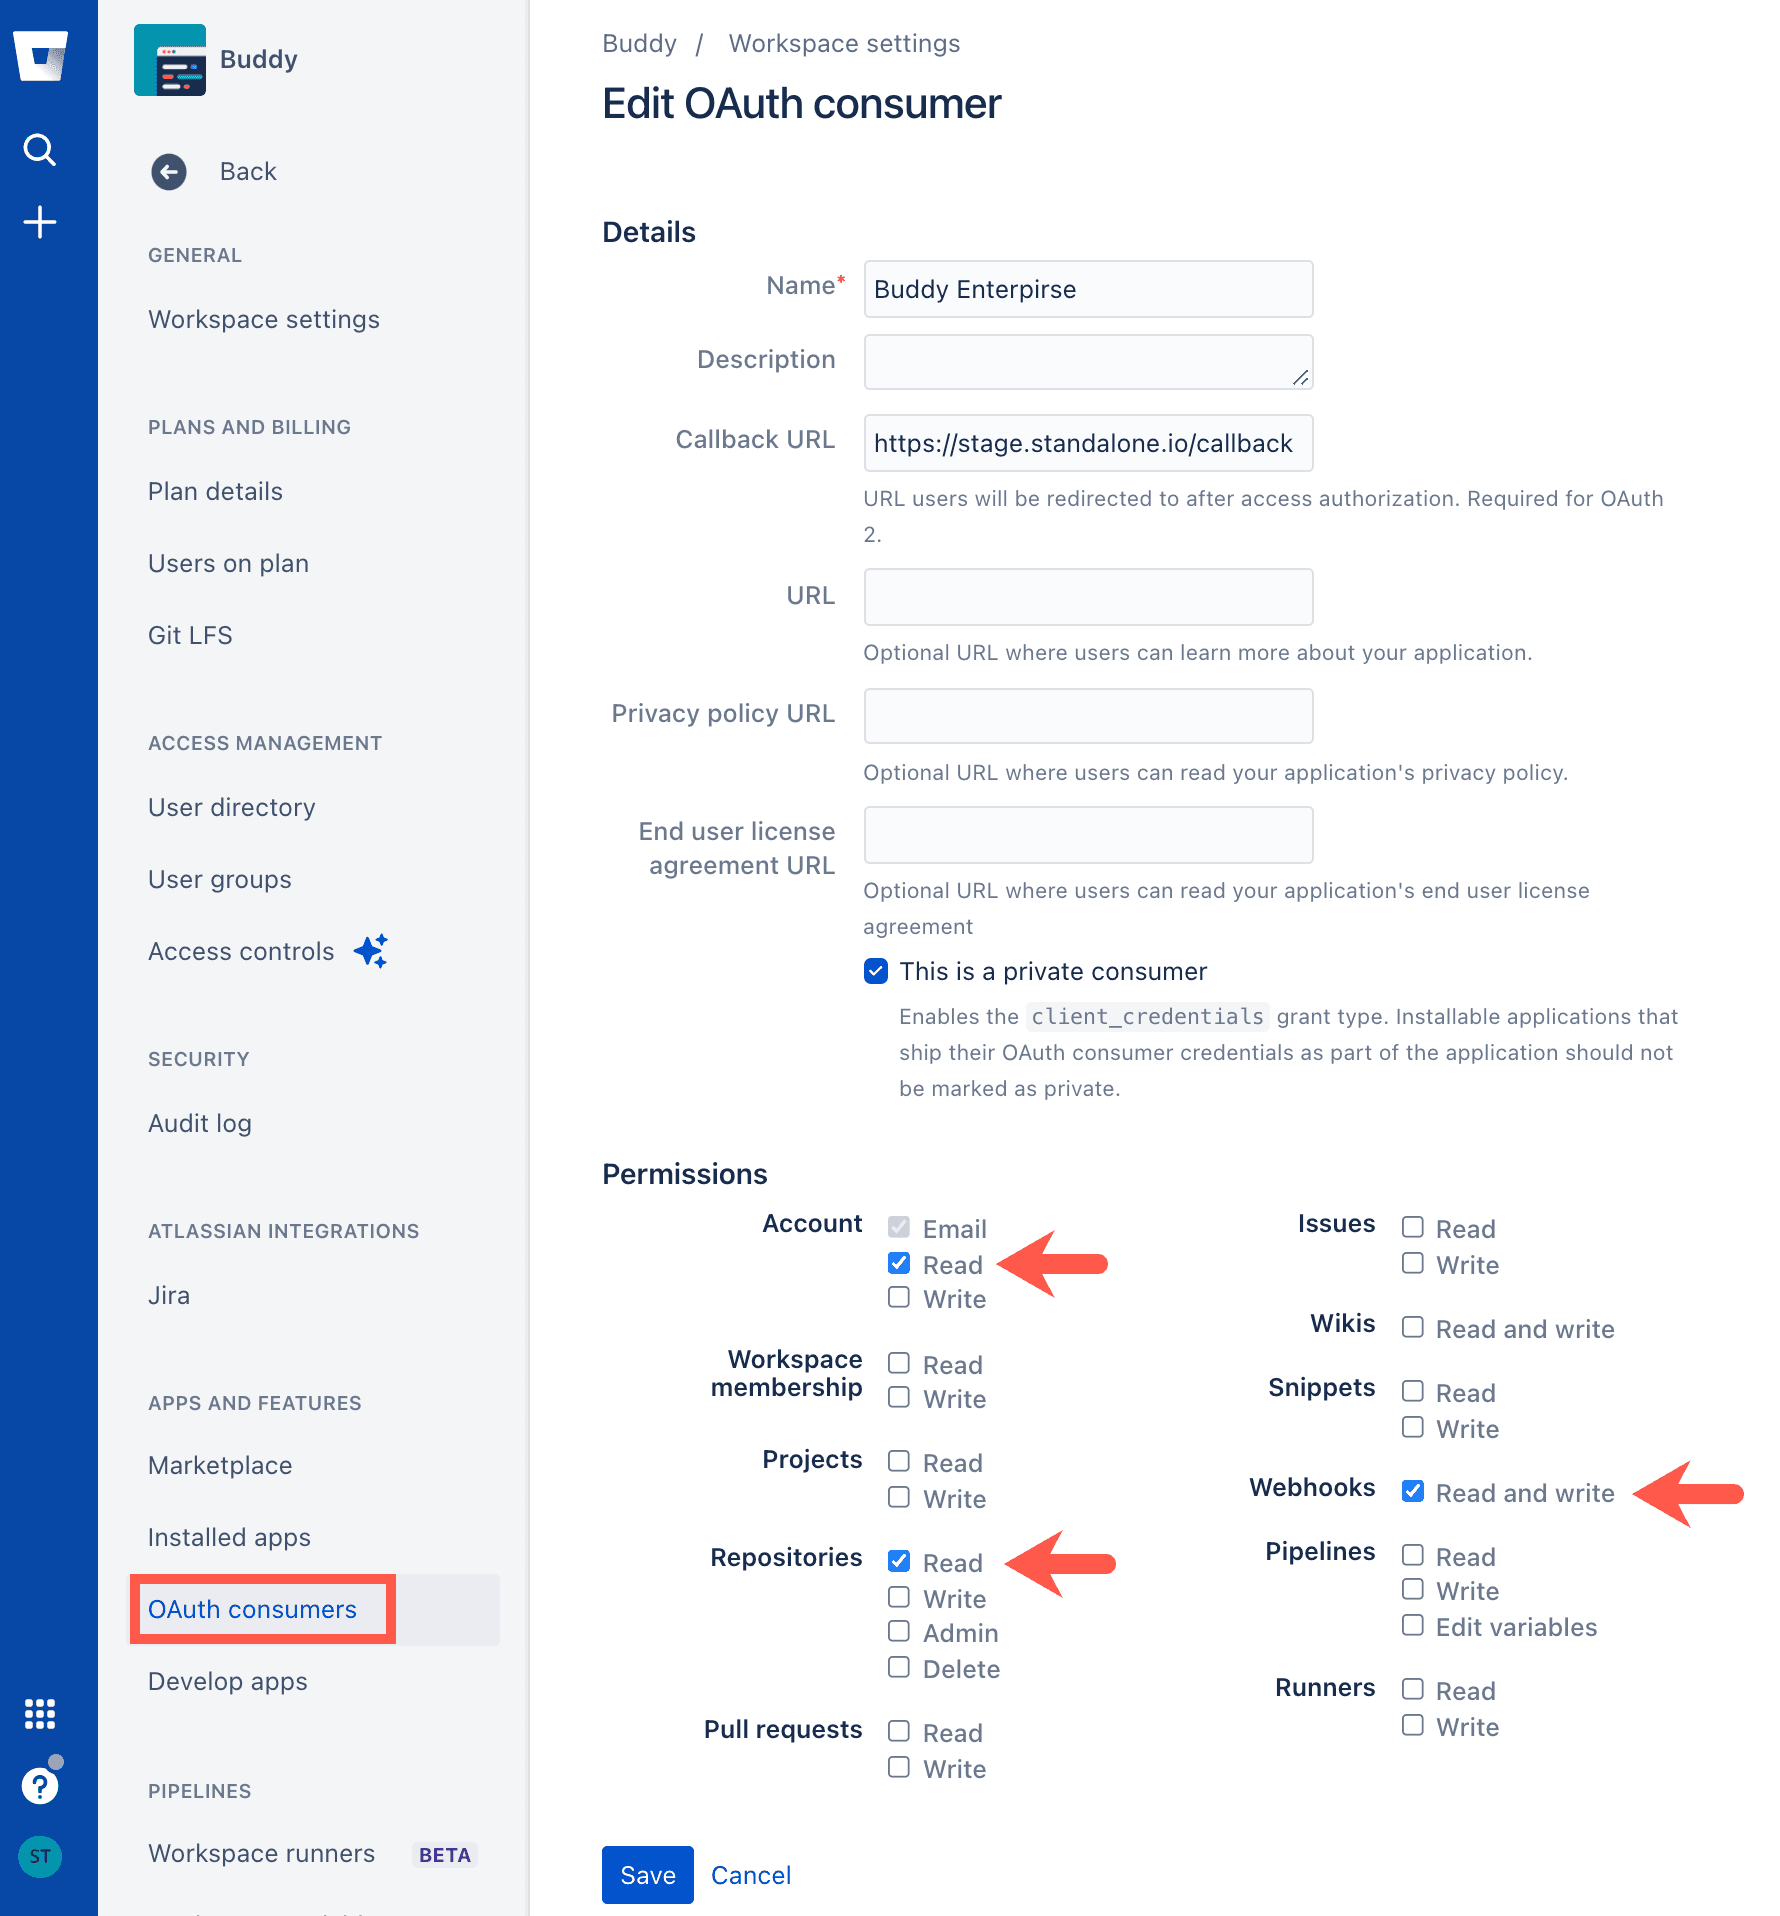
- Click Save to create the consumer.
- Copy the Key and Secret of the newly created consumer.
Image loading...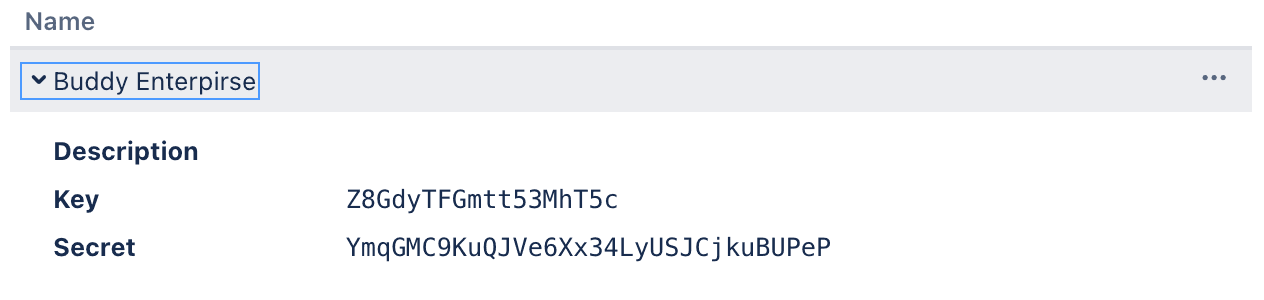
- Paste the Bitbucket OAuth consumer Key into the Buddy Client ID field.
- Paste the Bitbucket Client into the Buddy Client Secret field.
- Click Save changes and restart Buddy to apply the changes.
Webhook redirection on non-public-instances
If your instance is not publicly available, follow these instructions to ensure that webhooks from Bitbucket are successfully reaching Buddy:
- Go to the settings of your Bitbucket App:
https://$INTERNAL_BUDDY_IP_ADDRESS/settings/apps/BITBUCKET. - Set the Public URL of this Buddy instance to the public address of your network with a custom port.
- On your router, redirect the public address and port to
$INTERNAL_BUDDY_IP_ADDRESS:80.
Tip
If your commits are now showing up in Buddy, go to the Code tab, and click Manual fetch → Fetch missing commits. This will update the webhook URL in the Bitbucket repository.
Image loading...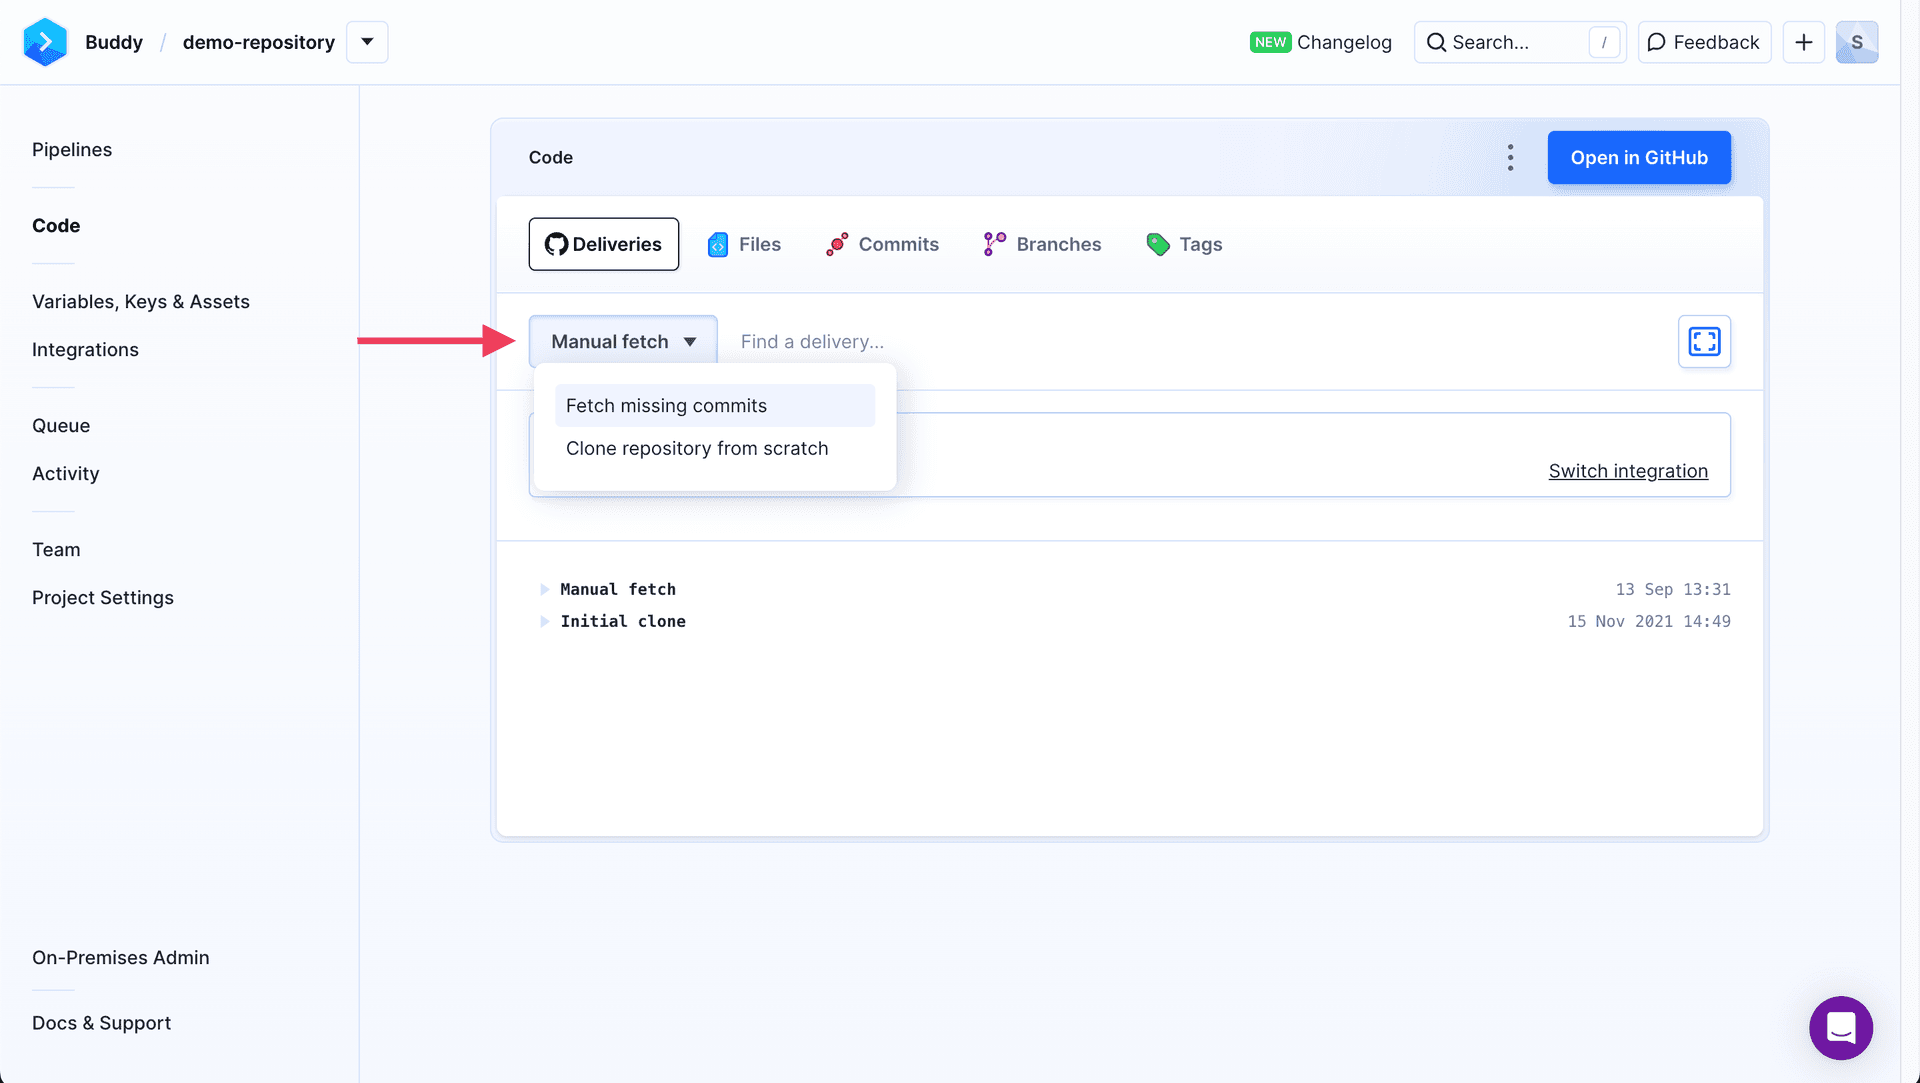
Last modified on Jan 29, 2025