AWS Lambda CI with Buddy
This article is part 3 of the series on AWS Lambda. Check out the previous articles:
In this article we will see how to create a CI pipeline with Buddy to test an AWS Lambda written in Go.
Buddy is a managed CI pipeline in the Cloud which allows you to build powerful pipelines in a very friendly way by combining pre-configured visual building blocks.
This article is a follow on from two previous articles:
- Determine prominent colors in a picture, your first AWS Lambda in Go
- Integration testing for AWS Lambda in Go with Docker-compose
Since we will be using the same code example, you should check them out before proceeding with this one! 🙂
Prerequisites
Before getting started, you need to make sure you have the following prerequisites:
- A Buddy account
- The lambda code in a repository on GitHub or Bitbucket. If you have a GitHub account, the easiest option is to fork my repository.
Once you have all of this, make sure to link your Bitbucket or GitHub account to your Buddy account, so that you can start creating pipelines off of your repositories.
Creating the pipeline
One of the things I love about Buddy.works is that it makes creating pipelines a very visual exercise. Essentially, you can combine and configure a bunch of predefined building blocks. With this approach you don't have to learn another custom YAML (or either Groovy!) syntax in order to define your pipeline.
Note that advanced users can still use a YAML-based definition language approach, which has its own advantages in terms of maintainability, versioning and repeatability.
Here we will show only the UI-driven approach, but you can always generate the YAML configuration file from the configuration defined through the UI.
On the other hand, Buddy.works doesn't support docker-compose out of the box (yet), so we need to replicate our docker-compose-based testing (from the previous article) by using plain docker containers and Buddy services.
I will show you how to do that so the pipeline can run all our tests automatically every time we push a new commit to our repository.
Take into account that, at the time you will be reading this article, the UI might have changed a bit, but the concepts and steps described here should be more or less the same, so don't worry if what you see in the screenshots below doesn't match 100% what you will be seeing on your screen.
To get started, login to Buddy, go to Projects and select New project.
Image loading...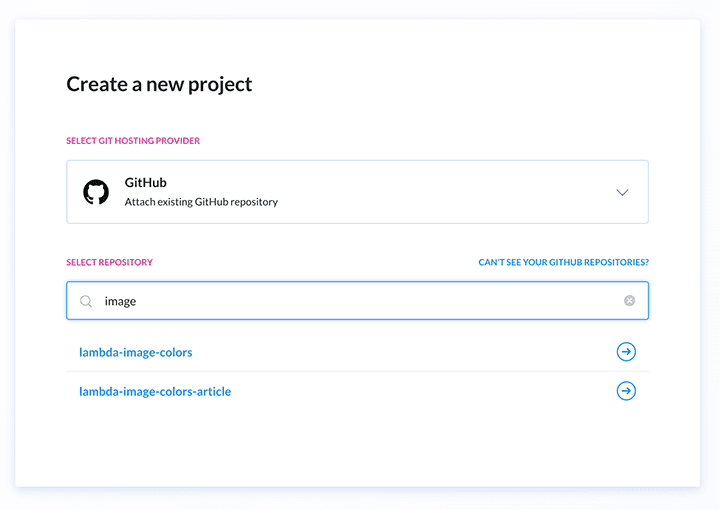
In my case here I am picking GitHub as a repository service and I select my lambda-image-colors article. Use the search bar if you have many repositories.
Once you select the repository you should see the following screen:
Image loading...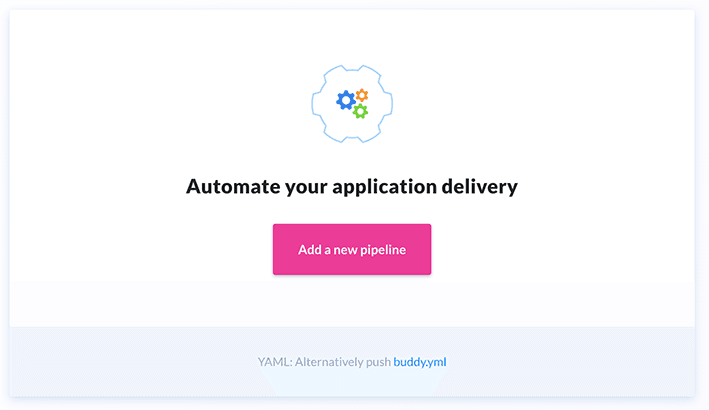
Click on "Add new pipeline".
Image loading...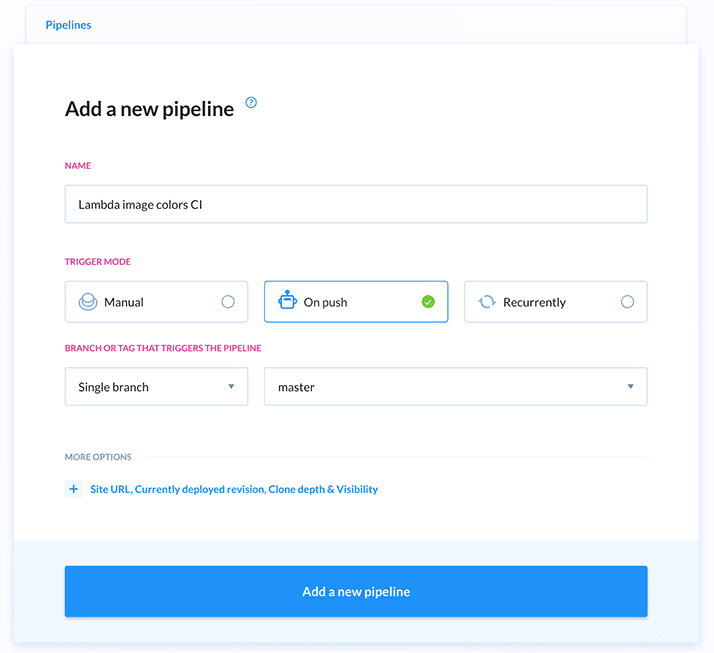
In this screen you can define what triggers your pipeline. In my configuration I am specifying that every push to the branch master will trigger the pipeline.
Once you are done, click on "Add a new pipeline".
Linting
Image loading...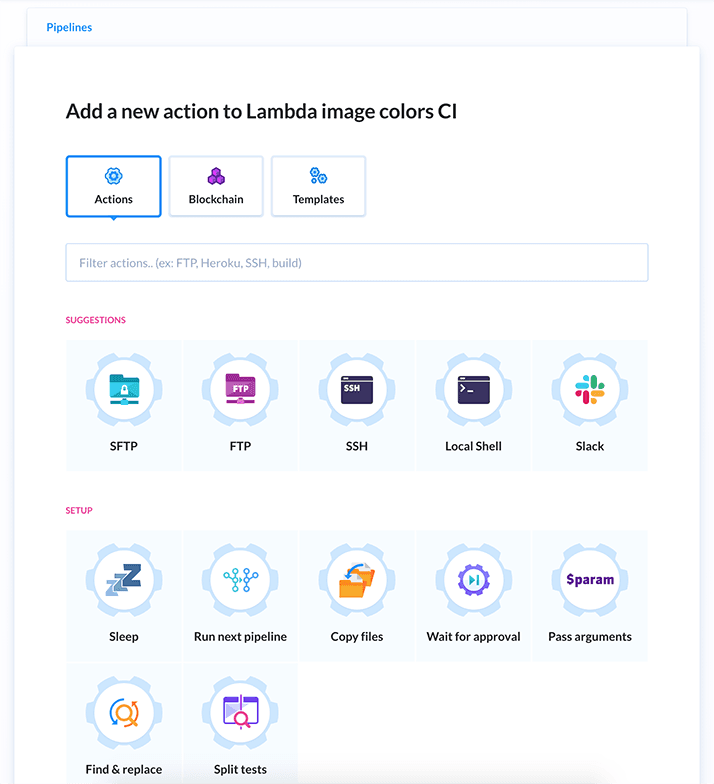
You are now editing your pipeline. A pipeline is a sequence of actions and actions can be created from different types of pre-defined blocks. There are really a lot of actions available, so for simplicity, tou can use the filter search bar to find the ones you need.
Our first action will be running the linting, so we can do that by searching for go:
Image loading...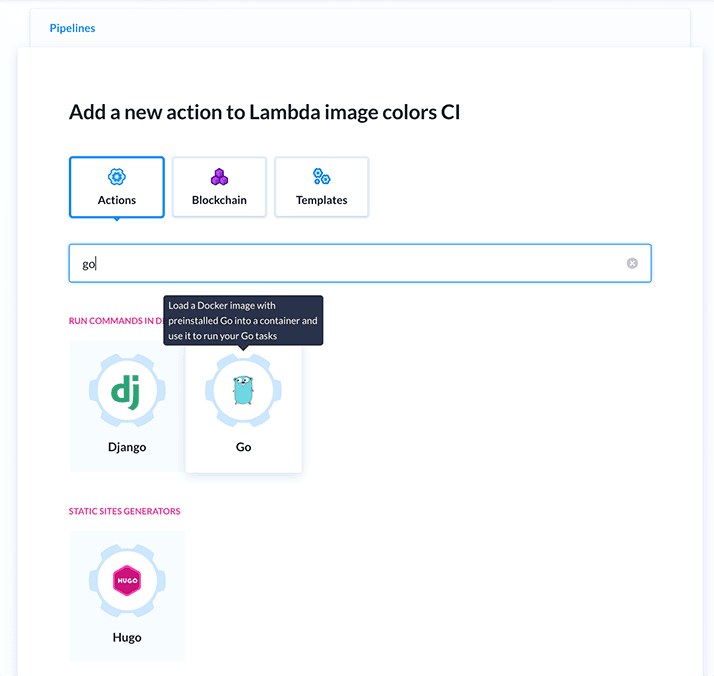
Now select the "Go" action and you should see the following screen to configure the new go-based action:
Image loading...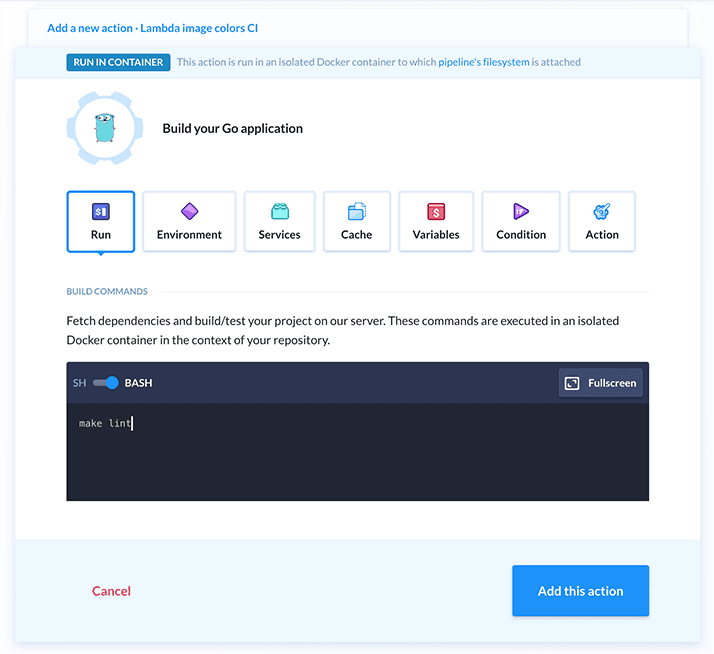
Here we just need to type make lint in the "build commands" area. What will happen here is that, when this action runs, Buddy will spin up a docker container based on a Go image and it will run the commands we just specified here. If the command fails, the action (and hence the pipeline) will be stopped and the execution marked as a failure. This docker container will have access to a copy of the repository, so the make command will actually run the linting tests as defined in our Makefile.
Once we are read, we can click on the "Add this action" button to go back to the pipeline actions dashboard.
Image loading...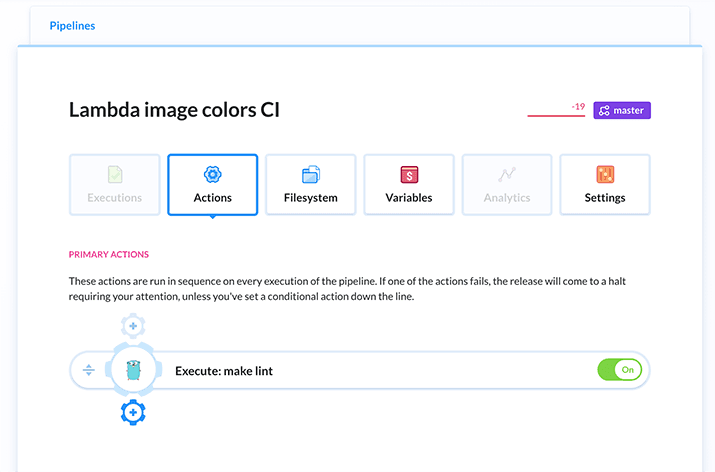
Here we can see that our first action was added. We can add another action after this by clicking on the gear icon with a "+" symbol just below our current action.
Unit test
Let's add another "Go application" action:
Image loading...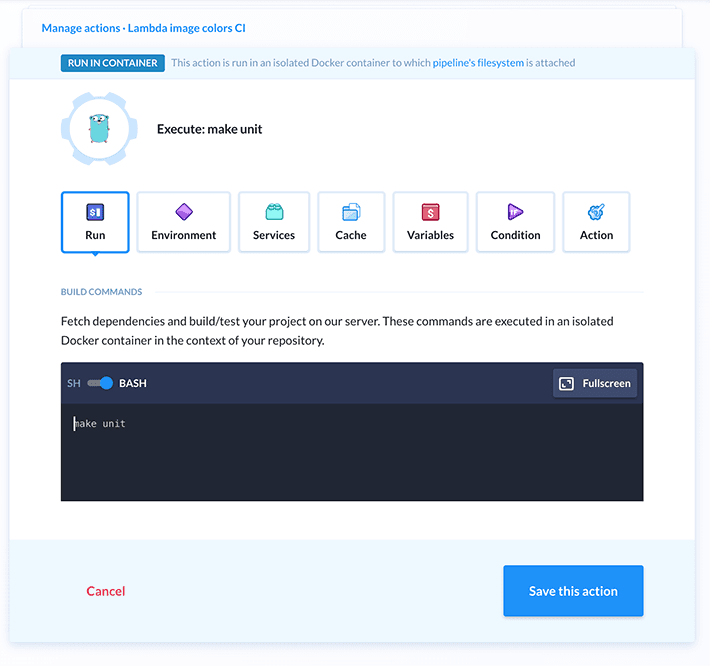
This action is very similar to the previous one, but this time we want to run make unit. Once done click on "Save this action".
Build Lambda executable
At this point we are back to the pipeline dashboard and from there we can add another "Go application" action:
Image loading...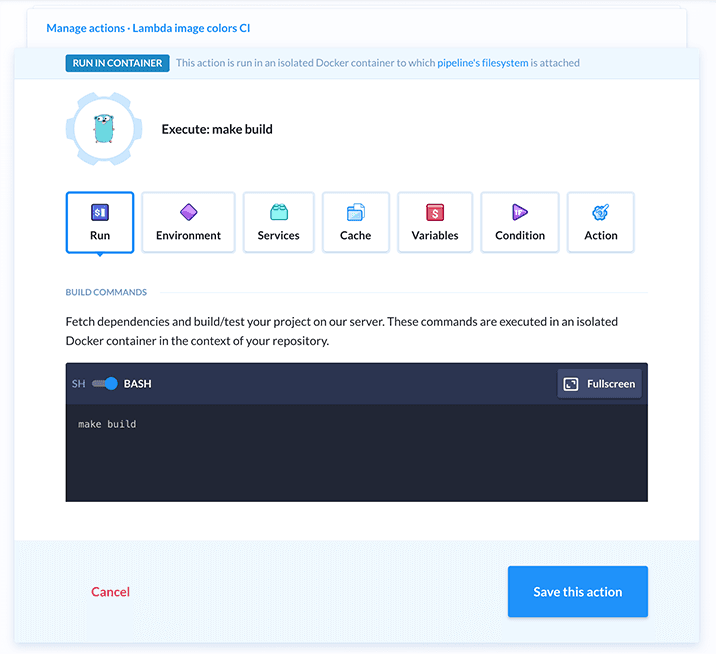
Here we are executing make build to generate our Lambda executable within the current workspace. We will be using this in the next step to build the Lambda image.
Build Lambda Docker image
This time we need to search for a "Docker" action and select "Build Image":
Image loading...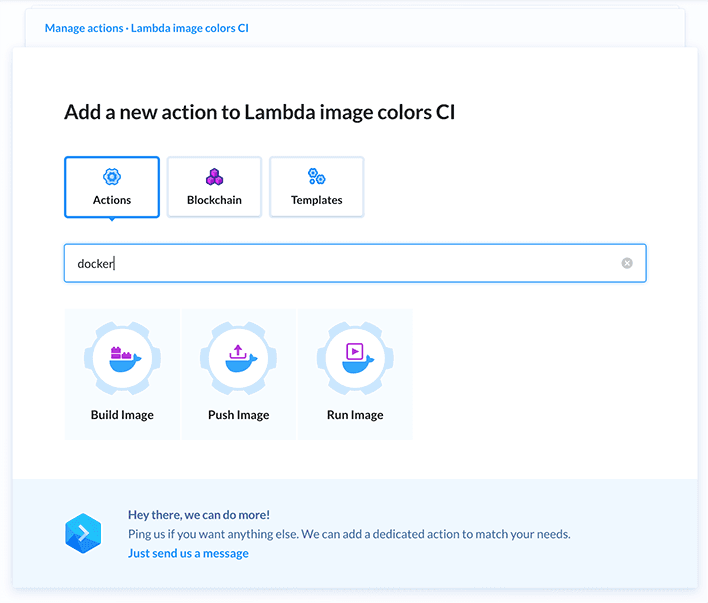
At this point you should see the following configuration panel:
Image loading...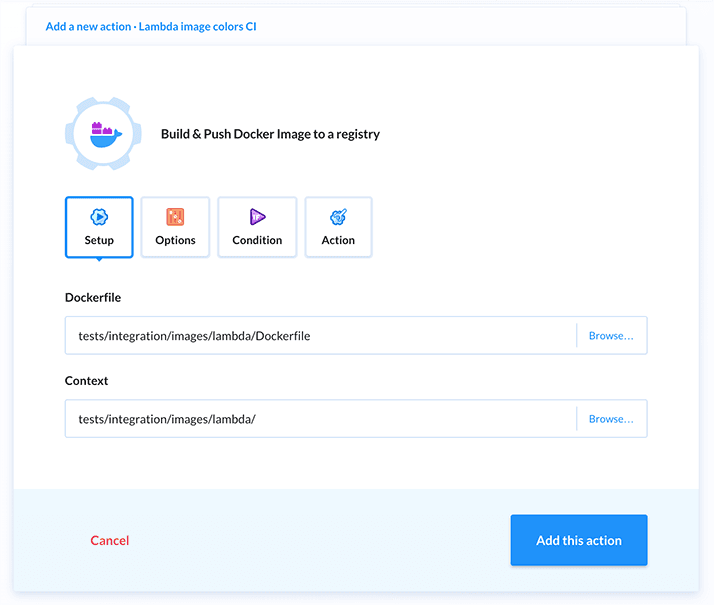
In the "Setup" section we have to specify where to find the Dockerfile for this image within our repository. You can manually write the path or click on the "Browse..." button to use a convenient file selector.
Let's set the Dockerfile path to tests/integration/images/lambda/Dockerfile.
We also have to specify what's the execution context for the Docker build process which we have to set to: tests/integration/images/lambda.
At this point switch to the "Options" section:
Image loading...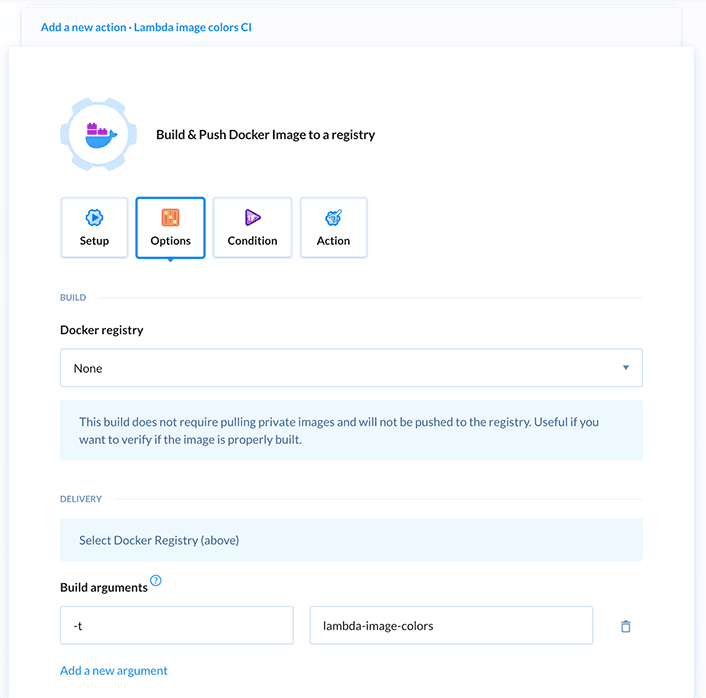
Here we just add the "Build argument" -t and we set it to lambda-image-colors. This will make sure that the image is tagged with this name.
At this point you can click on the button "Add this action" to finalize this action.
Build test runner Docker image
Back to the dashboard, we can now proceed similarly to build the image for the test runner:
Image loading...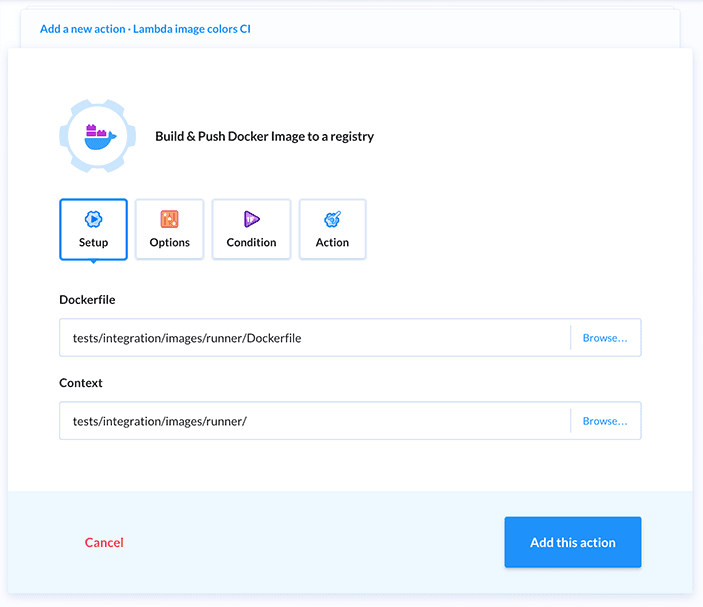
This time we select the Dockerfile in tests/integration/images/runner/Dockerfile and set the "Context" to tests/integration/images/runner/
We also add a tag to the image from the "Options" section:
Image loading...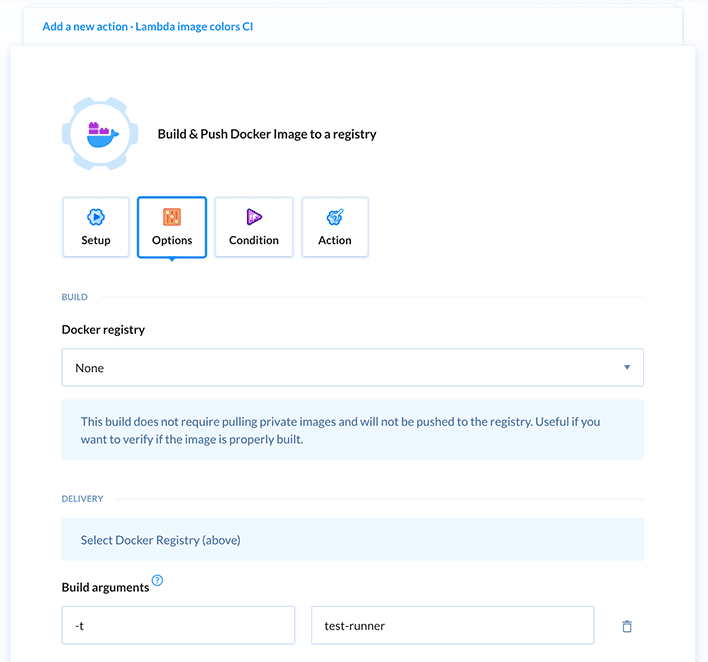
This time the tag will be test-runner. Let's confirm this action with the button "Add this action" and let's go back to the pipeline dashboard.
Running the test runner
From the dashboard, now let's search for "exec" and select the action "Local Shell":
Image loading...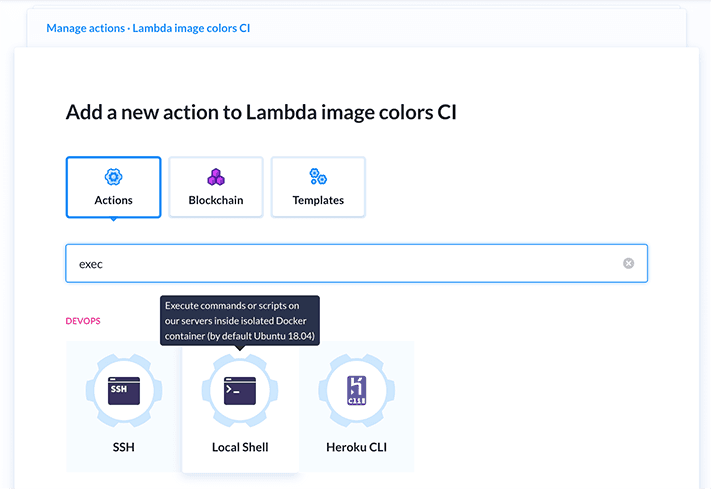
You will go into the action configuration, which should look like this:
Image loading...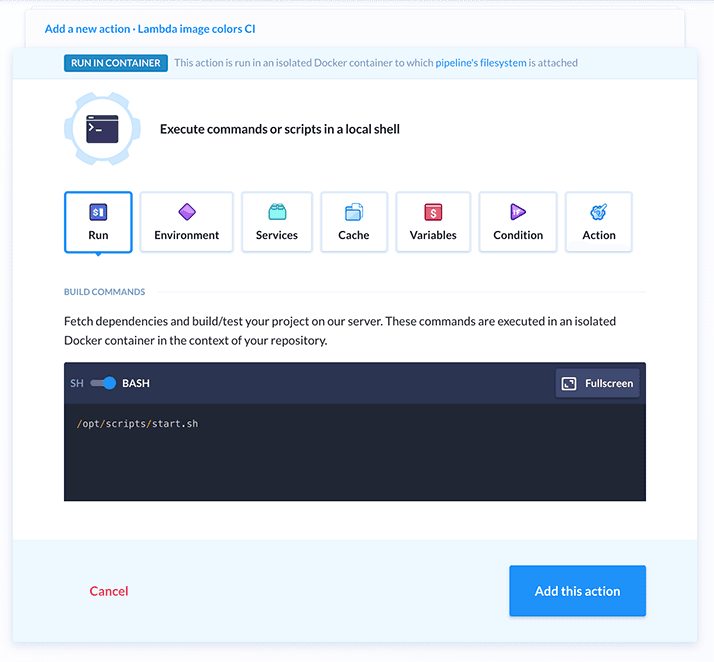
In the "Run" section specify /opt/scripts/start.sh as script to run, then switch to the "Environment" tab:
Image loading...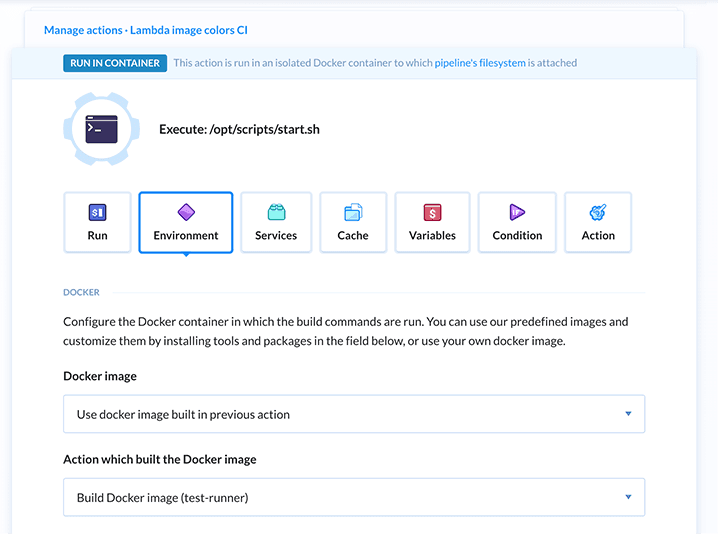
Here you have to select "Use docker image built in previous action" as "Docker Image" and then select our "Build Docker image (test-runner)" as image.
At this point you can switch to the "Services" tab:
Image loading...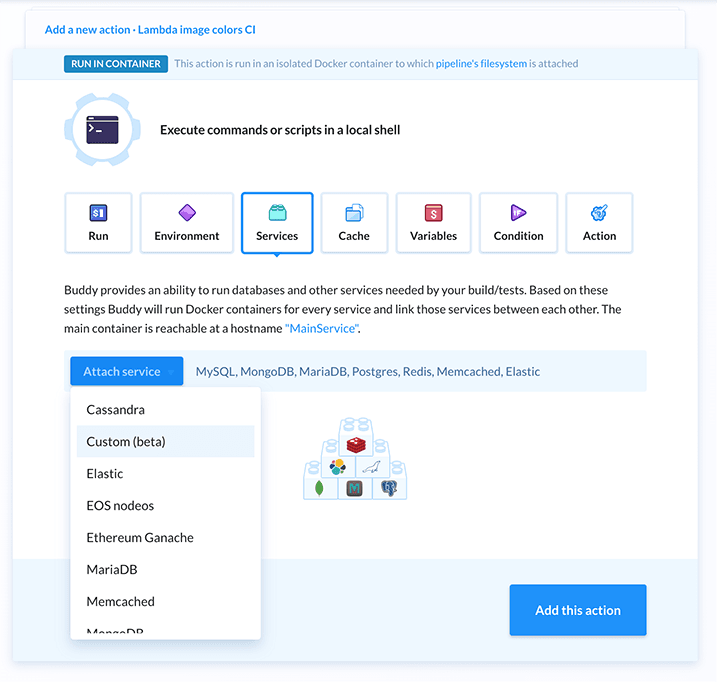
In this section you can define a number of docker containers that will be running in the background while your main executable is running.
We want to run localstack and our Lambda container. In order to do that, click on "Attach service" and then select "Custom".
At this point you should enter the service definition panel:
Image loading...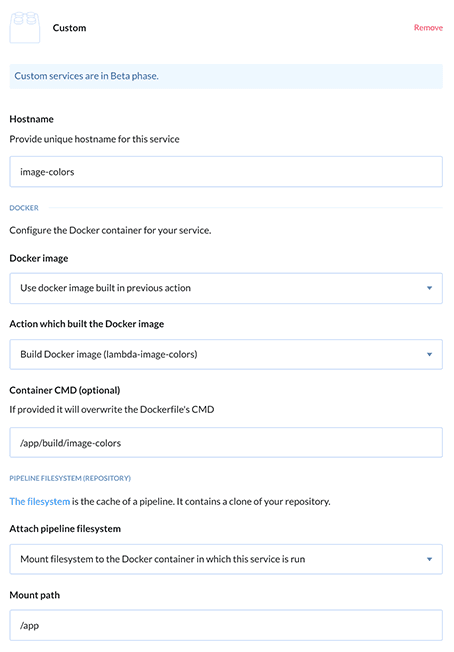
Let's start by configuring our Lambda service. First of all, let's specify an "Hostname" (image-colors). Then, we have to select "Use docker image built in previous action" as "Docker Image" and "Build Docker image (lambda-image-colors)" as "Action". Finally we have to specify the "Container CMD" (/app/build/image-colors) and we want to attach the entire filesystem of the current pipeline under /app.
Once all of this is done, let's add a new service to configure localstack:
Image loading...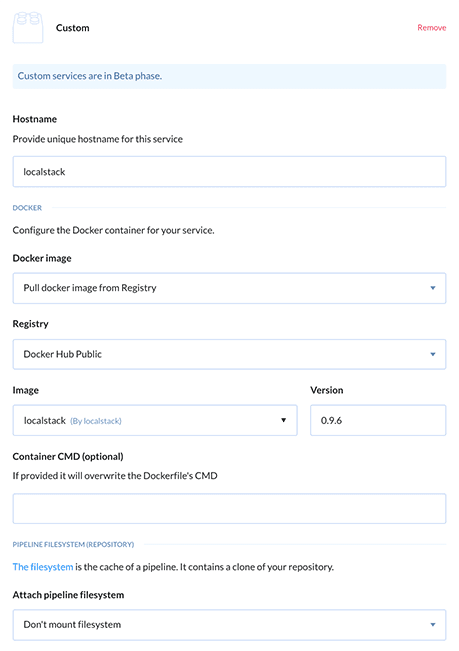
Again, we have to setup the hostname (localstack). This time we can fetch the image of the container directly from Docker Hub. To do that you have to select the option "Pull docker image from Registry", then "Docker Hub Public" as "Registry" and finally "localstack (by localstack)" version "0.9.6" as "Image".
In this case we don't need to attach the filesystem to the container.
Once you are ready with this step, switch to the "Variables" configuration tab:
Image loading...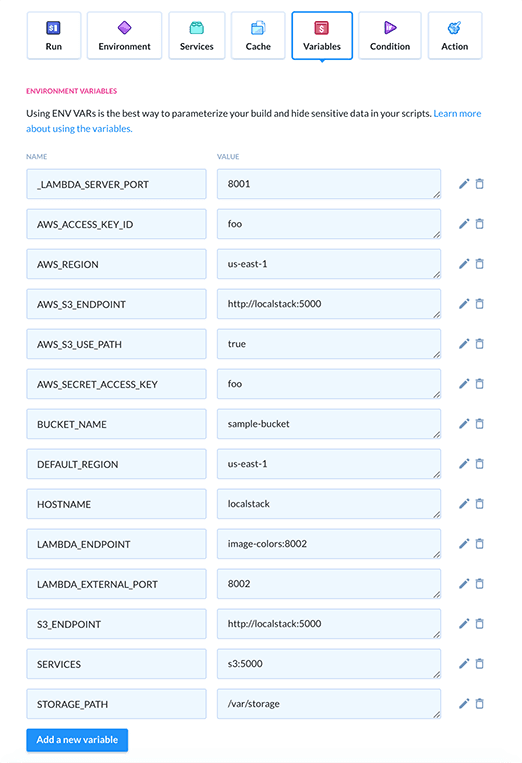
In this section, we need to copy all the environment variables from all containers that we have previously defined in our docker-compose.yml. There is currently no way to make them specific to the actual test runner or to the services container, the variables, will in fact, be passed to all the containers. In our case this is not a problem, because we don't have any naming conflict.
These are all the variables you have to add:
AWS_ACCESS_KEY_ID:fooAWS_REGION:us-east-1AWS_S3_ENDPOINT:http://localstack:5000AWS_S3_USE_PATH:trueAWS_SECRET_ACCESS_KEY:fooBUCKET_NAME:sample-bucketDEFAULT_REGION:us-east-1HOSTNAME:localstackLAMBDA_ENDPOINT:image-colors:8002LAMBDA_EXTERNAL_PORT:8002S3_ENDPOINT:http://localstack:5000SERVICES:s3:5000STORAGE_PATH:/var/storage_LAMBDA_SERVER_PORT:8001
And this is it! Save this last action and then save your pipeline. Now you can trigger the pipeline manually to test it, but from your next git push it will be executed automatically.
If everything went well, you should see the pipeline completing successfully. You can also inspect the logs at every step of the pipeline in case you want to troubleshoot some specific step.
Exporting the YAML configuration
Now that your pipeline is complete. You might want to have it embedded within your repository as a configuration file.
Buddy allows you to do that by committing a buddy.yml file in the root folder of your repository.
We don't have to re-write all our pipeline from scratch, thankfully we can easily export what we have done with the visual editor into a buddy.yml file.
To do that, you can click on the YAML helper menu item on the right-hand side of your pipeline dashboard and then select Export current pipelines to YAML:
Image loading...
From there you should see a modal window containing the configuration for our pipeline in YAML format:
Image loading...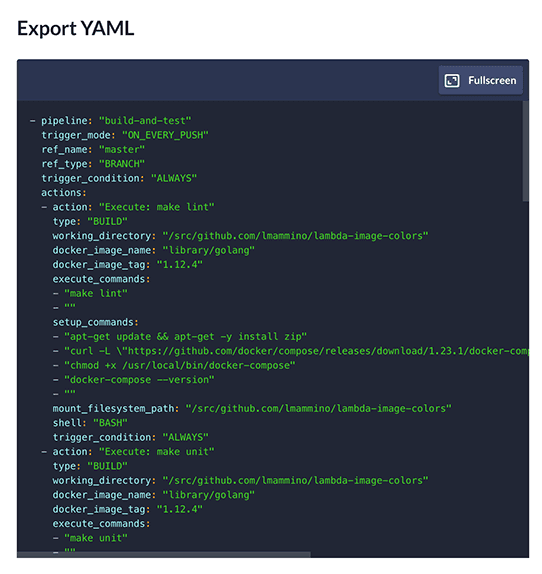
Copy-paste this code into a buddy.yml file and commit that into your repo.
To make the configuration file the default way to define your pipeline you need to turn YAML configuration to ON.
This is something you can do, again, from the right-hand side menu of the pipeline page by clicking on YAML configuration: OFF.
At this point you should see this modal:
Image loading...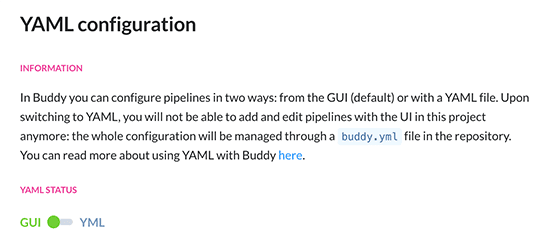
Click on the toggle to enable the YAML configuration.
From now on, every change to you buddy.yml in your repository will automatically modify your pipeline.
Conclusion
In this article we saw how to create a pipeline using Docker and Buddy services.
Buddy is a very friendly, yet powerful CI platform, and I am really curious to know what are you going to build with it.
Until next time, CIAO :)