Building a cookie alert as a Web component
While surfing the Web, surely you have noticed that almost all websites show an alert, a banner, a pop-up window or similar informing you about their cookie management policy involving personal data. This is a legislative requirement due to the entry into force of the European General Data Protection Regulation (GDPR) since May 2018.
As a frontend developer, you may have had to implement one of these alerts or in any case to look for one ready to be integrated into your site. Maybe your website is based on Angular or React or Vue or something other and you’d like not to struggle too much with this integration.
Of course, this is just one case where you’d like to have a UI component to be used in your Web application regardless of the UI framework you are using. Surely you have in mind many other situations similar to this one. So, you may be wondering if you can build such framework-free UI components. The Web components technology answers this question.
Introducing Web components
Web components are a set of standard specifications for creating custom, reusable HTML elements in Web pages and applications. Their specifications refer to the HTML and DOM standards, of which they are now an integral part.
Web components are basically based on three features:
- Custom elements They are a set of JavaScript APIs to create custom DOM elements associated with a specific HTML tag
- Shadow DOM A set of JavaScript APIs that allow you to manage a specific DOM for a component, independent from the Web page’s DOM
- HTML template It is an integration to the HTML specifications allowing you to define portions of markup that is not interpreted at the Web page loading but at runtime.
In this article, we will explore the basics of Web components technology in order to implement a simple cookie alert you can use in your Web application independently from the UI framework you are using. You will find the final code of the project in this GitHub repository.
Setting up the component
Let’s start by creating a JavaScript file cookieAlert.js with the following content:
class CookieAlert extends HTMLElement {
  constructor() {
      super();
  }

  connectedCallback() {
    this.innerText = "Here I am!";
  }
}

customElements.define("cookie-alert", CookieAlert);
As you can see, there is a CookieAlert class definition inheriting from HTMLElement. This code is the initial step for creating a Custom Element, that is an element entirely similar to a standard HTML element. Since it inherits from HTMLElement, the resulting Custom Element will have all the properties that any generic HTML element has.
The class has a constructor calling the super() method and defines a connectedCallback() method assigning a string to the innerText property of the element itself. The connectedCallback() method is automatically invoked when an instance of the element is inserted in the DOM.
The role of the last line in the code above is to associate the tag <cookie-alert> to the class CookieAlert. This enables you to use the element <cookie-alert> like any other standard element inside an HTML page. Now, create an index.html file in the same folder of the cookieAlert.js file and put the following markup:
<!doctype html>
<html lang="en">
<head>
  <meta charset="utf-8">
  <title>A cookie alert Web Component</title>
  <script src="cookieAlert.js"></script>
</head>
<body>
  <h1>A cookie alert Web Component</h1>


  <cookie-alert></cookie-alert>
</body>
</html>
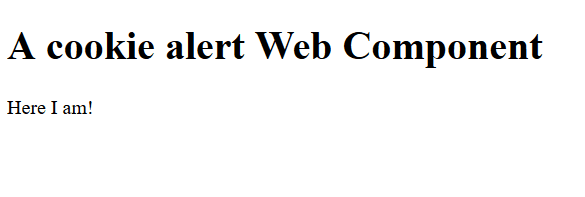
You put a reference to the JavaScript file implementing the Custom Element and used the <cookie-alert> tag inside the HTML body. By opening the HTML page in a browser you will see the following:
Image loading...
Congratulations! You have created your first Web component!
Adding markup and style
Of course, this component is really poor. Surely you want to add some structured markup and a bit of CSS. Here is a little improvement of the Web component:
const template = document.createElement('template');

template.innerHTML = `
<style>
.container {
  color: rgb(255, 255, 255);
  background-color: rgb(35, 122, 252);
  padding: 1em 1.8em;
  width: 100%;
  font-family: Helvetica,Calibri,Arial,sans-serif;
}
.footer {
  position:fixed;
  left:0px;
  bottom:0px;
}
</style>

<div class="container footer">
  <span>Here I am!</span>
</div>`;

class CookieAlert extends HTMLElement {
  constructor() {
      super();
  }

  connectedCallback() {
    this.appendChild(template.content.cloneNode(true));
  }
}

customElements.define("cookie-alert", CookieAlert);
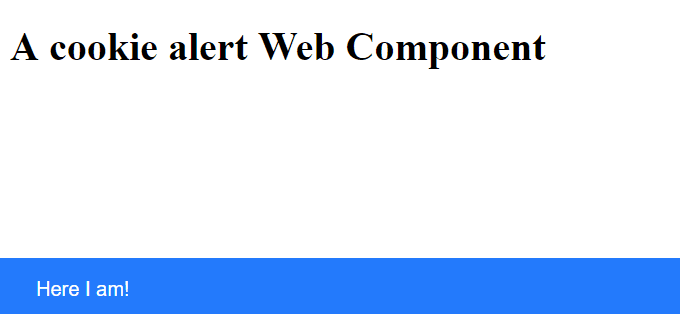
In this version of the component, you notice the template element created in the first line. This element allows you to define a markup block that is not immediately rendered. Its content, stored into the innerHTML property, is retrieved within the connectedCallback() method of the component via the cloneNode() method.
Although in this specific example it would not have been necessary, cloning the template’s content before appending it to the DOM is a good practice. This avoids altering its initial structure if you need to make changes before making it visible.
This new version of the component will look like the following:
Image loading...
We are using templates here just to get a handy way to manage markup and styles, but they offer other advanced features. See templates documentation for more details.
Adding properties
Now, let’s improve the component by adding a property that allows you to specify your own message. So, make a few changes to the component’s code, as shown in the following:
class CookieAlert extends HTMLElement {
  constructor() {
      super();

      this._message = "This website uses cookies to ensure you get the best experience";
  }

  get message() {
    return this._message;
  }

  set message(value) {
    this._message = value;
    this.updateMessage();
  }

  connectedCallback() {
    this.appendChild(template.content.cloneNode(true));
    this.updateMessage();
  }

  updateMessage() {
    this.querySelector("span").innerHTML = this._message;
  }
}
You see that the message property has been defined in the component’s constructor. You also find a getter and a setter managing this property. In particular, the setter invokes the updateMessage()_ method that assigns the current value of the message property to the innerHTML property of the element within the component’s template. The updateMessage() method is also called inside the connectedCallback()_ method to ensure assigning the initial value of the message.
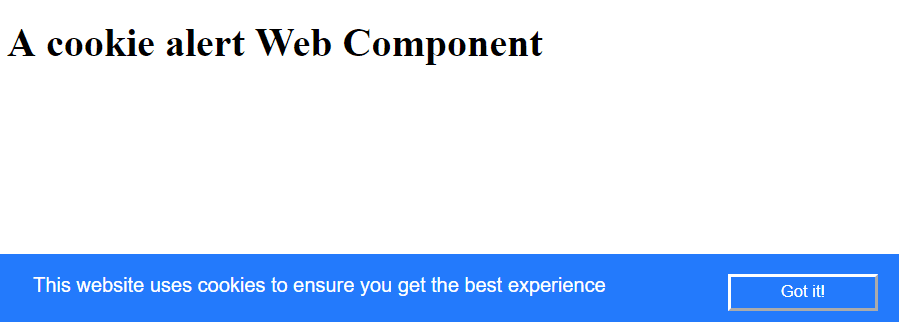
If you open the HTML page including with this version of the component, you will get the new text shown inside the blue bar. But the real news is that now you can assign a value from your own JavaScript code. For example, you can add a script in the page as follows:
<!doctype html>
<html lang="en">
<head>
  <meta charset="utf-8">
  <title>A cookie alert Web Component</title>
  <script src="cookieAlert.js"></script>
  <script>
   window.addEventListener("load", () => {
     const cookieAlert = document.getElementById("myCookieAlert");
     cookieAlert.message = "This is my custom message!";
   });
  </script>

</head>
<body>
  <h1>A cookie alert Web Component</h1>


  <cookie-alert id="myCookieAlert"></cookie-alert>
</body>
</html>
The script in the head of the HTML page assigns a listener to the load event of the current browser’s window. This listener simply gets the <cookie-alert> element in the page and assigns a custom message to the message property of the Web component. You will see the custom message instead of the default message.
Syncing attributes and properties
As a frontend developer, you should know that HTML attributes and DOM element’s properties are not the same thing. Sure, usually they are mapped each other, but this is not for free. In order to get the usual behaviour of standard HTML elements, you need to map attributes to properties of your own Web component and vice versa.
Let’s start by looking at how you can map the message property to an HTML attribute with the same name. Actually, it’s very simple. You can just use setAttibute() method in the property setter, as shown below:
  set message(value) {
    this._message = value;
    this.setAttribute("message", value);
    this.updateMessage();
  }
On the other side, mapping an attribute to a property is a little more tricky. As a first step, you need to declare which attributes you want to monitor by adding a static getter observedAttributes() to the Web component class:
static get observedAttributes() {
  return ["message"];
}
The getter returns an array with the attribute names the component want to observe. In our case, just one attribute.
Then, you need to implement an attributeChangedCallback() method that will be invoked when a change occurs to any of the observed attributes. The following is a possible implementation for the cookieAlert component:
attributeChangedCallback(name, oldValue, newValue) {
  if (oldValue !== newValue) {
    if (name === "message") {
      this._message = newValue;
      this.updateMessage();
    }
  }
}
This code will change the internal _message property and will show the new value through the updateMessage() method.
These changes allow you to set your custom message using the message attribute of the <cookie-alert> element, without any JavaScript code:
<cookie-alert message="This is my custom message!"></cookie-alert>
Handling events
We have almost done with our simple cookie alert component. What is missing is a button allowing the user to confirm he read the message, so that it will be no longer shown. Let’s start by rearranging the markup template as follows:
const template = document.createElement('template');

template.innerHTML = `
<style>
.container {
    color: rgb(255, 255, 255);
  background-color: rgb(35, 122, 252);
  padding: 1em 1.8em;
  width: 100%;
  font-family: Helvetica,Calibri,Arial,sans-serif;
}
.footer {
  position:fixed;
  left:0px;
  bottom:0px;
}
.button {
  color: rgb(255, 255, 255);
  background-color: transparent;
  border-color: rgb(255, 255, 255);
  padding: 5px 40px;
  margin-right: 50px;
  cursor: pointer;
  float:right;
}
</style>

<div class="container footer">
  <span></span>
  <button class="button">Got it!</button>
</div>`;
You added a element and a button CSS class in the markup. Now, add a few lines of code to manage the click event and the alert visibility. These lines will be executed when the component is appended to the page’s DOM:
connectedCallback() {
  this.appendChild(template.content.cloneNode(true));
  const cookiesAccepted = getCookie("cookiesAccepted")
  if (cookiesAccepted === "y") {
    this.style.visibility = "hidden";
  } else {
    this.querySelector("button")
      .addEventListener("click", ()=>{
        this.style.visibility = "hidden";
        setCookie("cookiesAccepted", "y", 365);
      });
    this.updateMessage();
  }
}
As you can see, after appending the template content, the cookieAccepted cookie is retrieved. As expected, the visibility of the component depends on the cookie value. If no cookie has been set, the component will be visible and a listener will be assigned to the click event of the element. The listener will be responsible for hiding the Web component and setting the cookie value with an expiration of one year.
Here we used two utility functions getCookie() and setCookie(), but you can use any other function or library you prefer to manage cookies. You can find the complete code in this GitHub repository.
**Note**: you can set o get cookies only if your page is served by a Web server. You will not find this code working if you open the HTML page directly from the file system.With these changes you will get a cookie alert like the following:
Image loading...
Exploiting the shadow DOM
At this point, you might think that your cookie alert is ready, although still very simple. To tell the truth, one of the most interesting features of the Web component technology is still missing. Let’s introduce it with a few possible scenarios.
Suppose your component is used inside a page containing the following CSS rule:
button {
  border-style: dotted;
}
This rule will apply to your component as well and it will appear as shown in the following picture:
Image loading...
Maybe you want it happens. Or most likely you don’t.
Moreover, suppose that the page hosting your component contains the following code:
window.addEventListener("load", ()=>{
  let buttons = document.querySelectorAll("button");
  buttons.forEach((btn)=>{
    btn.disabled = true;
  });
});
This code will disable all the buttons in the page, including the button inside your component.
Both these examples are saying you that the building blocks of your component are affected by the code and the style rules defined in the page. This may cause unexpected behaviour, beyond your control.
You can protect the internals of your component by exploiting the shadow DOM. This is a private DOM attached to the component. This DOM works like the page DOM, but it is not affected by the page hosting your component. You can attach a shadow DOM to your component by changing the code of its constructor as follows:
constructor() {
    super();

    this._message = "This website uses cookies to ensure you get the best experience";
    this.attachShadow({mode: "open"});
    this.shadowRoot.appendChild(template.content.cloneNode(true));
}
The attachShadow() method creates the root of the shadow DOM. You can access the created root node by accessing the shadowRoot property and manipulate it like any standard HTML element. In the above example, you appended the template elements. The object passed as a parameter to the attachShadow() method tells that the internal structure of your Web component remains accessible via JavaScript from external scripts, but it must be explicitly done via its shadowRoot property.
Of course, all the remaining code must be rearranged. In particular, the connectedCallback() and the updateMessage() methods must now refer to the shadowRoot property, as shown below:
connectedCallback() {
  const root = this.shadowRoot.getElementById("root");
  const cookiesAccepted = getCookie("cookiesAccepted")

  if (cookiesAccepted === "y") {
    root.style.visibility = "hidden";
  } else {
    root.querySelector("button").addEventListener("click", ()=>{
      root.style.visibility = "hidden";
      setCookie("cookiesAccepted", "y", 365);
    });
    this.updateMessage();
  }
}

updateMessage() {
  this.shadowRoot.querySelector("span").innerHTML = this._message;
}
These changes ensure that your component cannot be accidentally modified from the outside and will behave as you designed it. You can find the final code of the component in this GitHub repository.
Using the Web component everywhere
As said before, Web components are considered by any modern browser like standard HTML tags, so they can be used in any Web frontend application, regardless the library or framework you are using to create your UI.
For example, you can use the <cookie-alert> component in a React application by simply loading the script in your HTML page and using it like any HTML tag, as shown in the following:
import React, {Component} from 'react';
import logo from './logo.svg';
import './App.css';

class App extends Component {
   render() {
      return (
        < div className = "App" >
            < header className = "App-header" >
                < img src = {logo} className = "App-logo" alt = "logo" / >
                < h1 className = "App-title" > Welcome to React < /h1>
            < /header>
            <cookie-alert></cookie-alert>
        < /div>);
   }
}
export default App;
Even in an Angular application, you can use a Web component. You can treat the script implementing it as a static asset and import it in the HTML page as a normal JavaScript script. Then, you need to change the app.module.ts file as shown in the following example:
import {
   BrowserModule
} from '@angular/platform-browser';
import {
   NgModule,
   CUSTOM_ELEMENTS_SCHEMA
} from '@angular/core';
import {
   AppComponent
} from './app.component';
@NgModule({
   declarations: [AppComponent],
   imports: [BrowserModule],
   providers: [],
   bootstrap: [AppComponent],
   schemas: [CUSTOM_ELEMENTS_SCHEMA]
})
export class AppModule {}
The relevant part in this code is the import and the reference to CUSTOMELEMENTSSCHEMA. This is necessary to let Angular ignore unknown tags. In fact, in the absence of this indication, the compiler would generate an exception because of the presence of the <cookie-alert> tag that does not match any Angular component. The reference to CUSTOMELEMENTSSCHEMA, therefore, allows us to use the Web component tags everywhere within the Angular application.
What about browsers compatibility?
Although very late with respect to the specifications publishing, most recent browsers support or are going to support the underlying technologies of the Web components. You can take a look at the current status of the implementation through caniuse.com.
However, how can you use Web components in an older browser or in a browser with partial support? You can use a collection of polyfills, i.e. implementations that simulate native support on those browsers that do not implement it.
You need to import the polyfill before loading the script that implements the component, as shown in the following example:
<head>
   <meta charset="utf-8">
   <title>Pop-up info component</title>
   <script src="https://unpkg.com/@webcomponents/webcomponentsjs@2.0.0/webcomponents-loader.js"></script>
   <script src="cookieAlert.js"></script>
</head>
The webcomponents-loader.js will check the capabilities of the current browser and will load just the minimum polyfills to enable the missing features.
Summary
In this article, you learned how to implement a cookie alert UI component by using the Web component technologies. You started discovering how the basic structure of a Web component is and how to add markup and style rules. You added properties and mapped them to HTML attributes and vice versa, then you added some code to handle events. You also met the shadow DOM, a feature that allows you to protect the internal structure of your component from unwanted external effects. Finally, you learned how to include your Web components in React and Angular applications and how to use them also in browsers with partial support.
Of course, this article gave you an overview of how you can build your own Web components, but the standard provides other interesting features.