How to automate security testing with StackHawk and Buddy CI/CD
Preparations
Integration with Buddy
The first step is integrating StackHawk with Buddy. Sign in to your Buddy account and go to the integrations tab. Click New integration and look up StackHawk CLI on the list:
Image loading...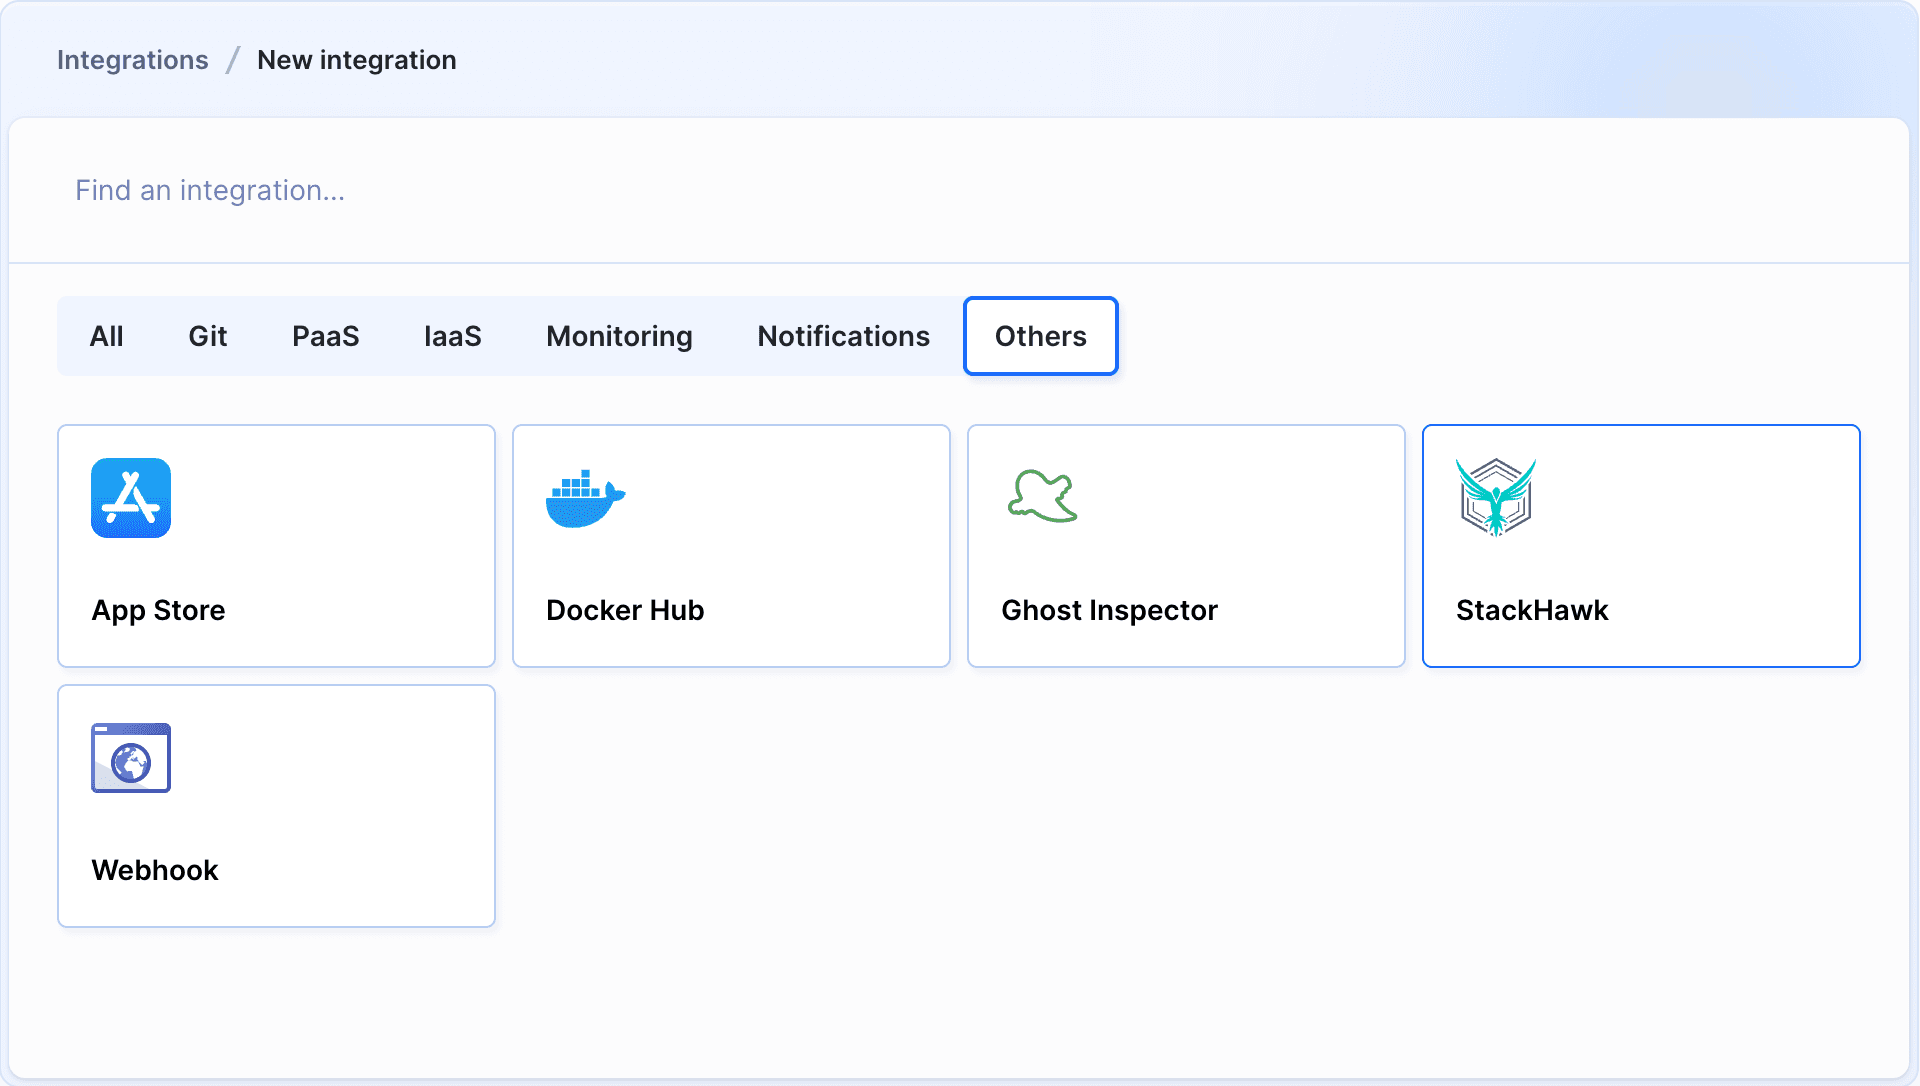
We can see the integration requires an API key to work. Go to your StackHawk's profile, switch to the tab with API keys, and create a new key:
Image loading...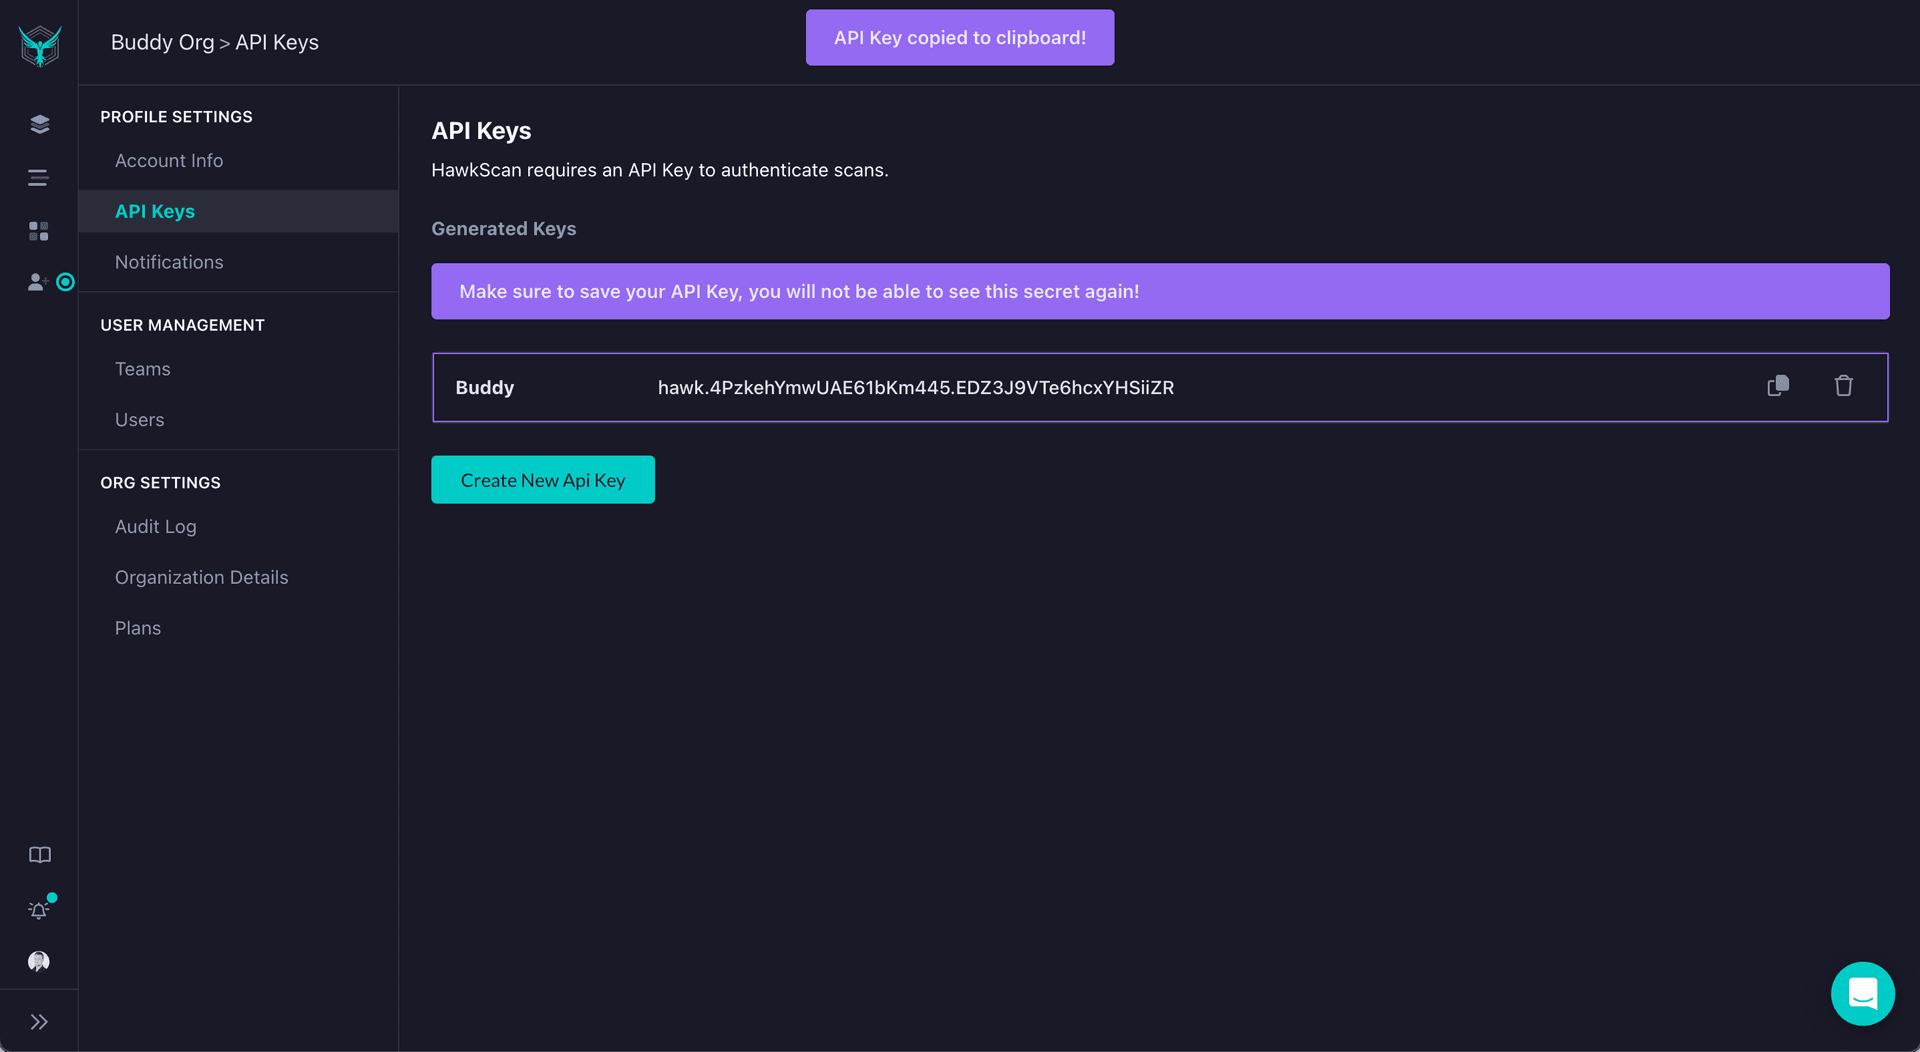
Copy the key's value and paste it to Buddy to finish configuration:
Image loading...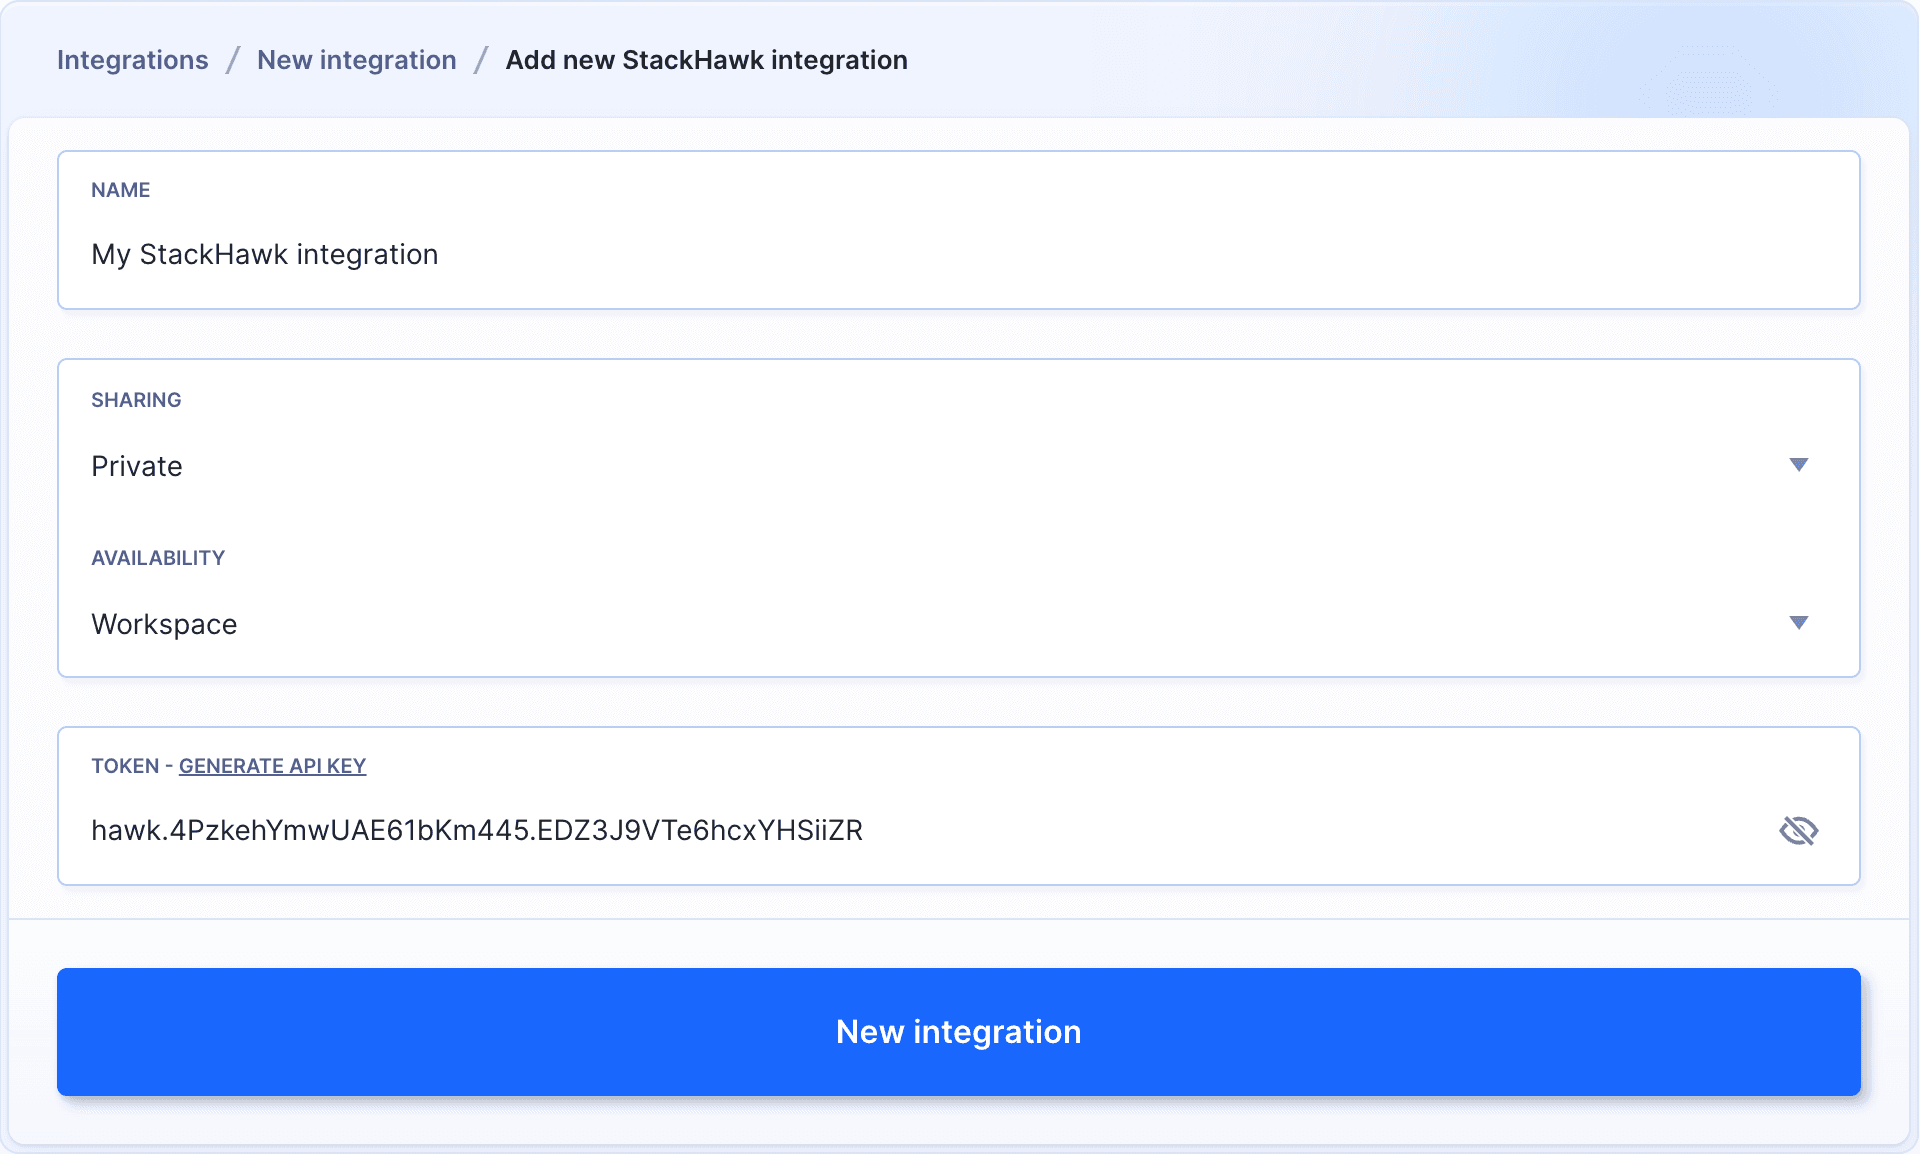
Preparing application in StackHawk
The StackHawk CLI action operates on YAML configuration files. You can download the file of your existing application from the YAML preview of the StackHawk's panel:
Image loading...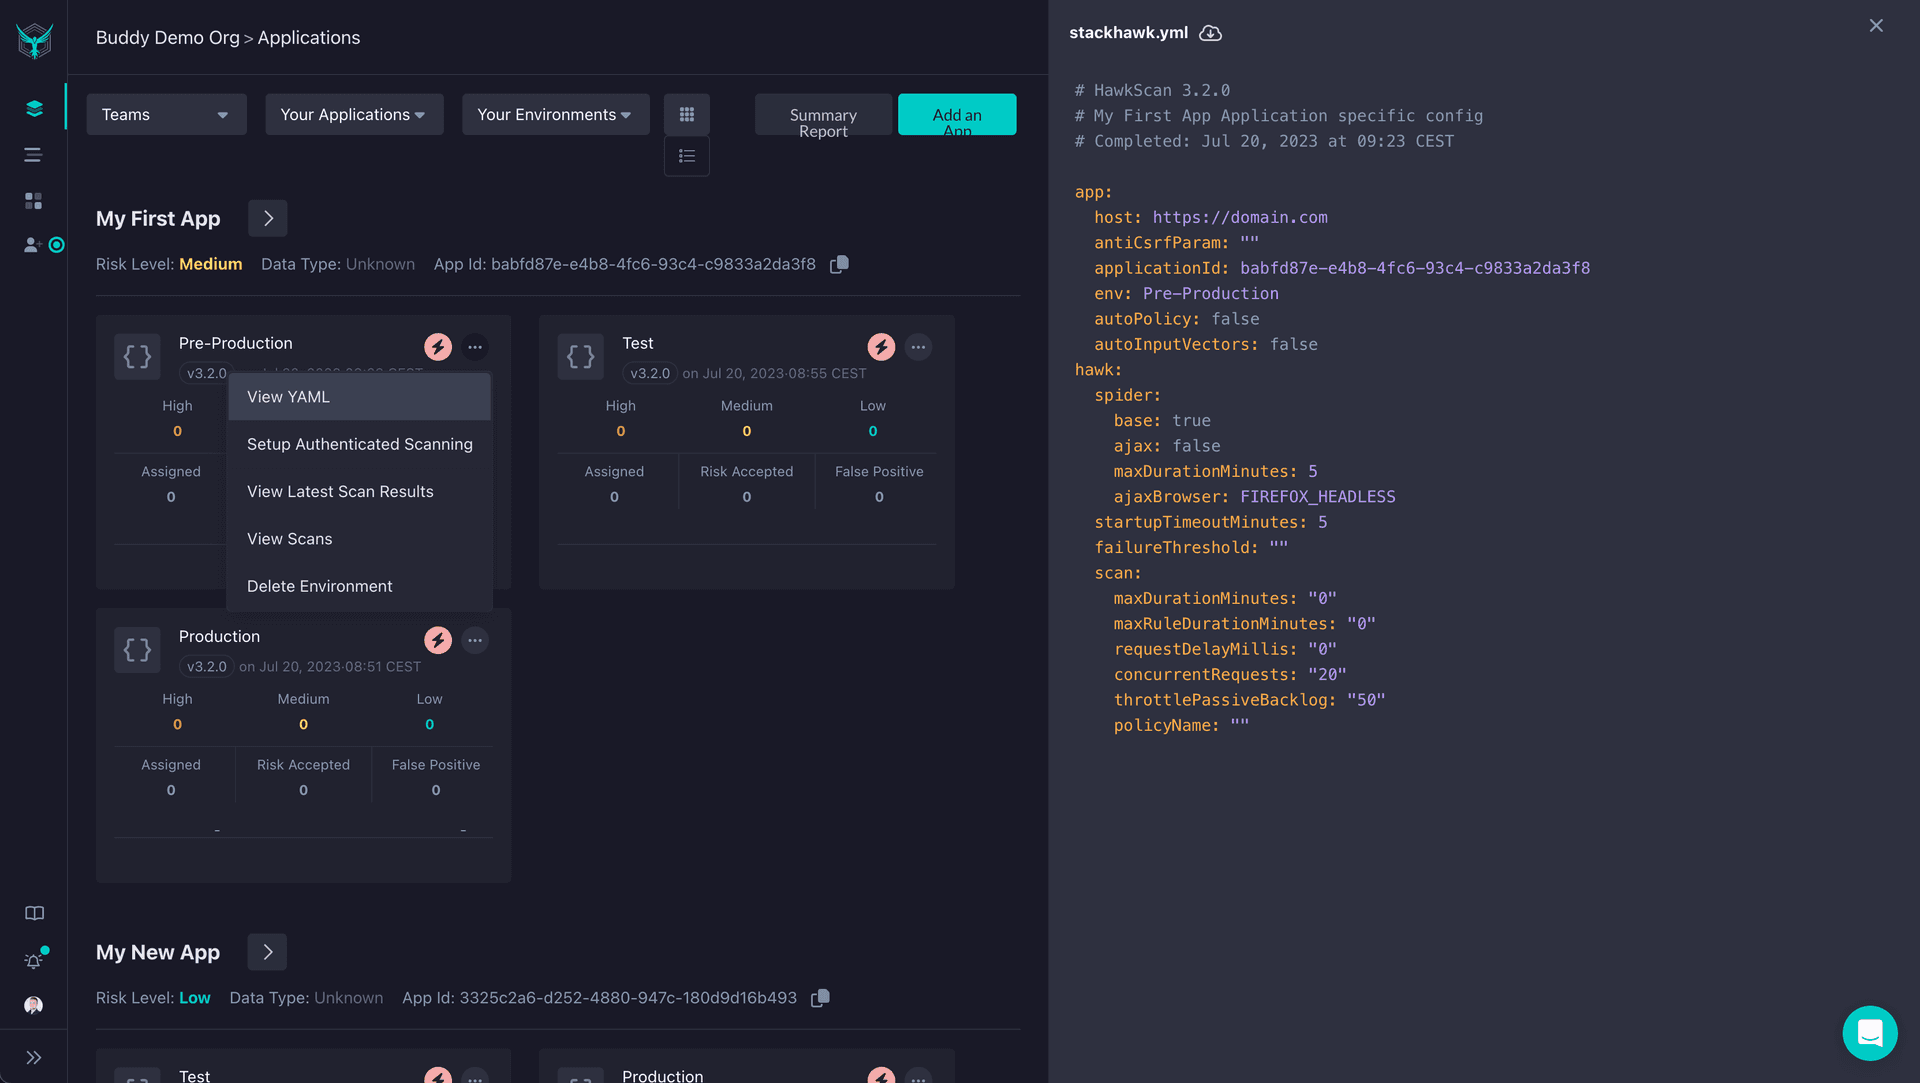
You can also create a new application strictly for this guide:
- Go to the applications tab and click Add an App.
- Give the app a telling name, select the runtime environment, and define the URL (host) to scan.
- Proceed to the next step and select the type of the application and the API.
- When done, copy the configuration and save it to
stackhawk.ymlfile.
Image loading...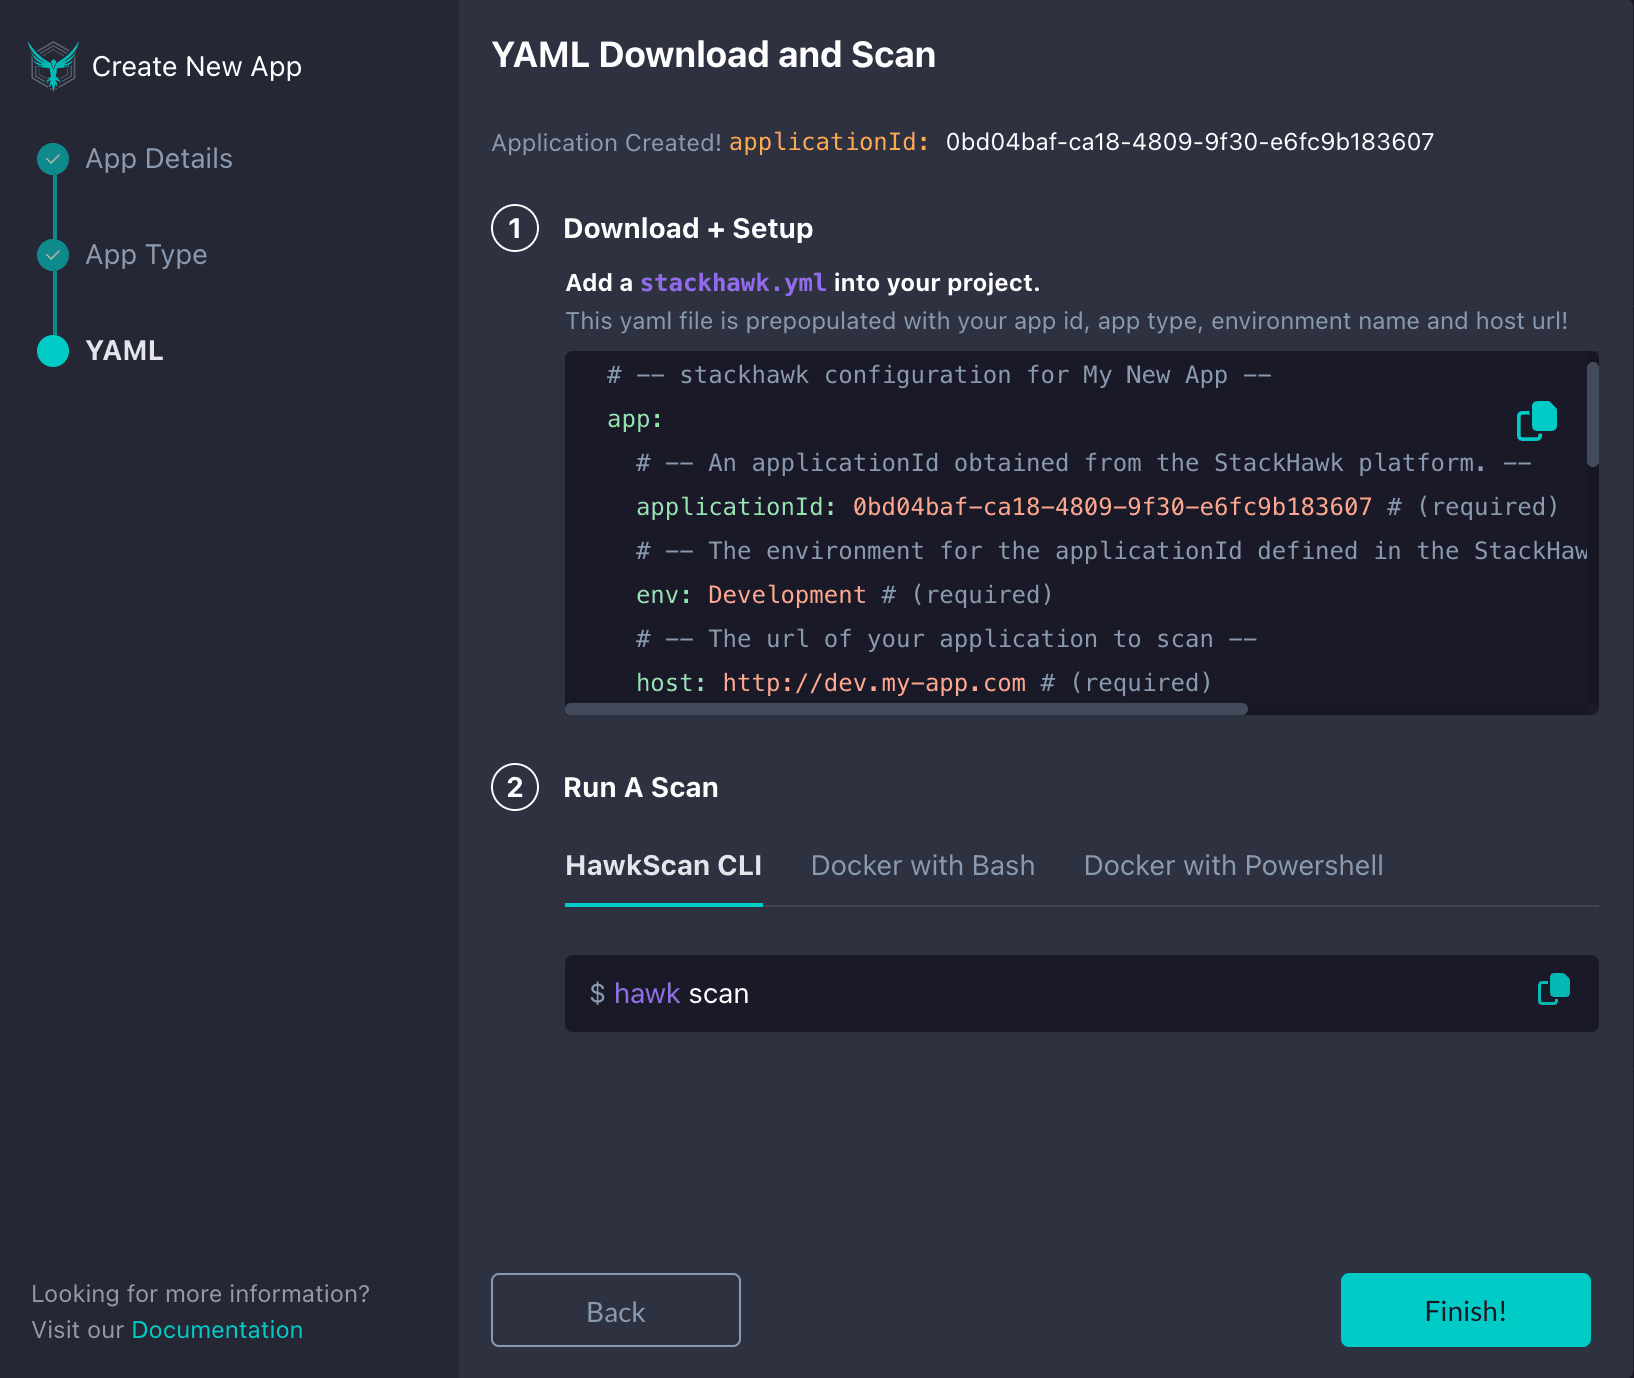
applicationID, env, and host are properly filled in the YAML file.
Repository configuration
The config file needs to be stored in a Git repository so that Buddy can pick it up before running StackHawk commands. You can choose whichever Git provider you like best, but we suggest using Buddy's native Git hosting to keep everything in one place.
- Add a new project in Buddy and select Buddy as the provider.
- Drag and drop
stackhawk.ymlto upload it to the repo:
Image loading...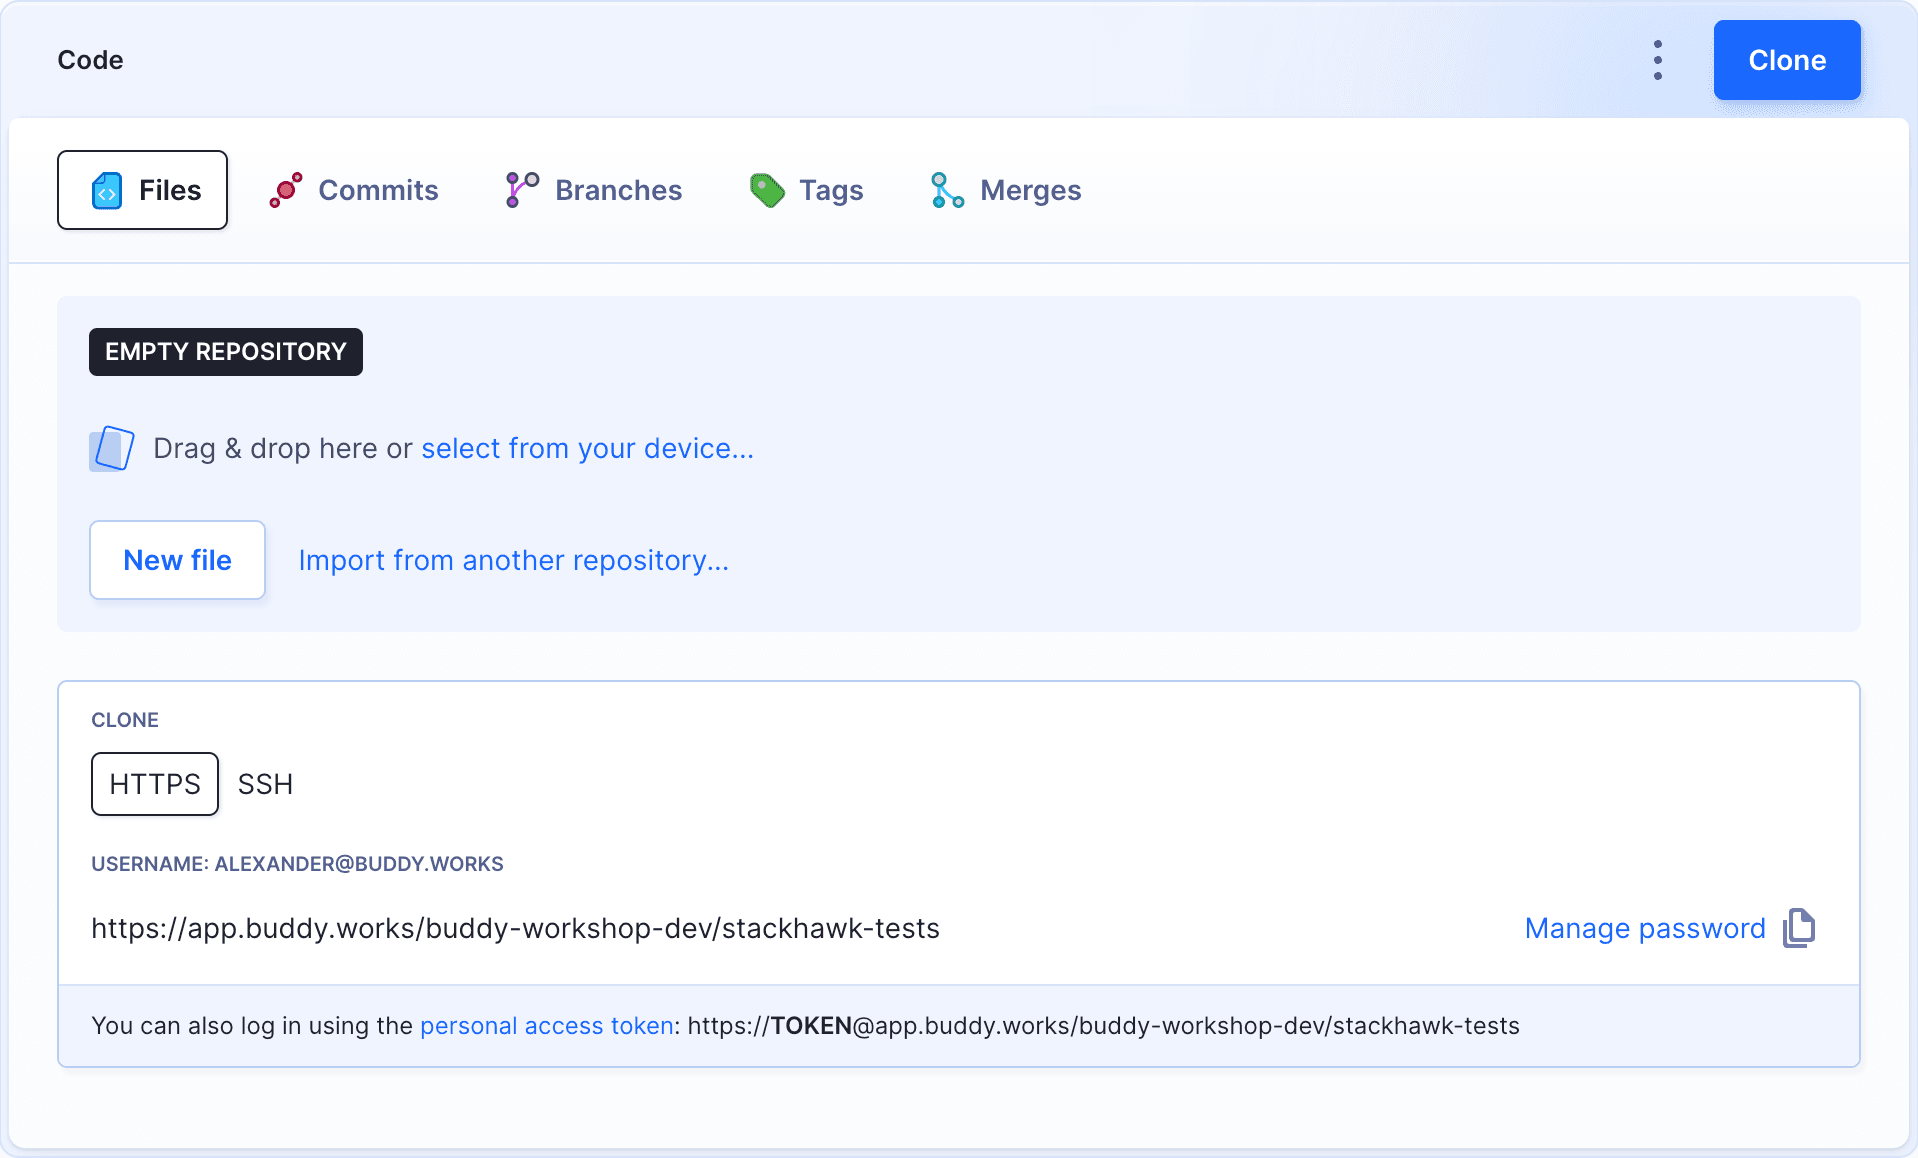
- Open the file to double-check the values. You can edit it directly in Buddy and commit the change without leaving the browser:
Image loading...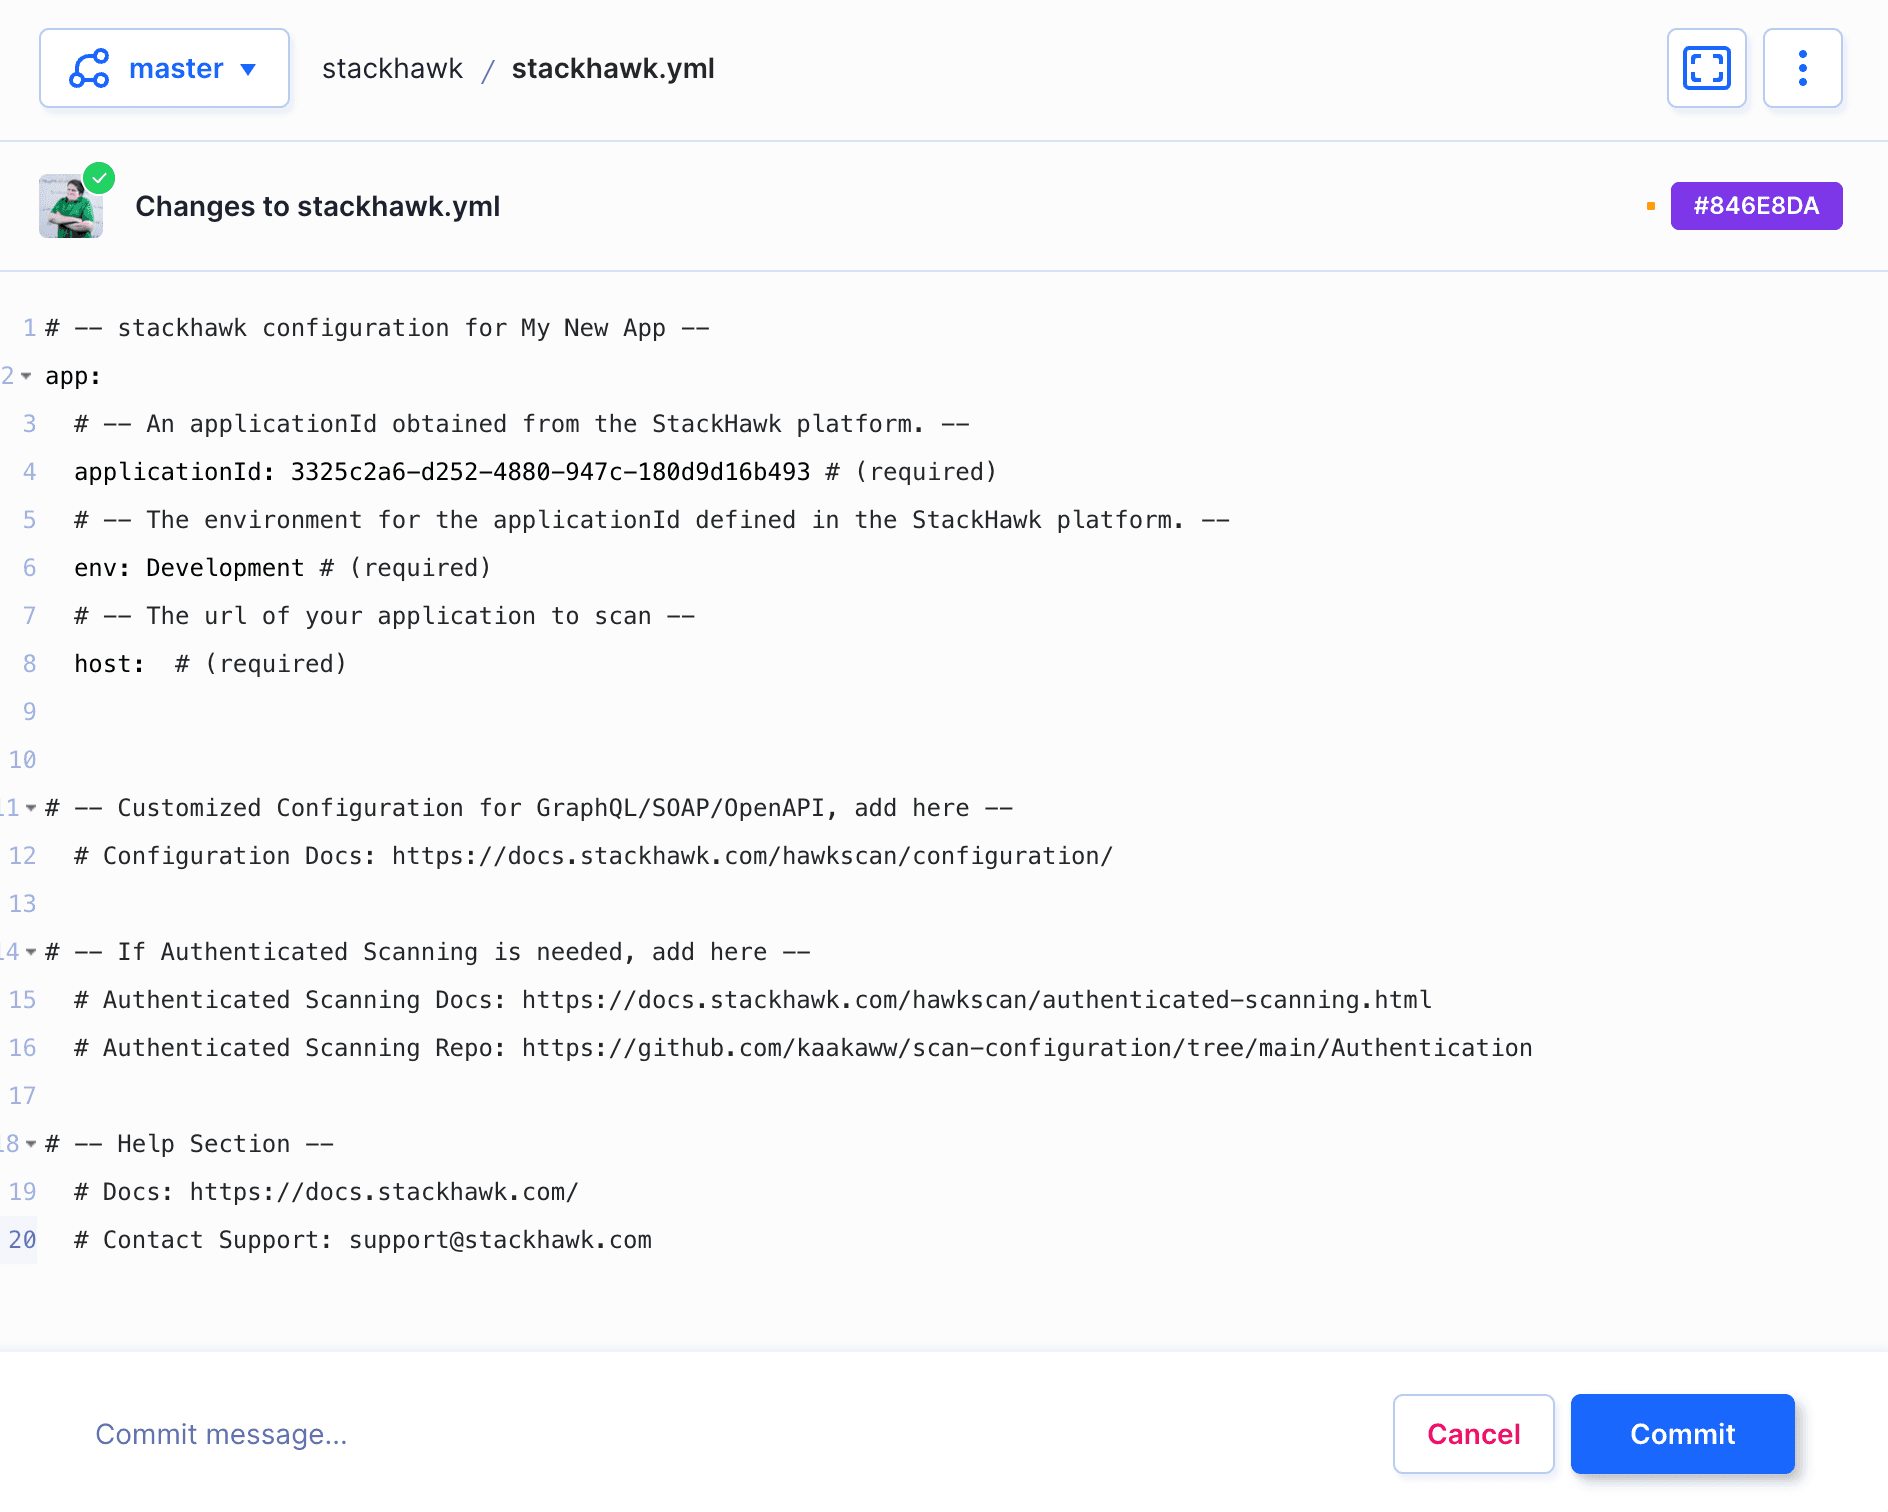
Pipeline configuration
git clone on the repository, triggers the tasks defined in your actions, and puts the artifacts and modified files in the pipeline filesystem.
Add a new pipeline and select the branch with the file. Each pipeline can be configured to run on certain events, such as a push to the selected branch, manually on a click, or on schedule at a given time. In this example, we'll set the pipeline to run once a day in the morning before the team gets to work:
Image loading...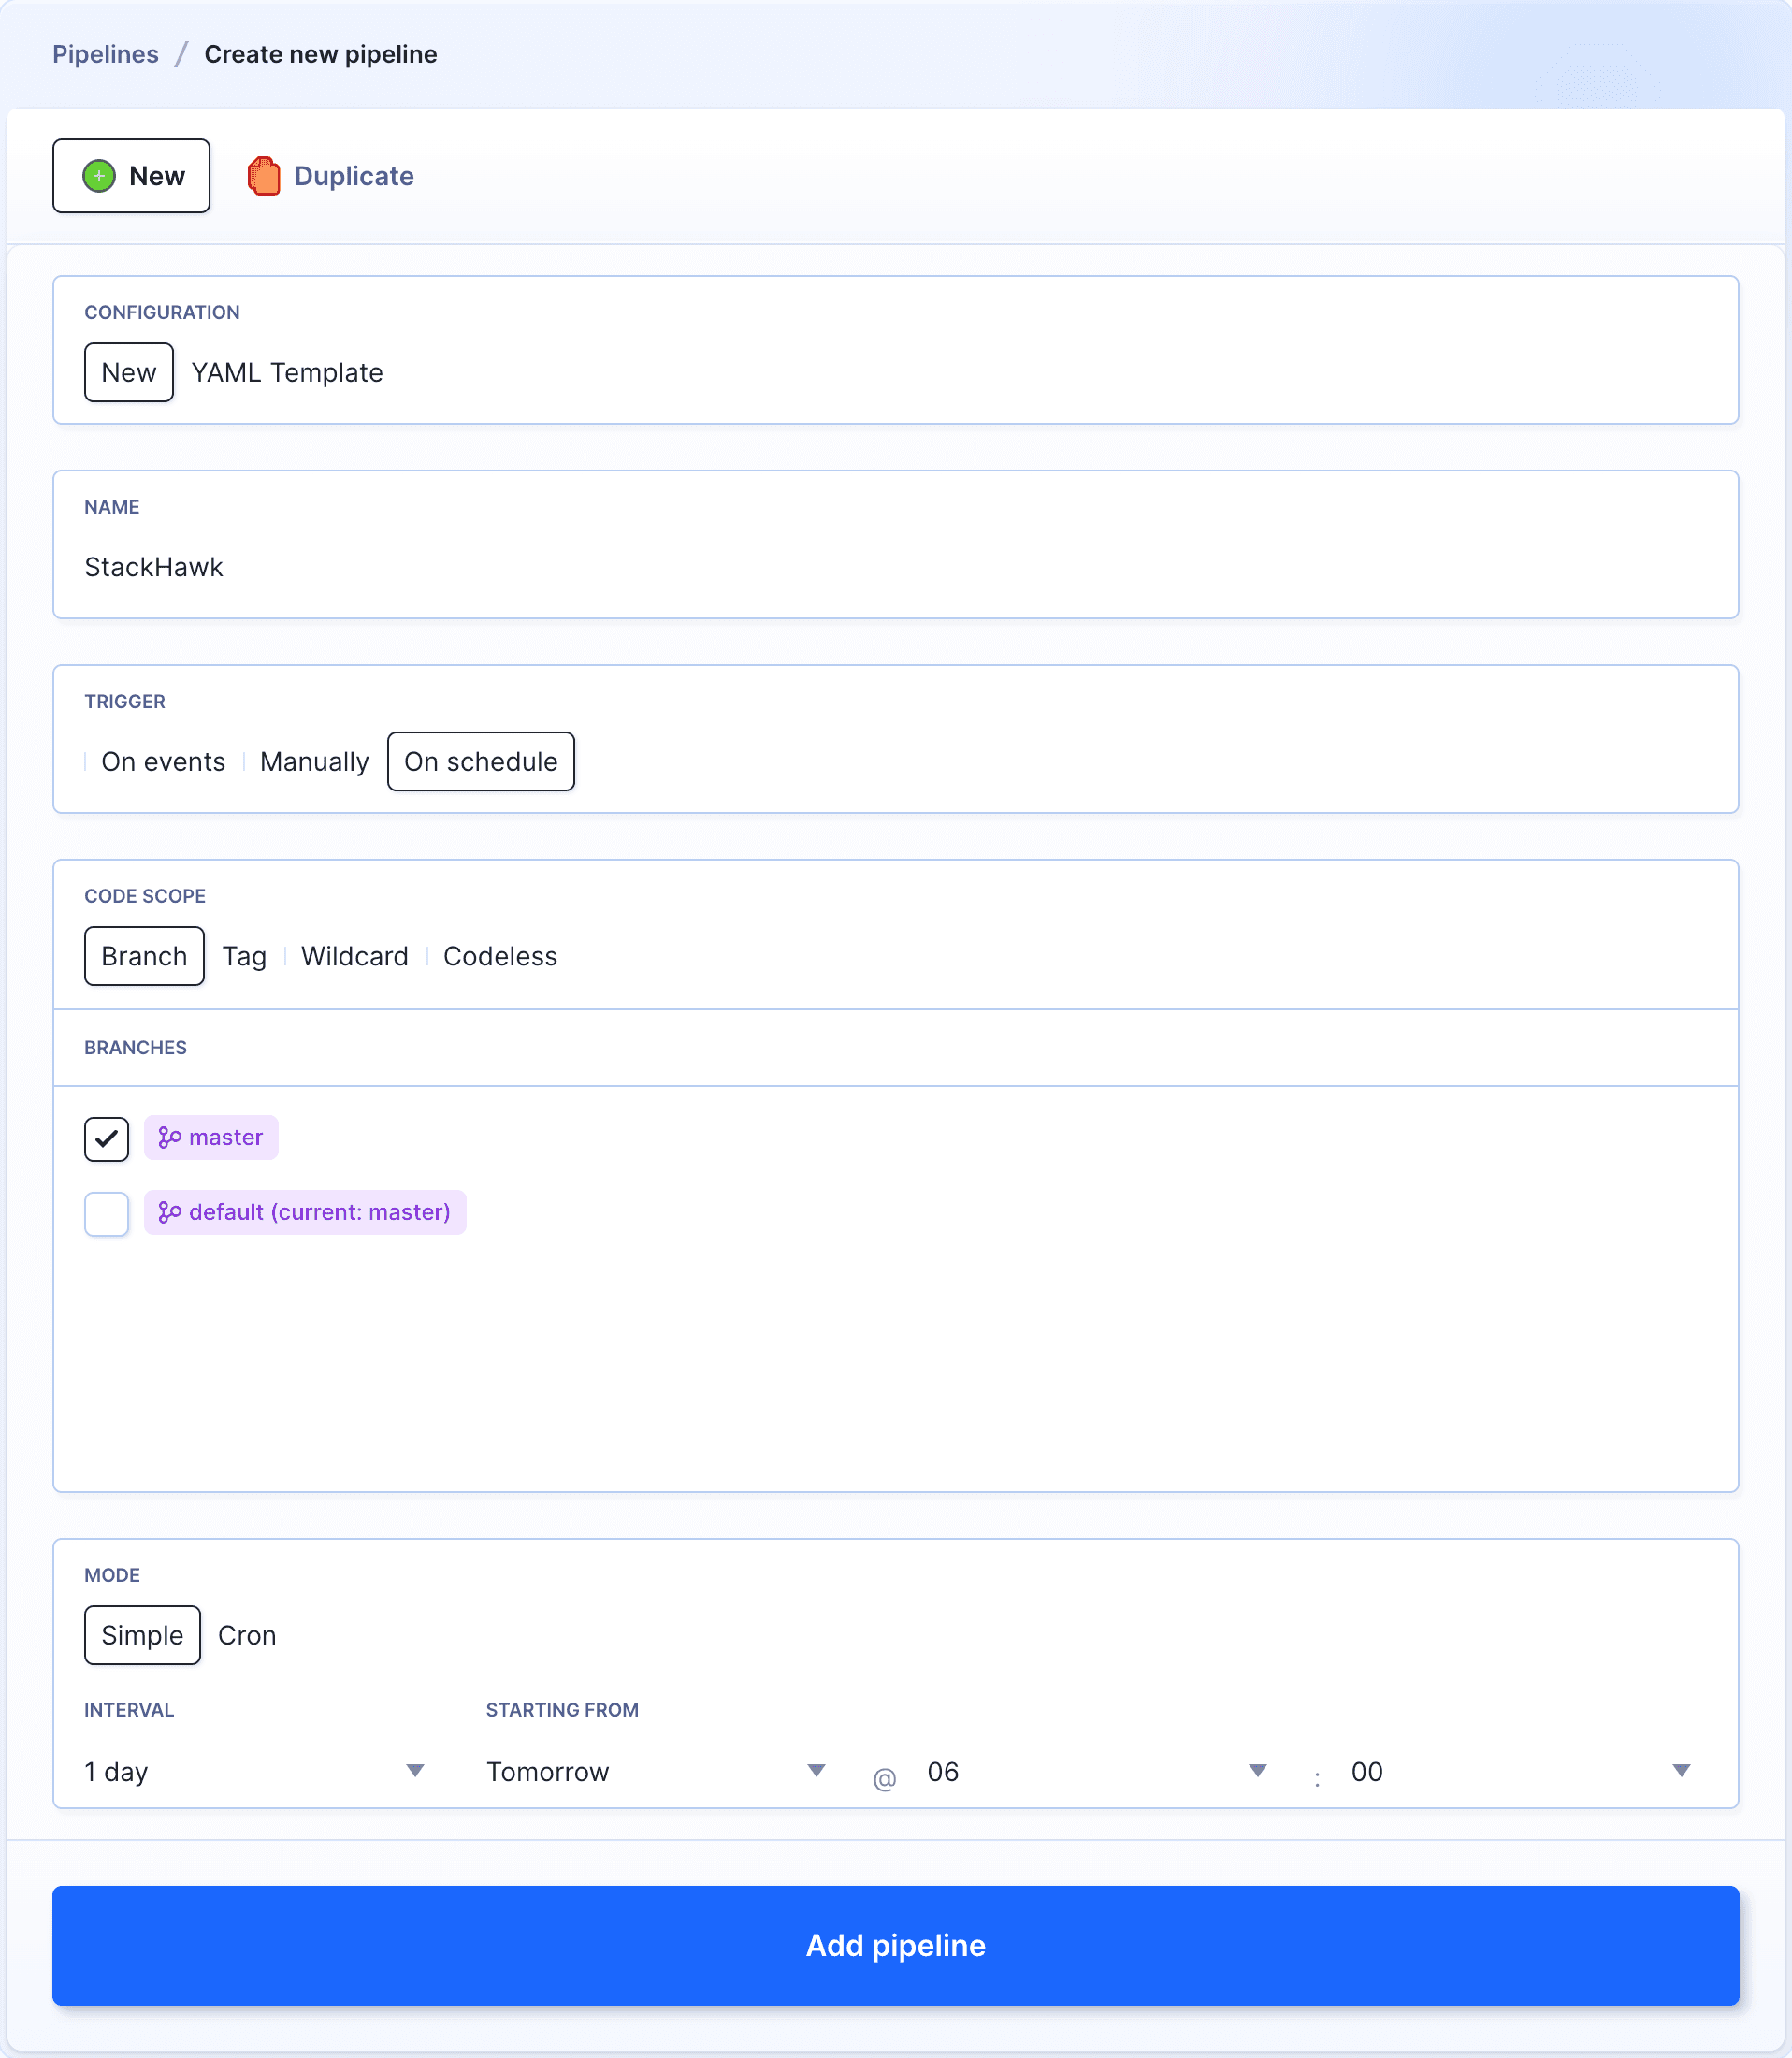
StackHawk CLI action
Now we can add the main course, which is the StackHawk CLI action. Look it up on the action list:
Image loading...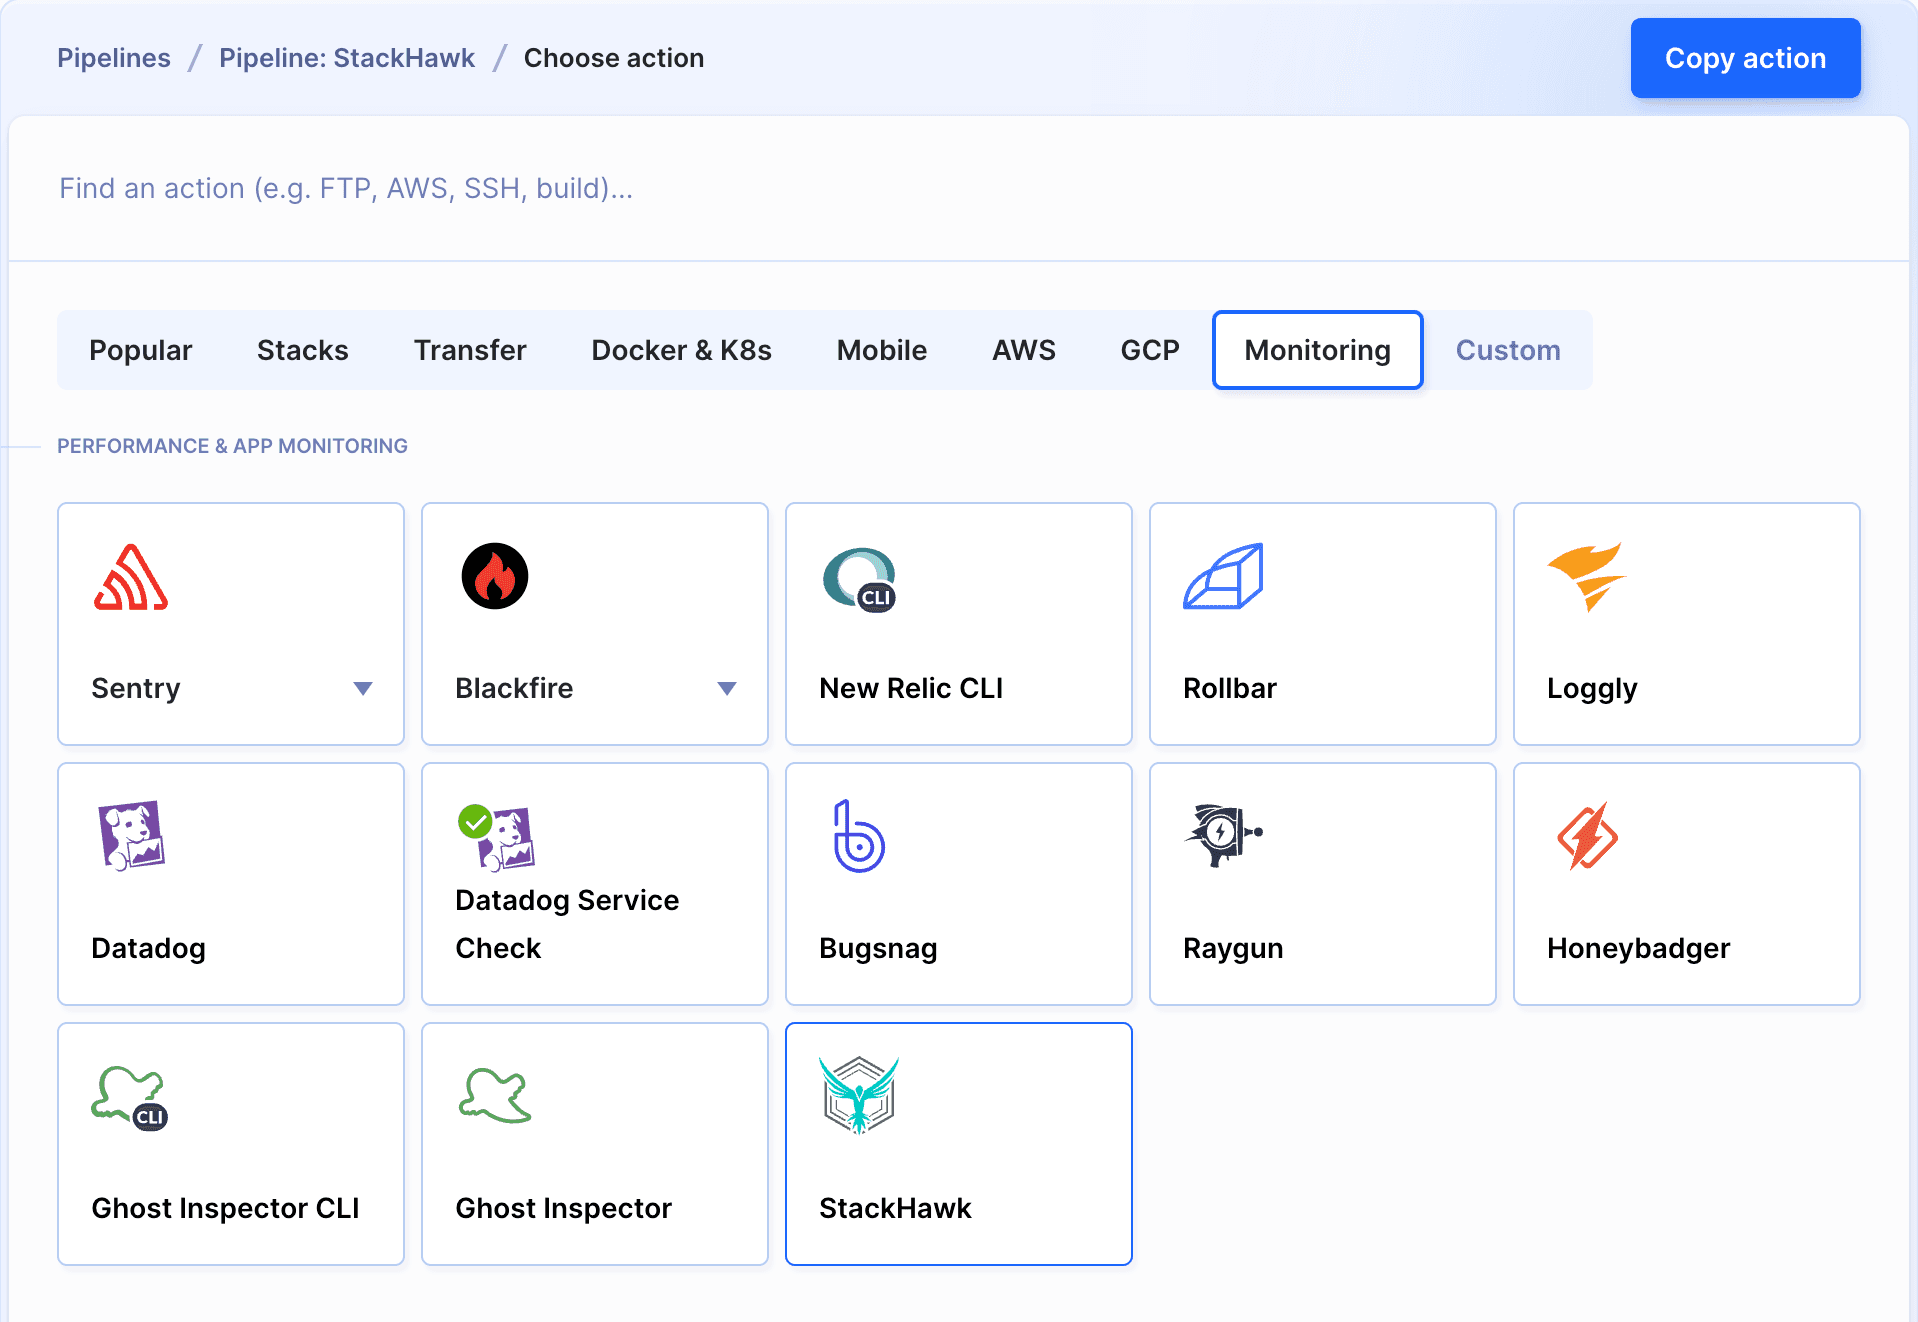
The action integrates with StackHawk and runs two commands by default:
bashhawk validate config stackhawk.yml # checks if the config file is correct and free of errors hawk scan --repo-dir=. # runs the scan in the context of the repository$$
Image loading...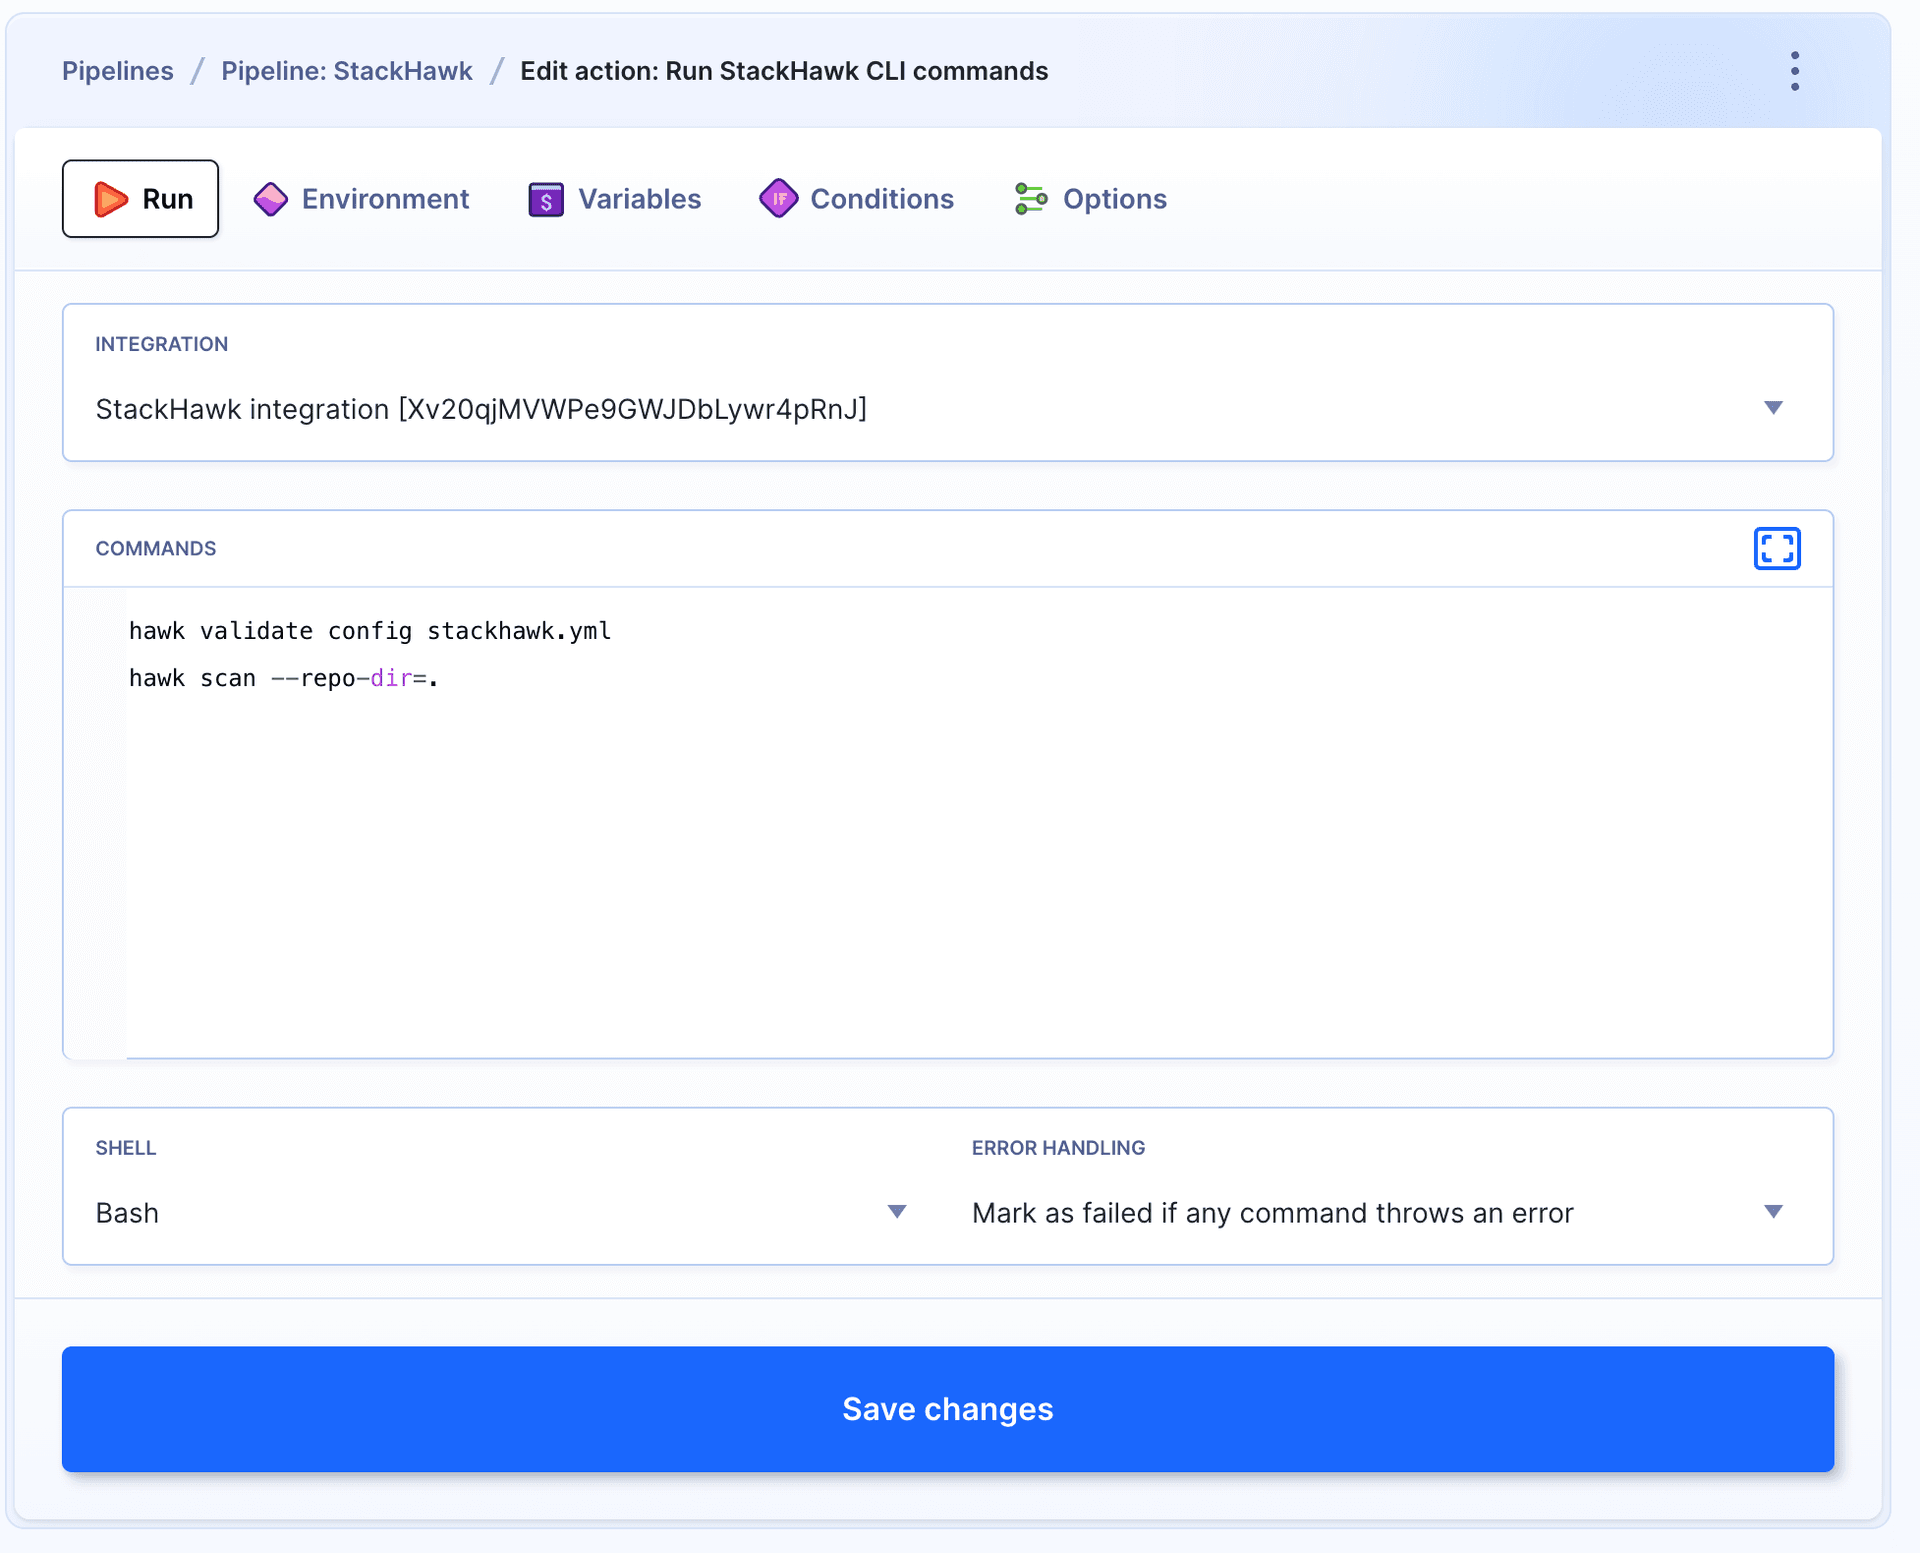
Let's test if everything works properly before the pipeline goes on schedule. Add the action and click the Run button to trigger it manually:
Image loading...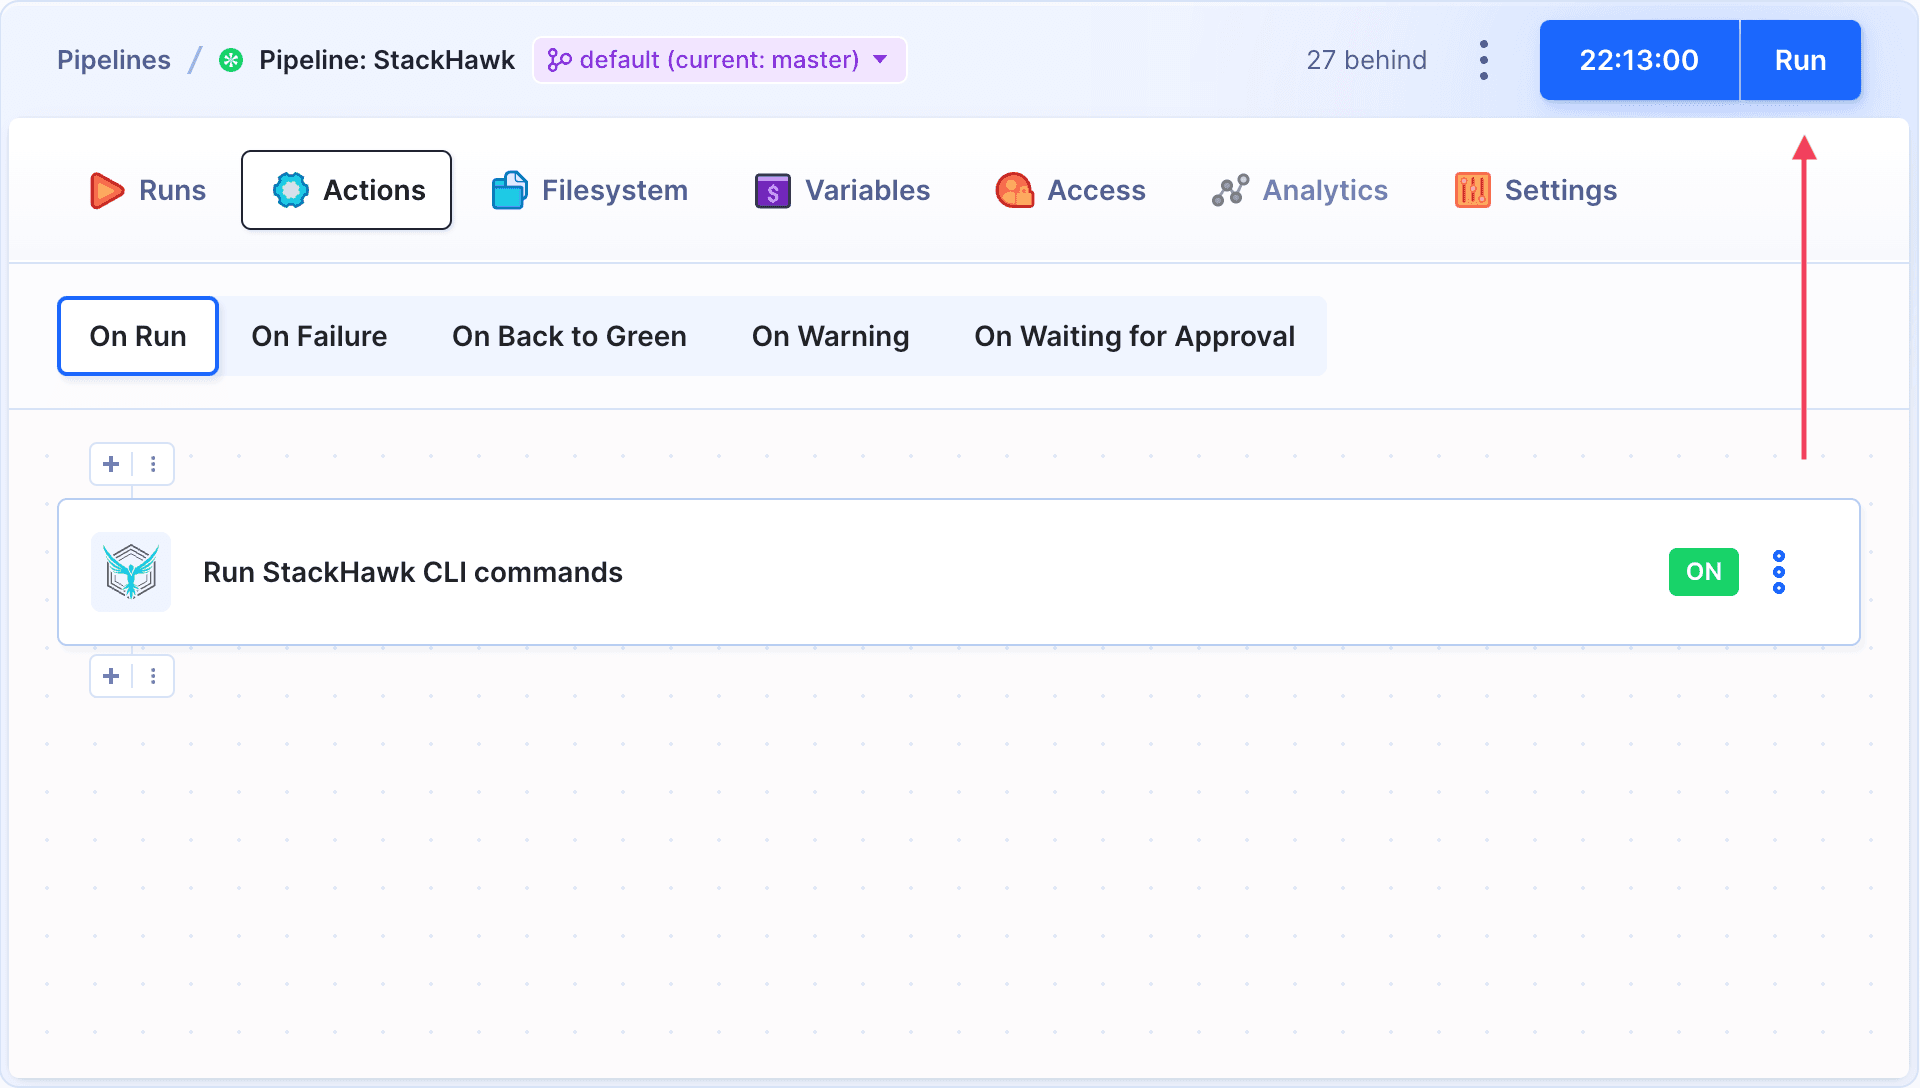
You can check the results of the execution in the Runs tab. Click the action to expand the logs and retrieve the link to the results on StackHawk:
Image loading...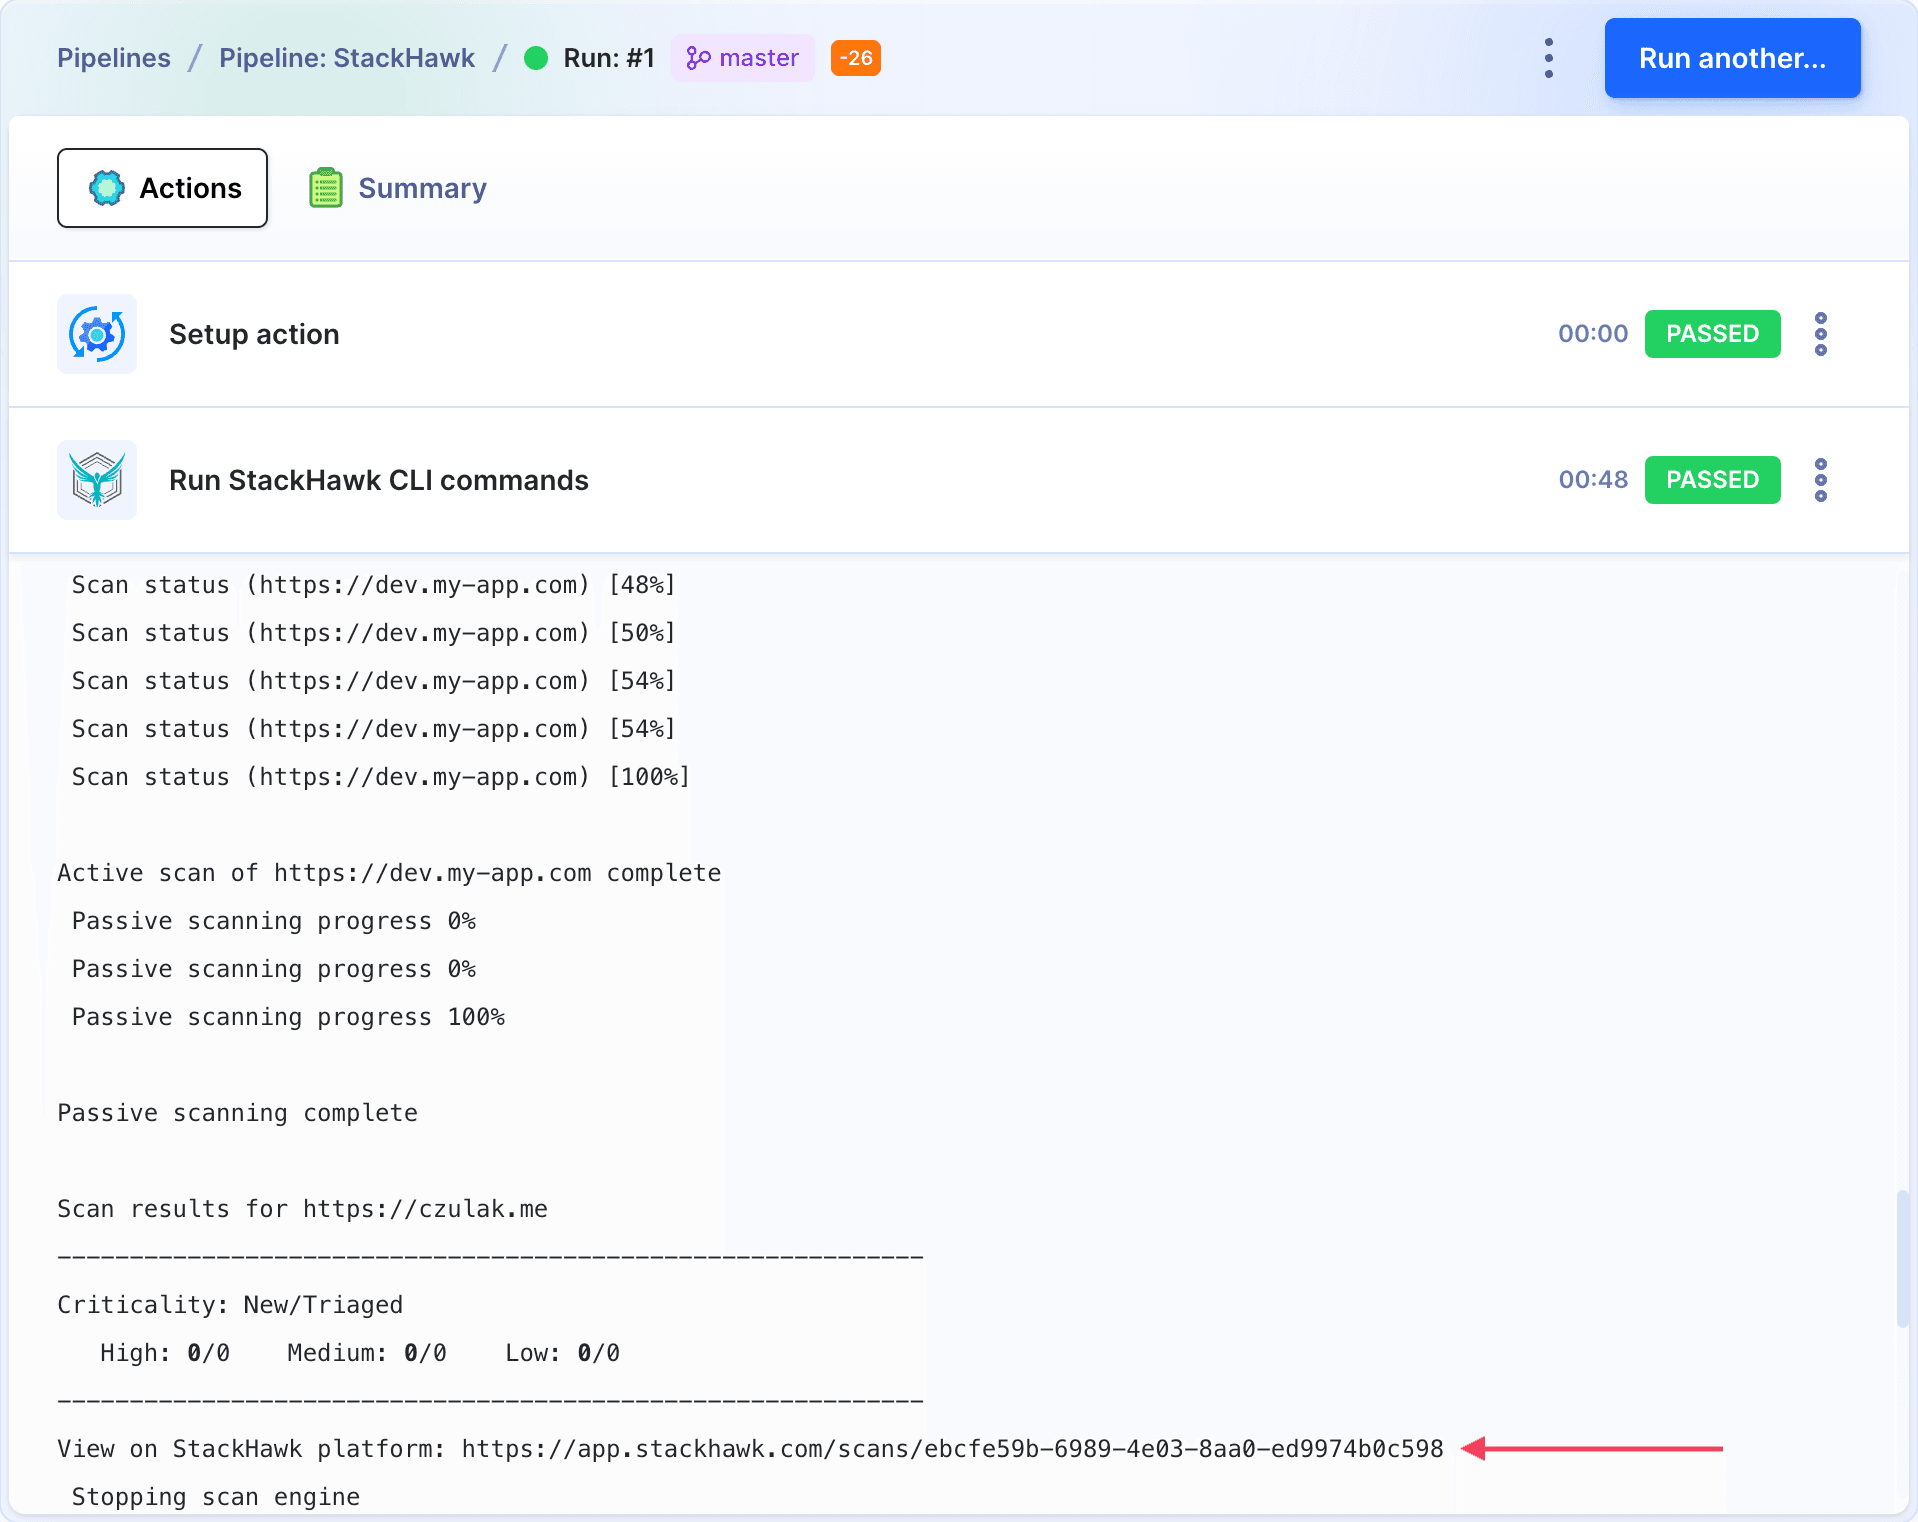
Testing multiple environments
If you test apps in multiple environments, you can add their config files to the StackHawk repository and swap the config filename in the command section. For example, for stackhawkDev.yml configuration, the commands will look like this:
bashhawk validate config stackhawkDev.yml hawk scan stackhawkDev.yml --repo-dir=.$$
hawk scan must go with stackhawkDev.yml. Without it, it always scans with the default stackhawk.yml file.
You can either add multiple pipelines - one for each config - or use environment variables allowing you to select the config manually on pipeline run. You'll need three variables, each representing the separate line from the StackHawk config:
$HawkAppId$HawkEnv$HawkURL
Use the variables to update the YAML file:
yaml# -- stackhawk configuration for DWAPP --
app:
  # -- An applicationId obtained from the StackHawk platform. --
  applicationId: ${HawkAppId} # (required)
  # -- The environment for the applicationId defined in the StackHawk platform. --
  env: ${HawkEnv} # (required)
  # -- The url of your application to scan --
  host: ${HawkURL} # (required)
Now, go back to your pipeline and add the Set Variables action before StackHawk:
Image loading...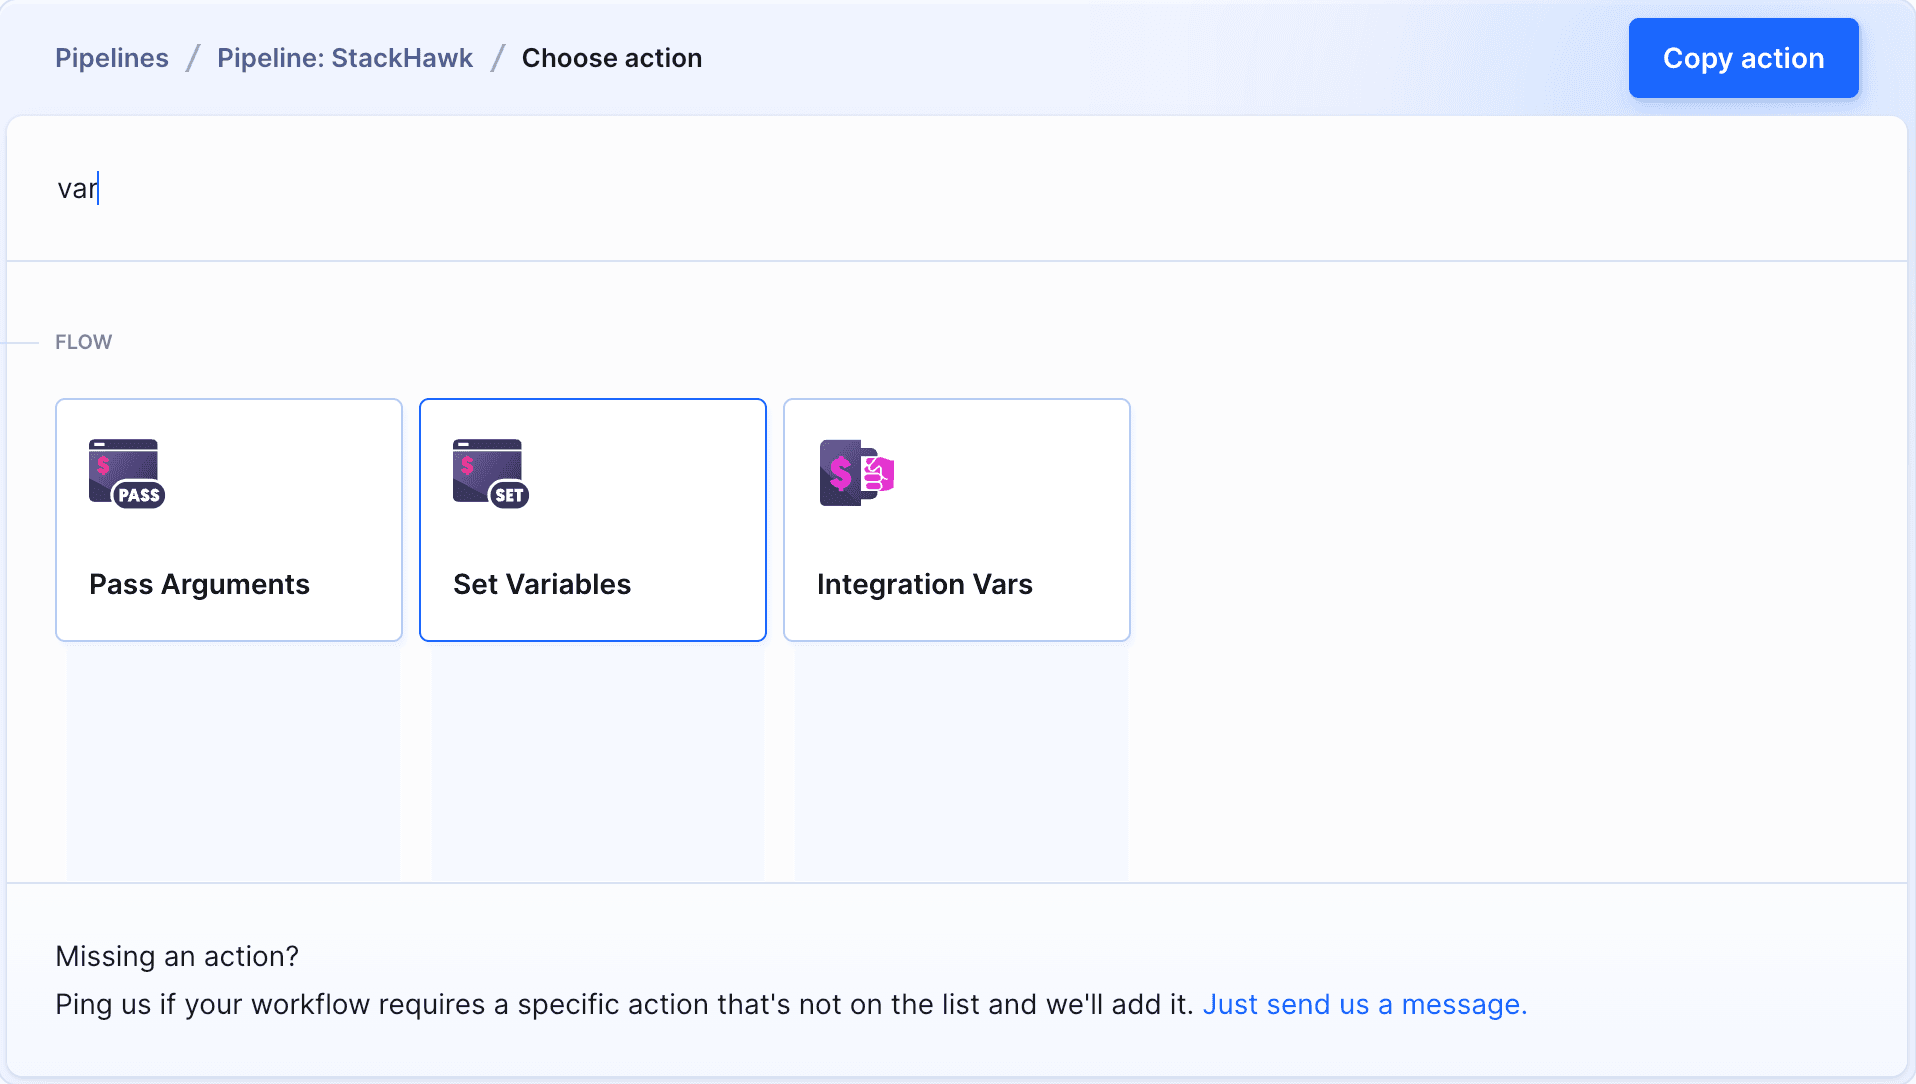
In the action, fill the variables with your application data. Separate the values with a new line:
Image loading...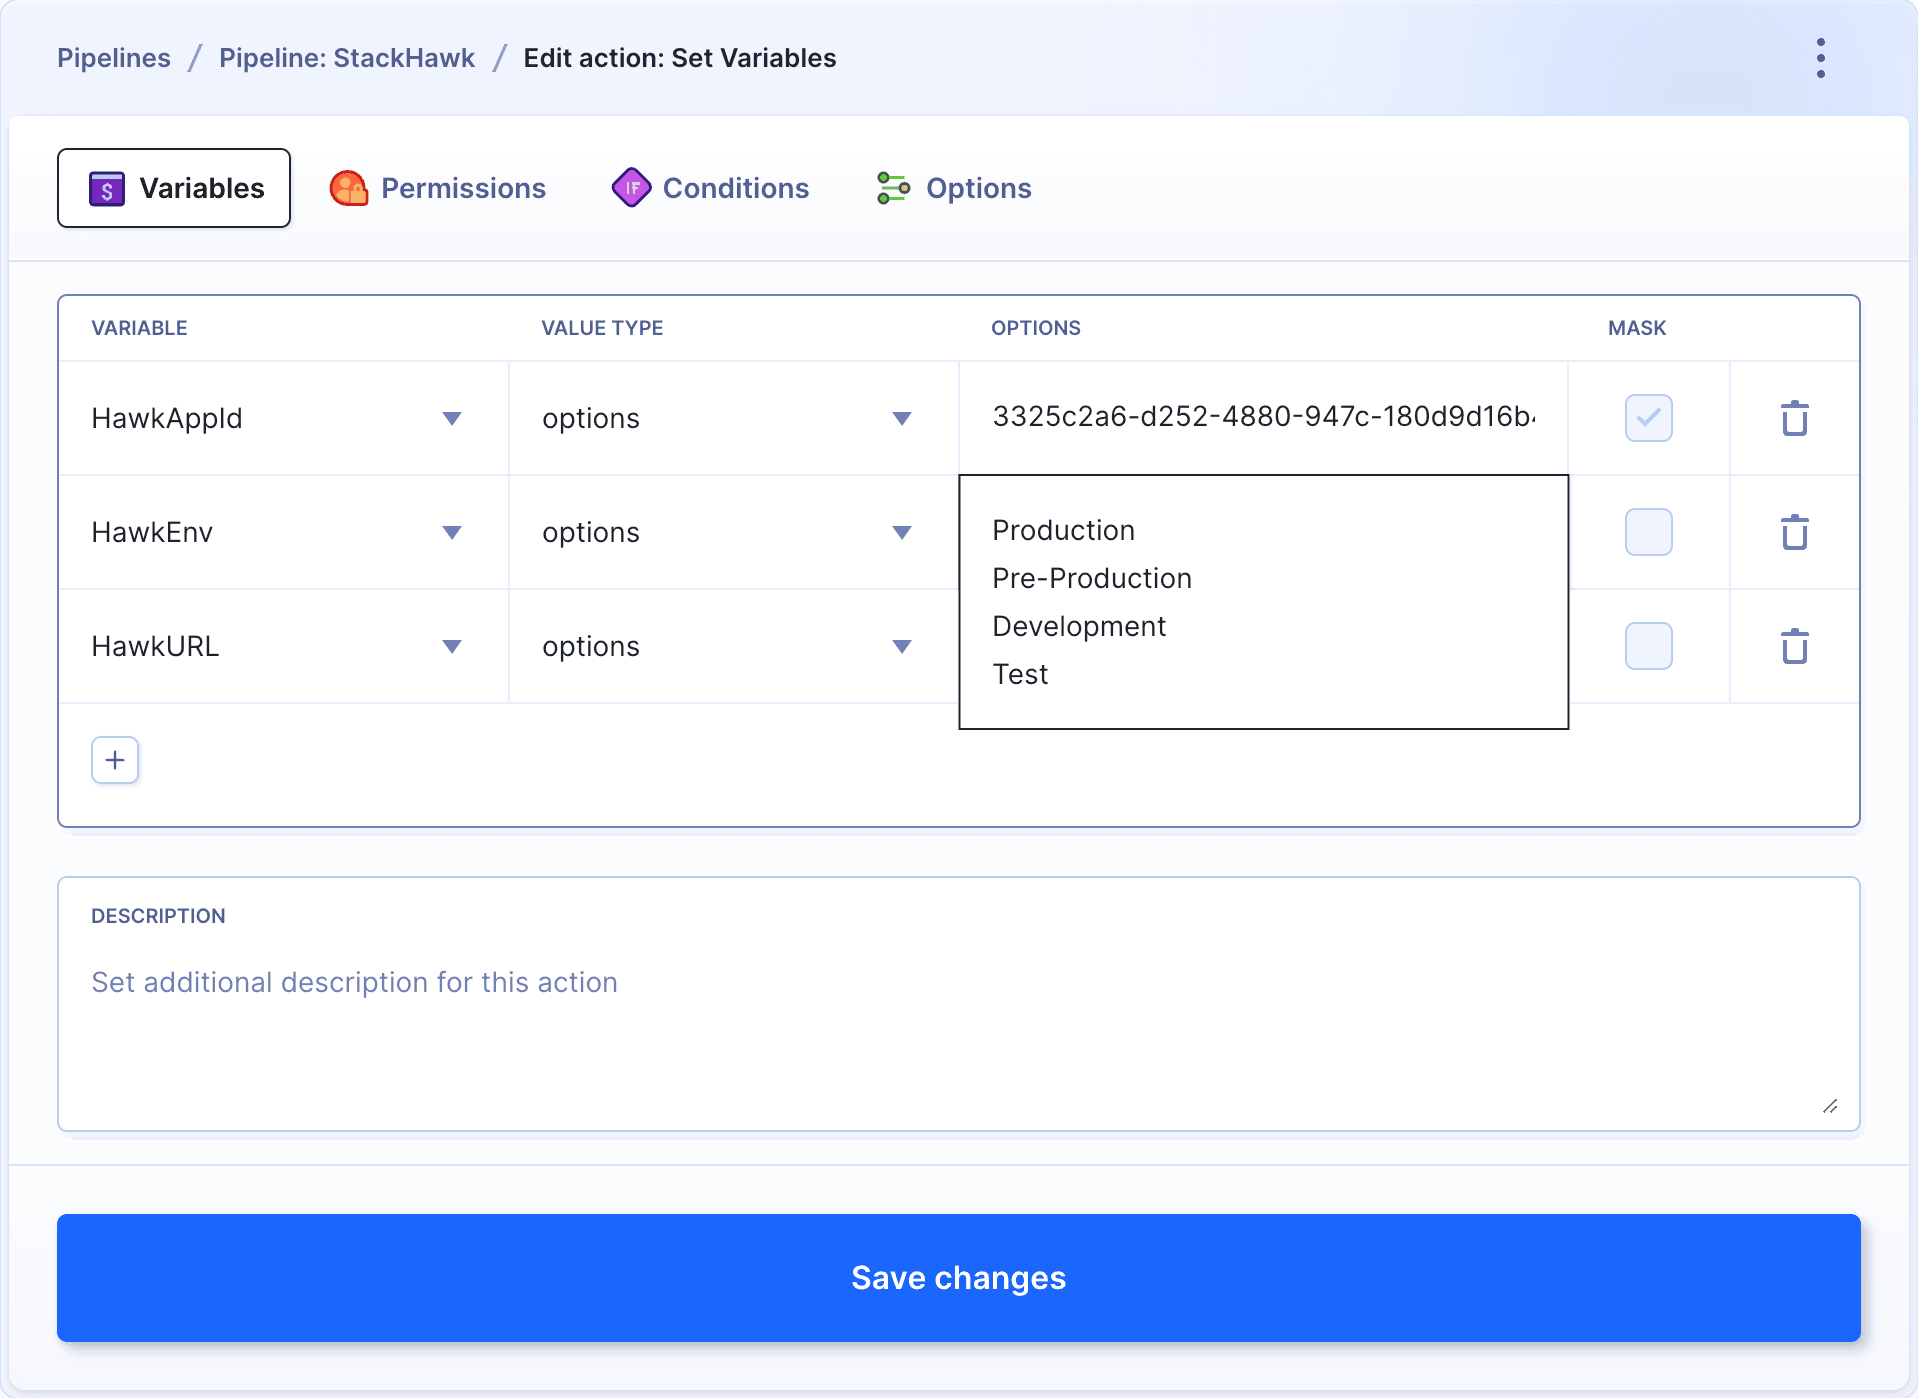
Run the pipeline again: Buddy will ask you to select the vars that will be passed to the config file and fetched by StackHawk:
Image loading...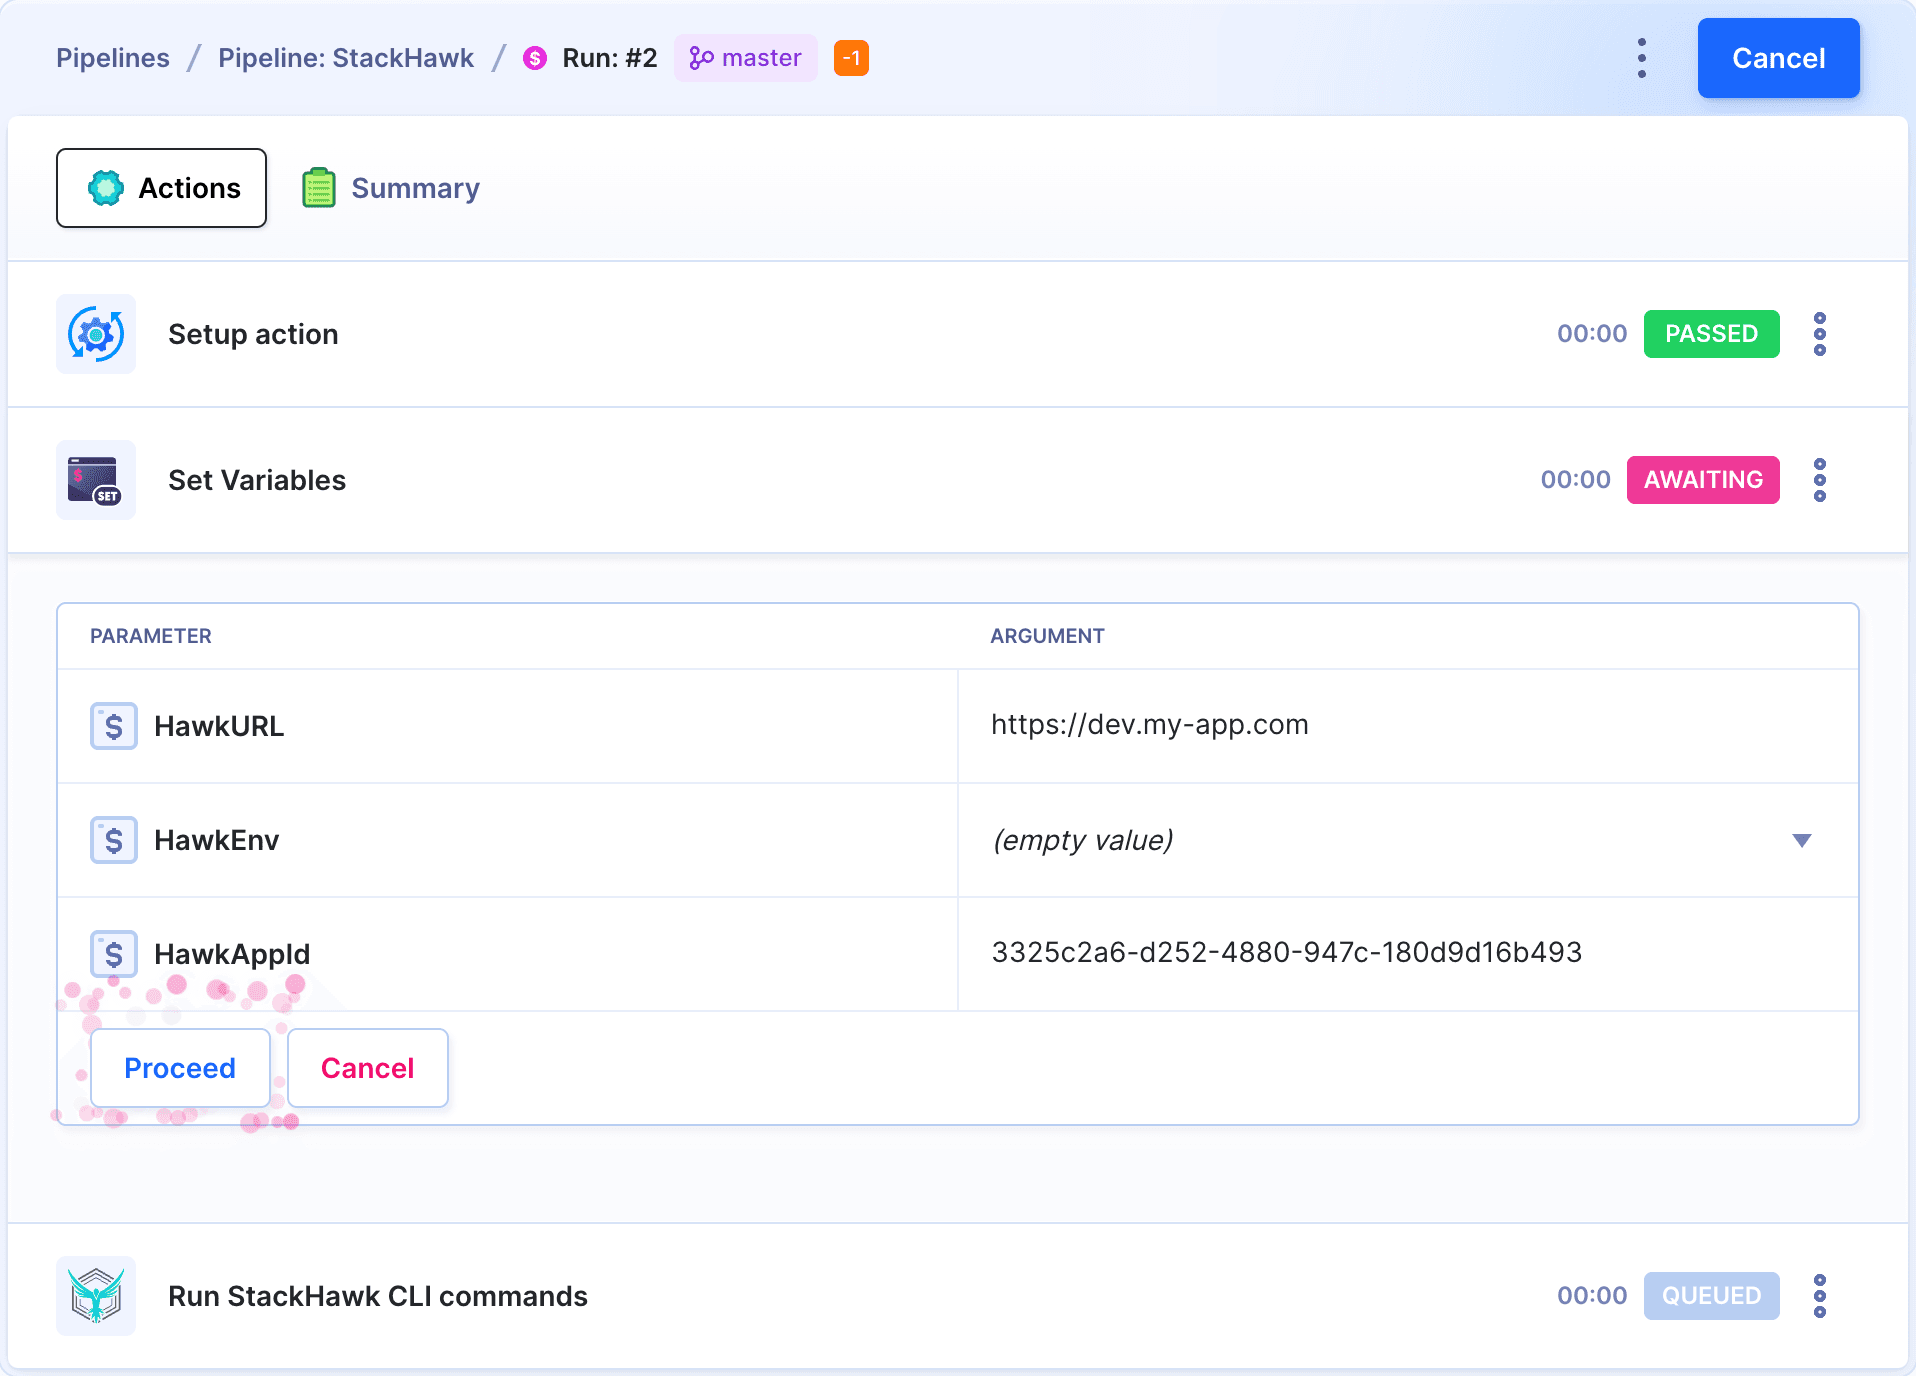
Sending scan details
Buddy lets you use messaging services to send scan results to the selected service channel or user. In this part we'll add a couple of actions that will fetch specific data from the scan report and pass it with Telegram. The pipeline is going to be triggered with a request from StackHawk which will also carry the payload with the scan results.
Create a new pipeline with the following settings:
- Name: e.g.
StackHawk report - Trigger: Manually (will be triggered by webhook anyway)
- Code scope: Codeless
- Name: e.g.
Copy the pipeline's webhook URL. You can find it in the pipeline options menu:
Image loading...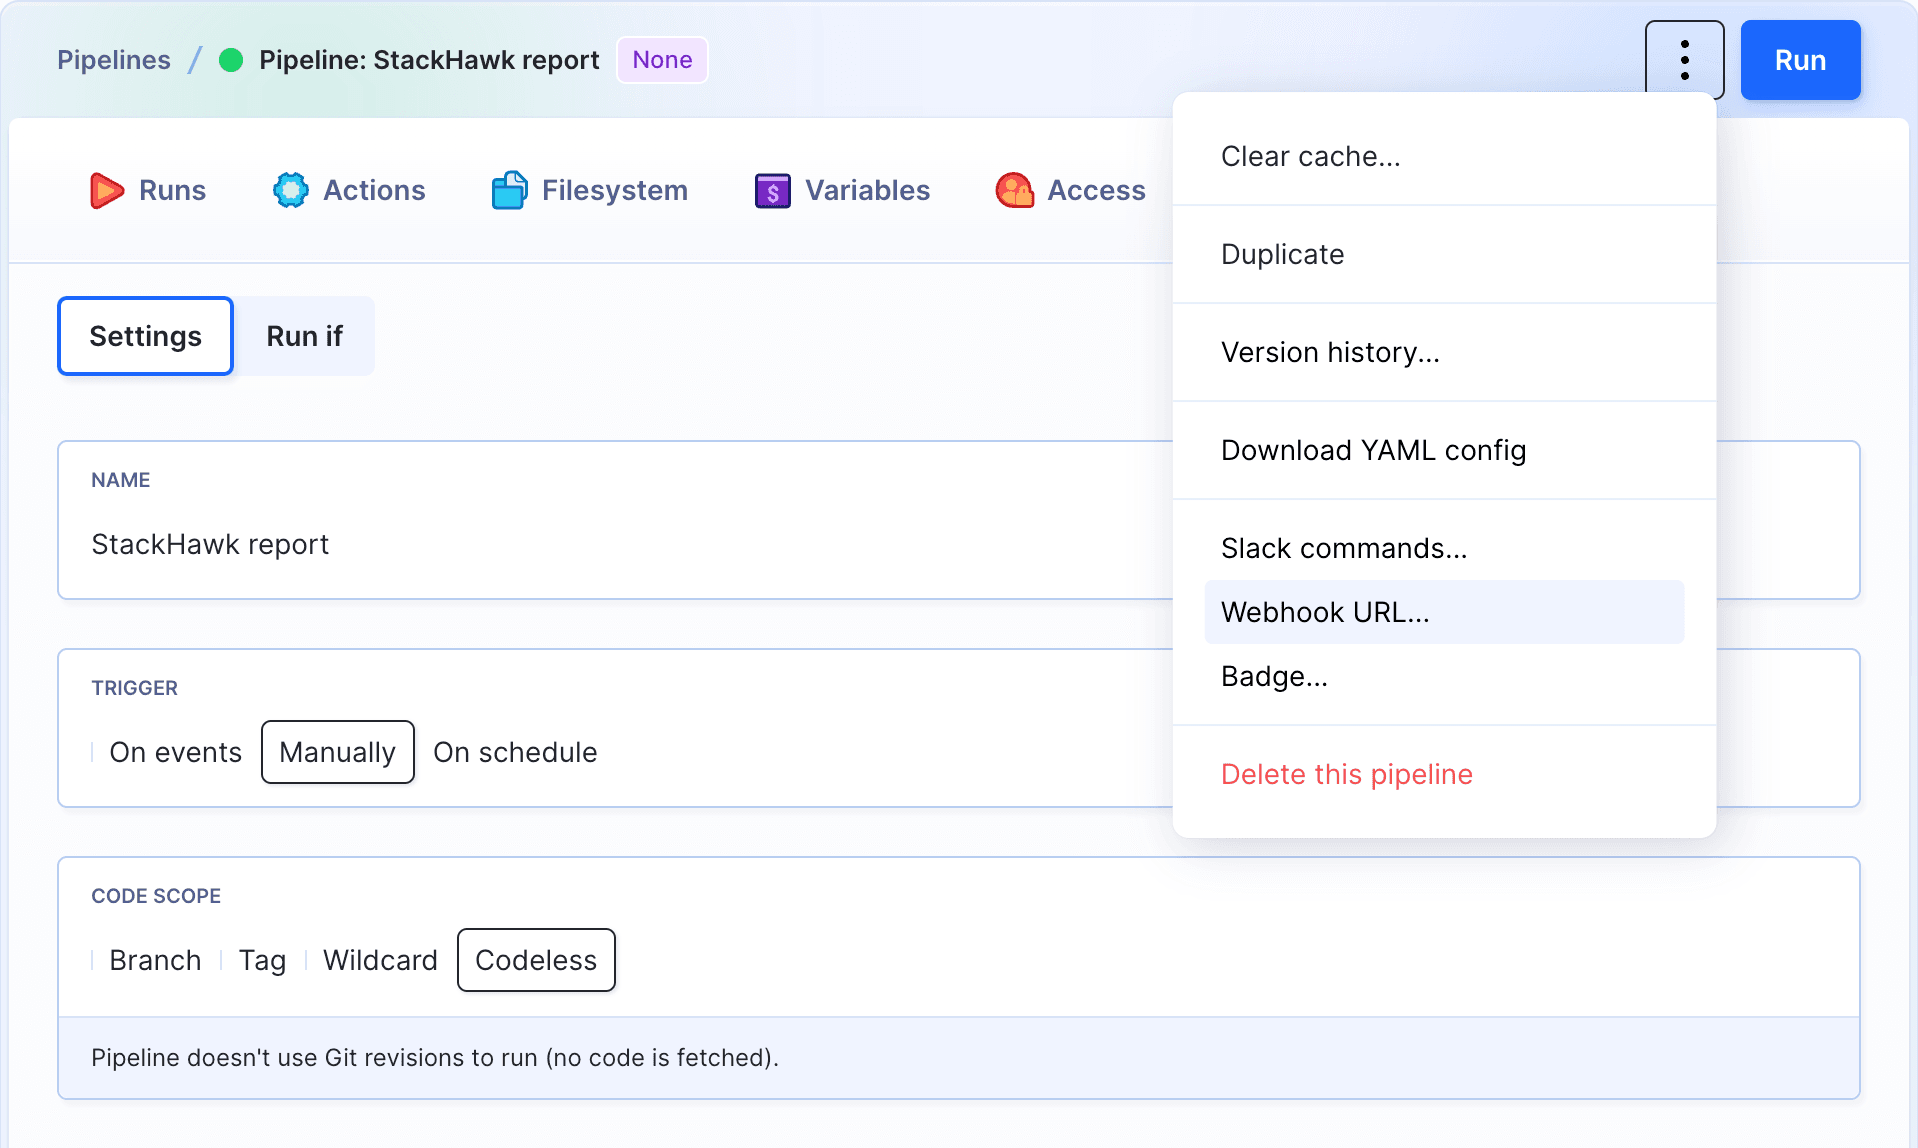
Image loading...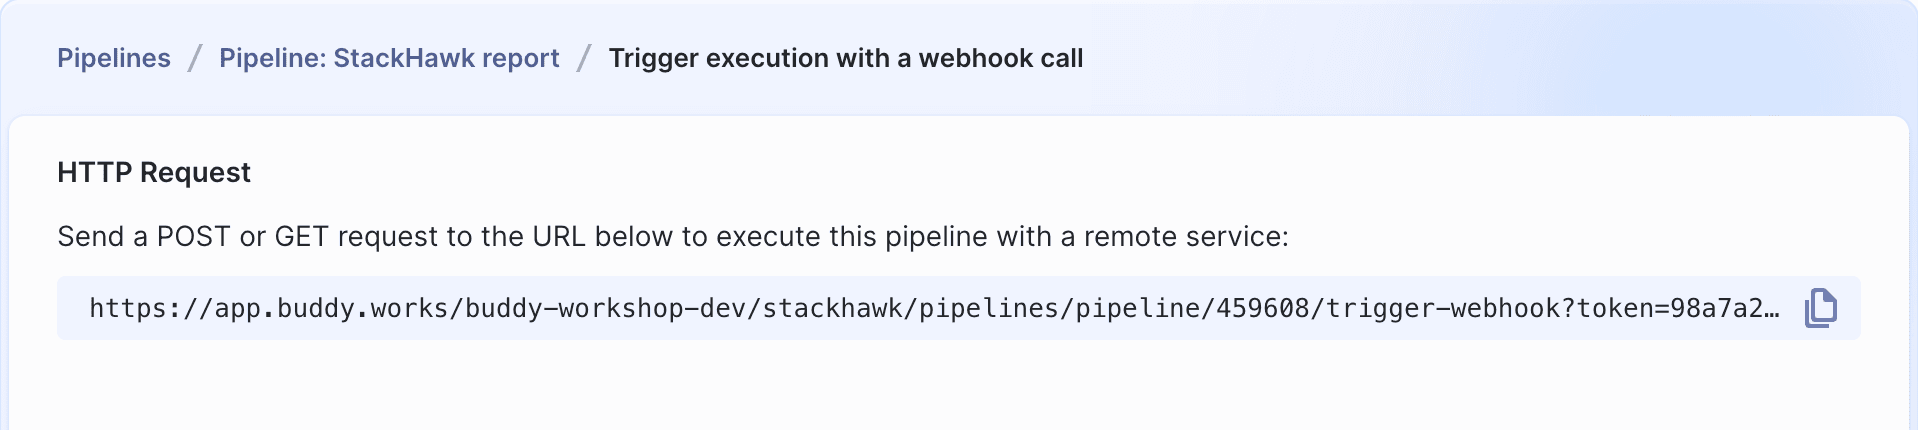
With the URL in the clipboard, go to https://app.stackhawk.com/integrations and click Generic Webhook. Define the data that you want to send and paste the webhook from Buddy as the webhook endpoint URL, for example:
Image loading...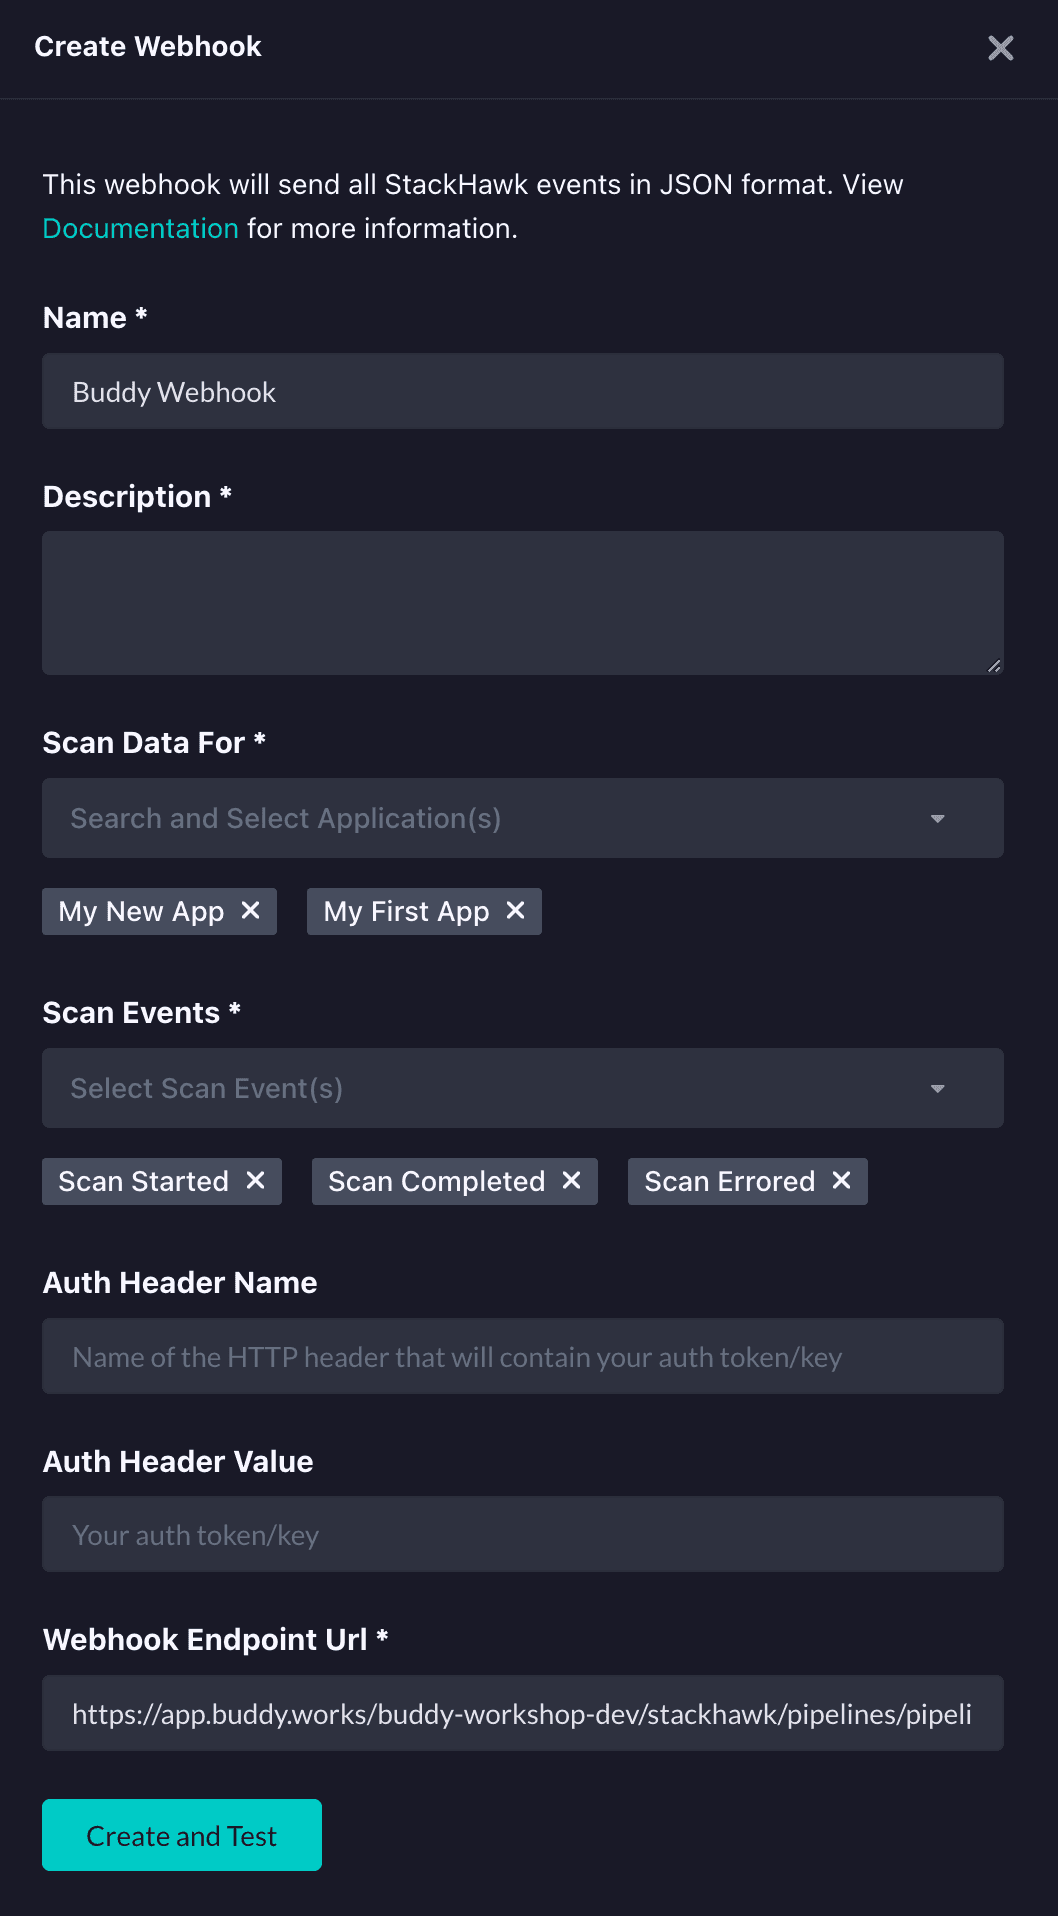
- Now we need to add an action that will parse the information from the report. For this, we'll use the Local Shell action:
Image loading...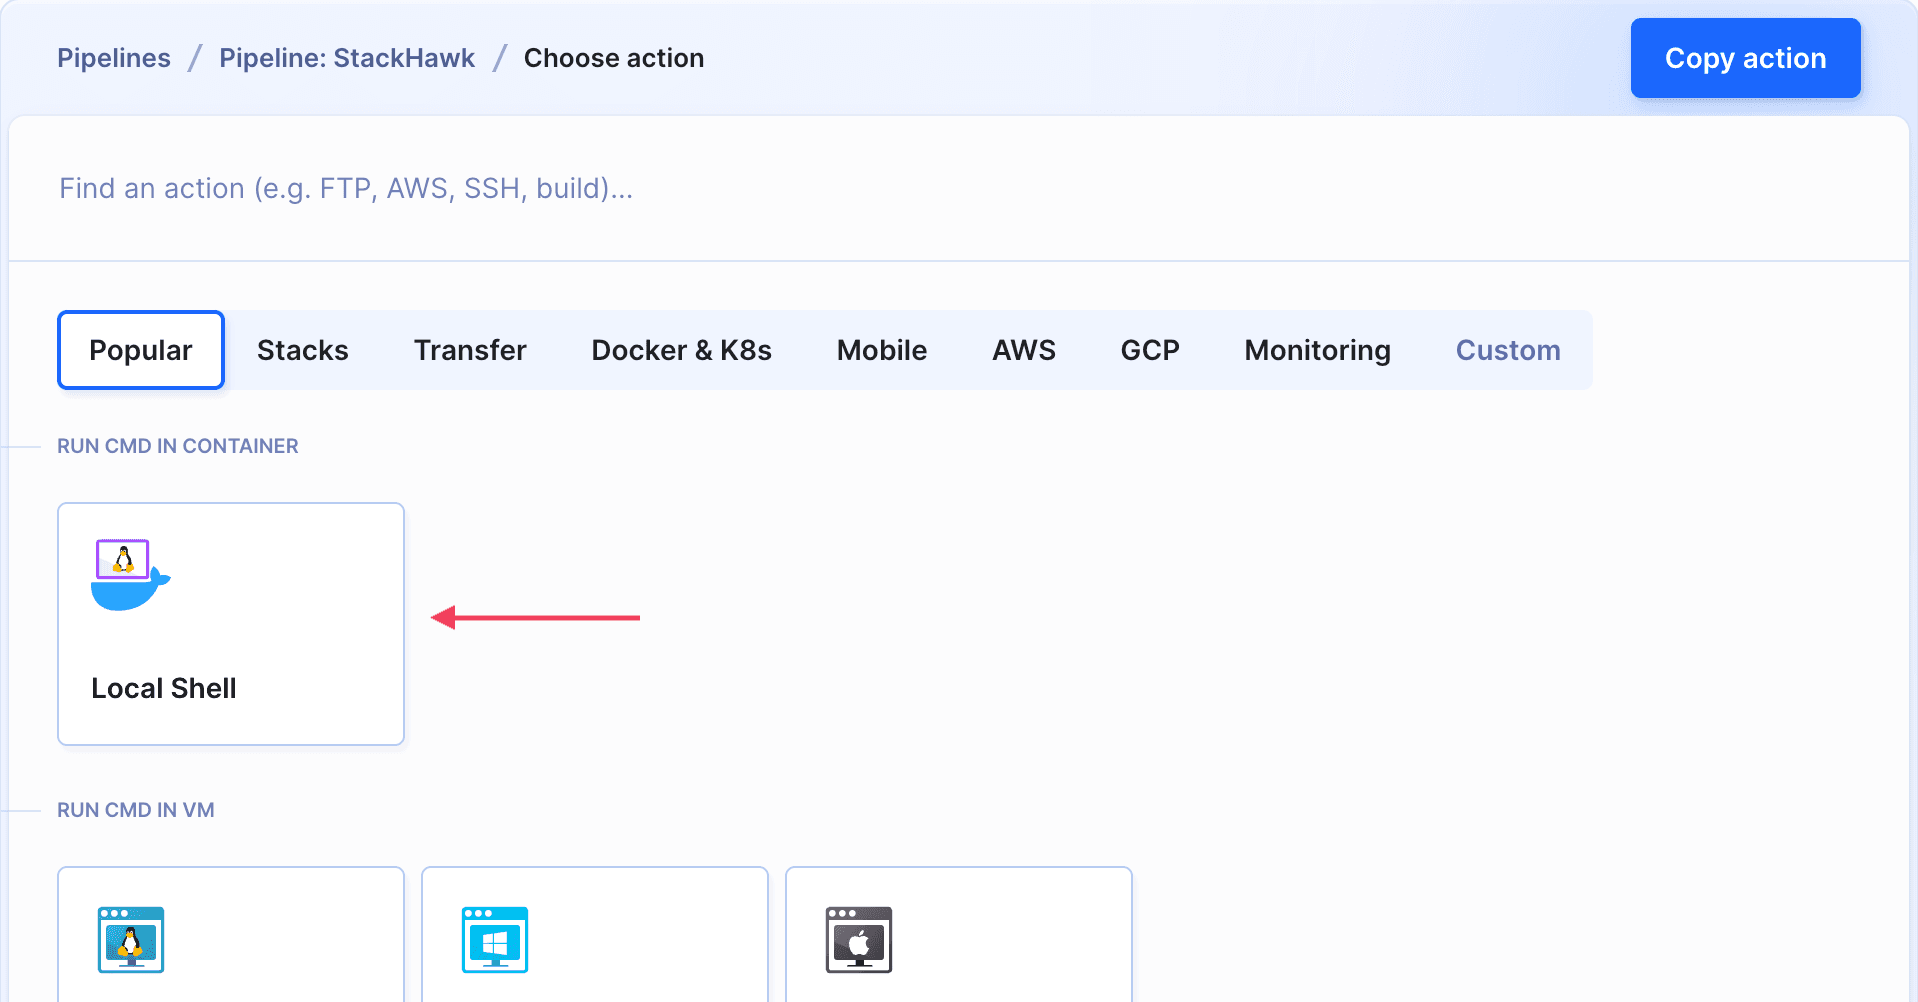
- The action launches a container with a plain Linux environment. However, it lacks jq, which is required to parse the JSON from StackHawk. Switch to the environment tab, go to Packages & Tools and enter the install command:
bashapt-get update && apt-get install -y jq$
Image loading...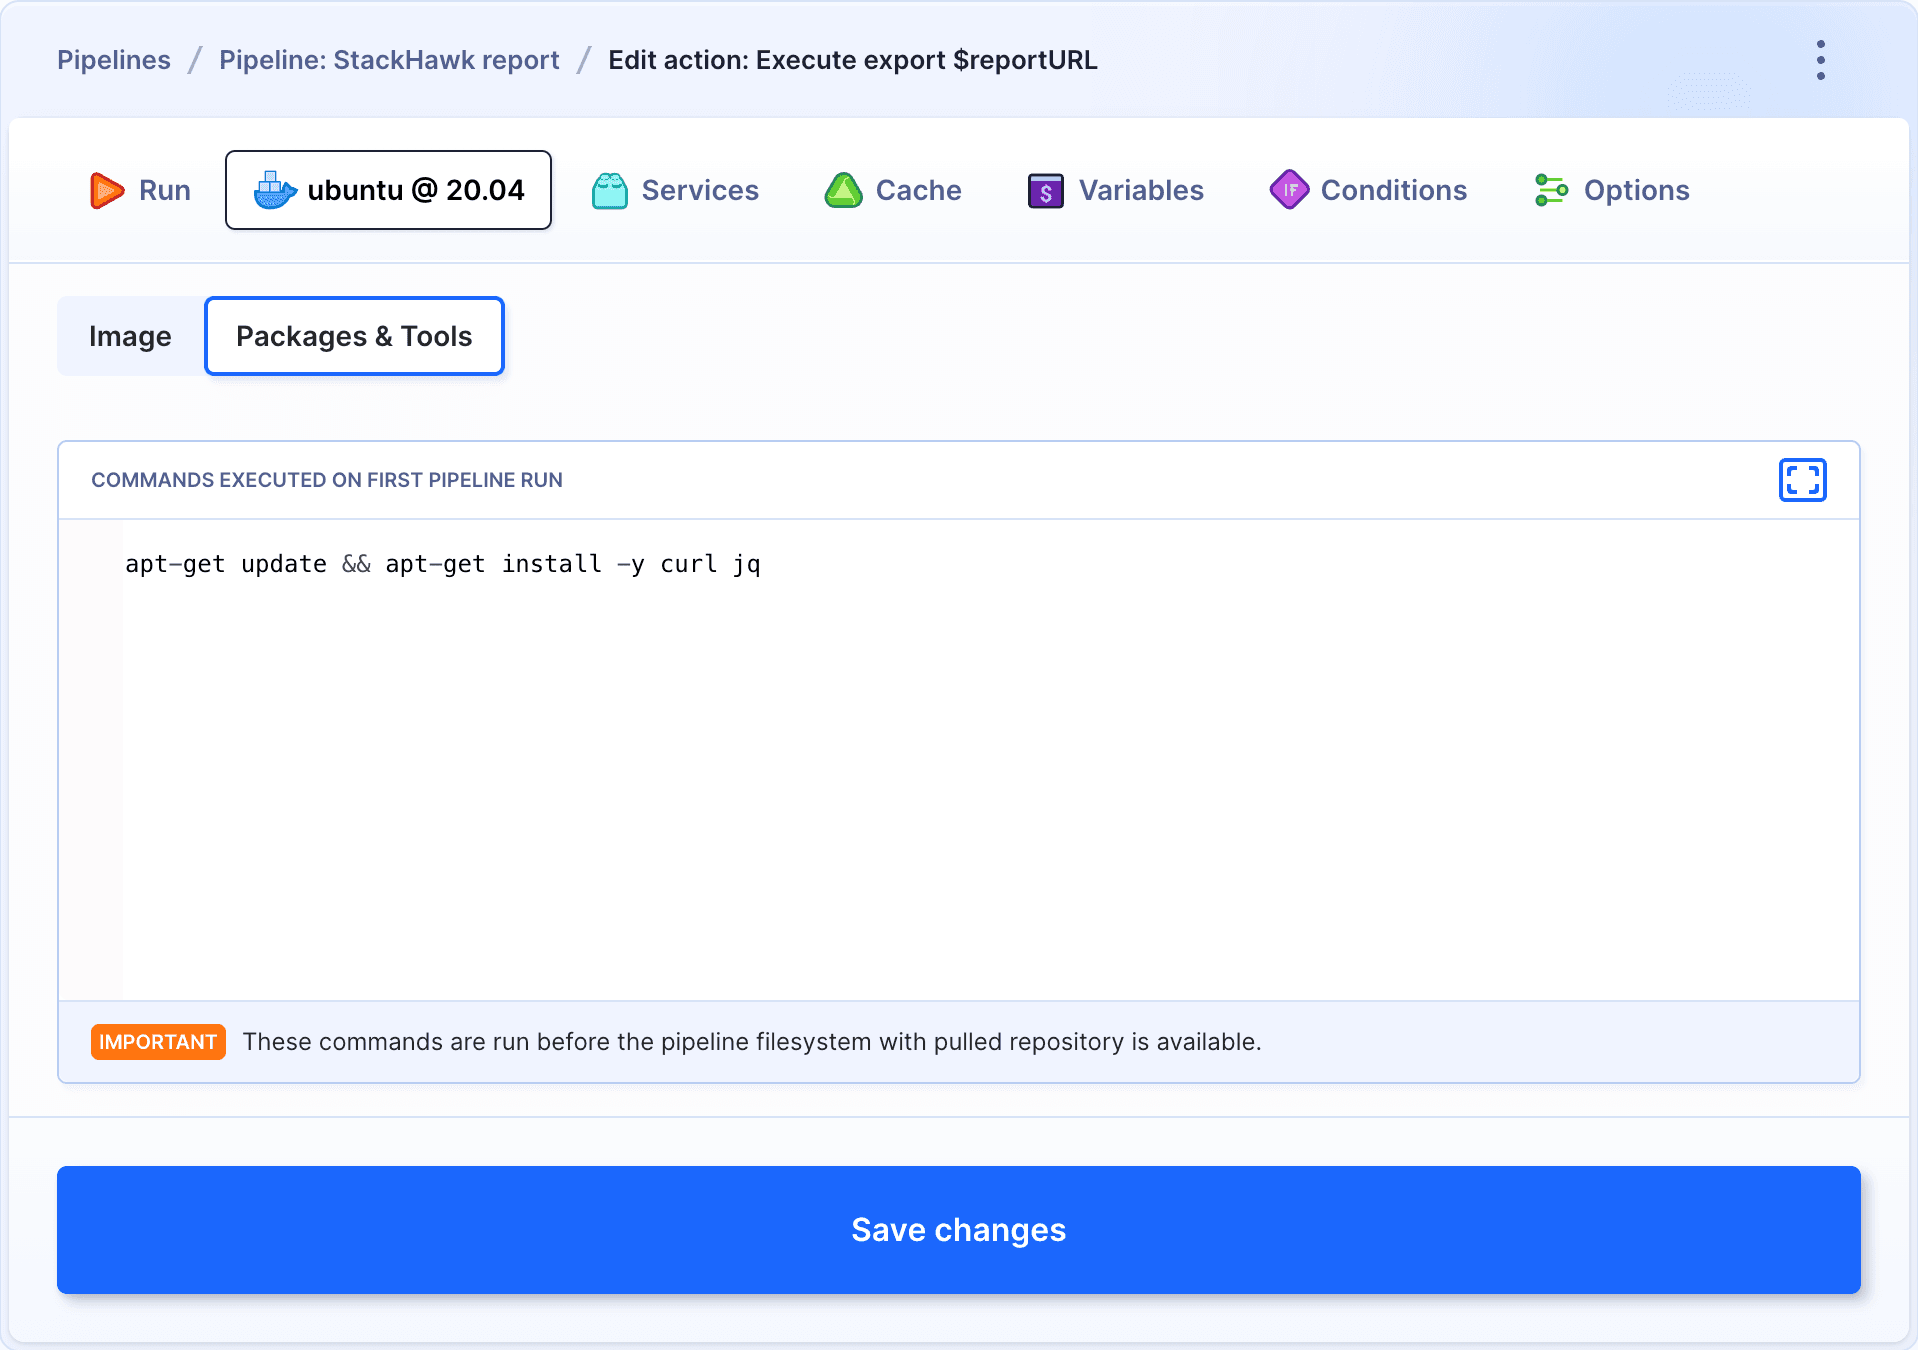
- Next, switch to the commands tab and define what you want to fetch from the report. Below you can see an example for the report's URL, environment name, scan status, application name, and URLs count:
bashreportURL=$(echo $scanCompleted | jq -r '.scan.scanURL') scanEnv=$(echo $scanCompleted | jq -r '.scan.env') scanAppName=$(echo $scanCompleted | jq -r '.scan.application') scanStatus=$(echo $scanCompleted | jq -r '.scan.status') scanURLsCount=$(echo $scanCompleted | jq -r '.completedScanStats.urlsCount')$$$$$
Image loading...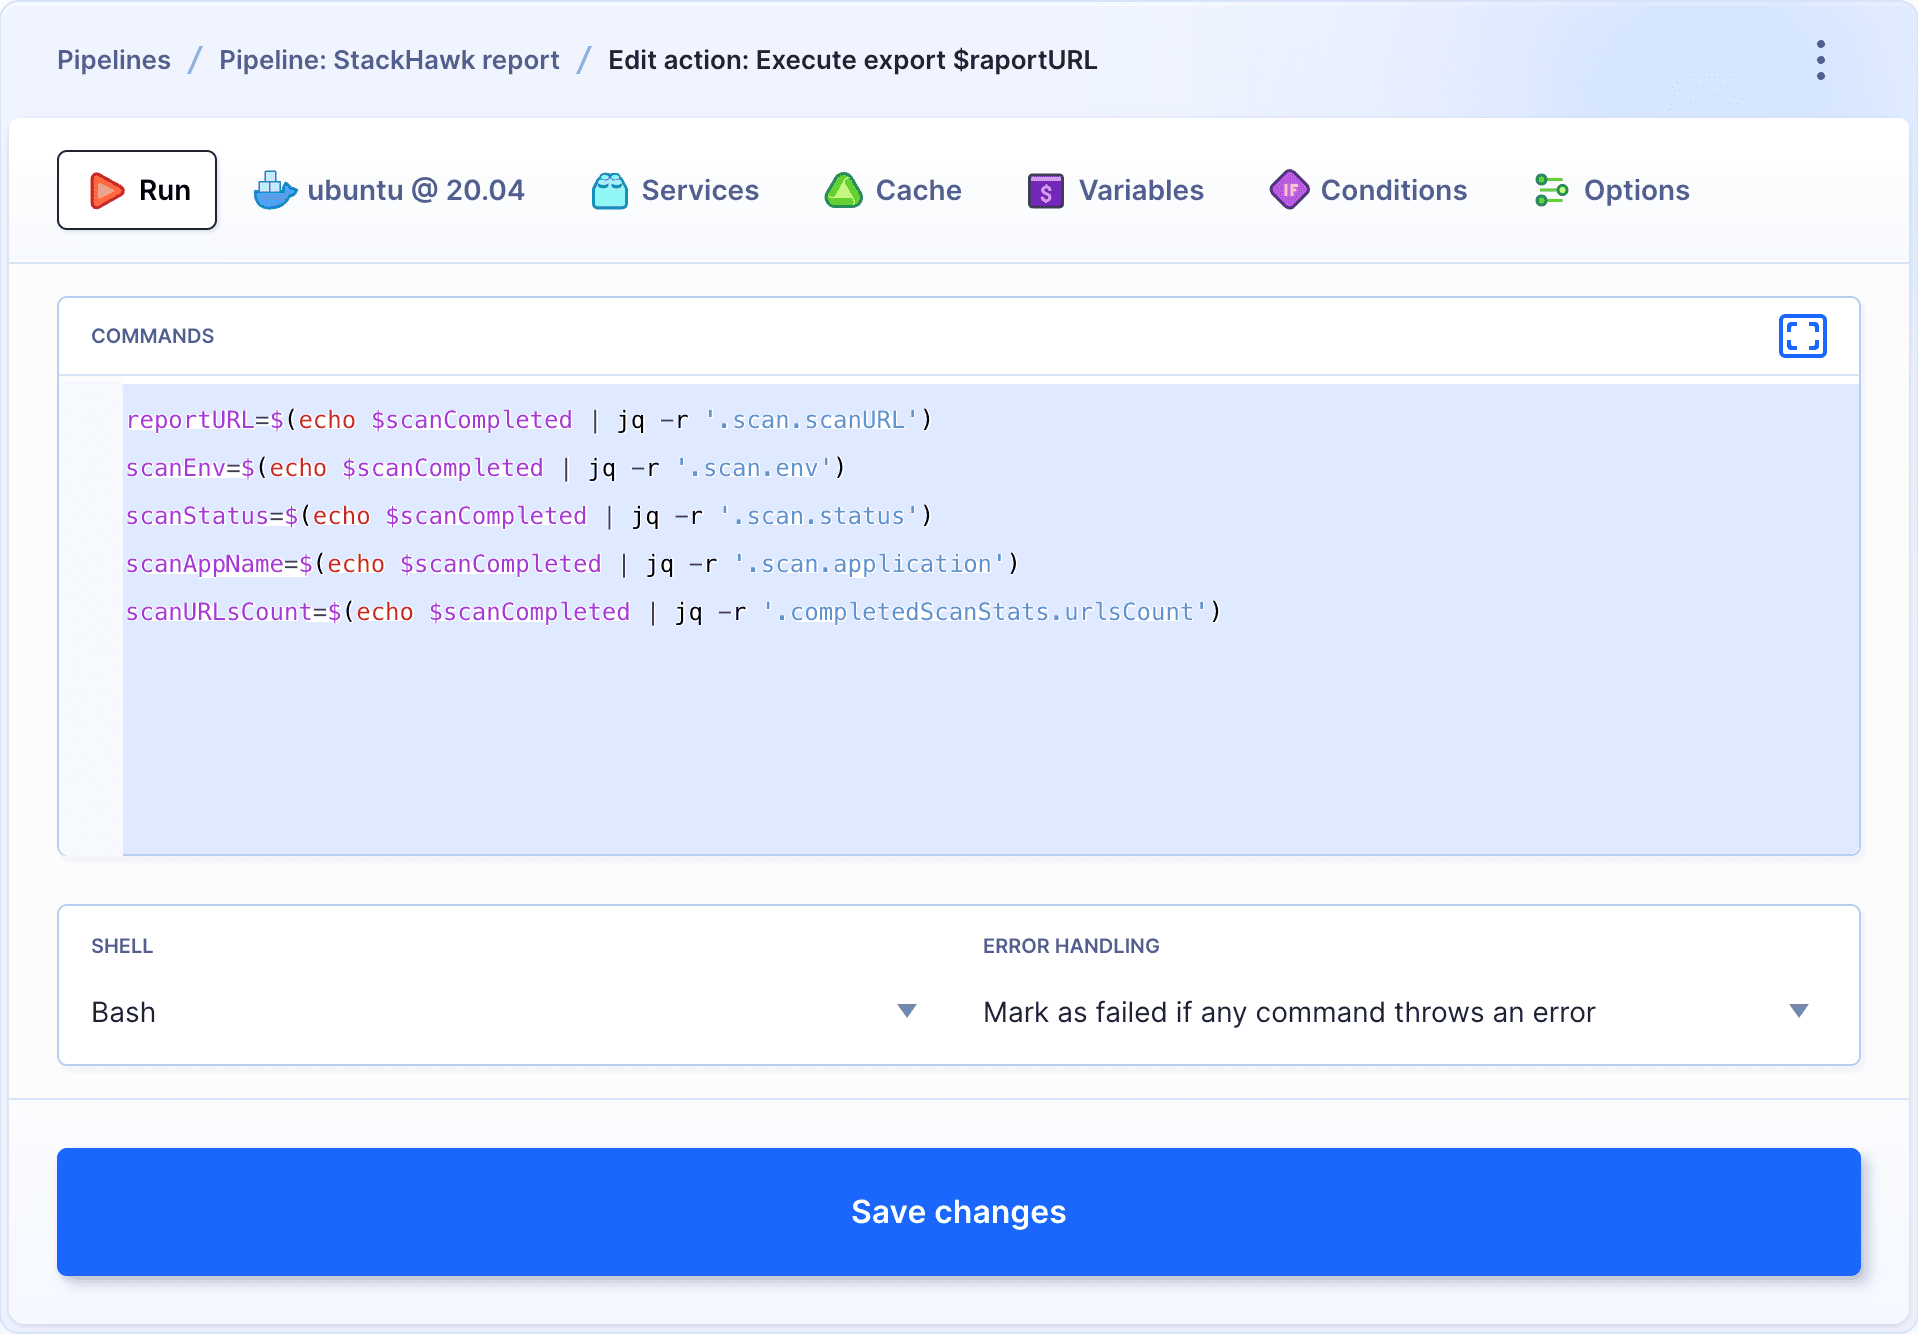
All variables must be added to the pipeline as settable so that Buddy can populate their values. This includes scanCompleted, the top-level key of the StackHawk payload that the webhook fills in, and the five variables from the script above. You can do it in the Variables tab:
Image loading...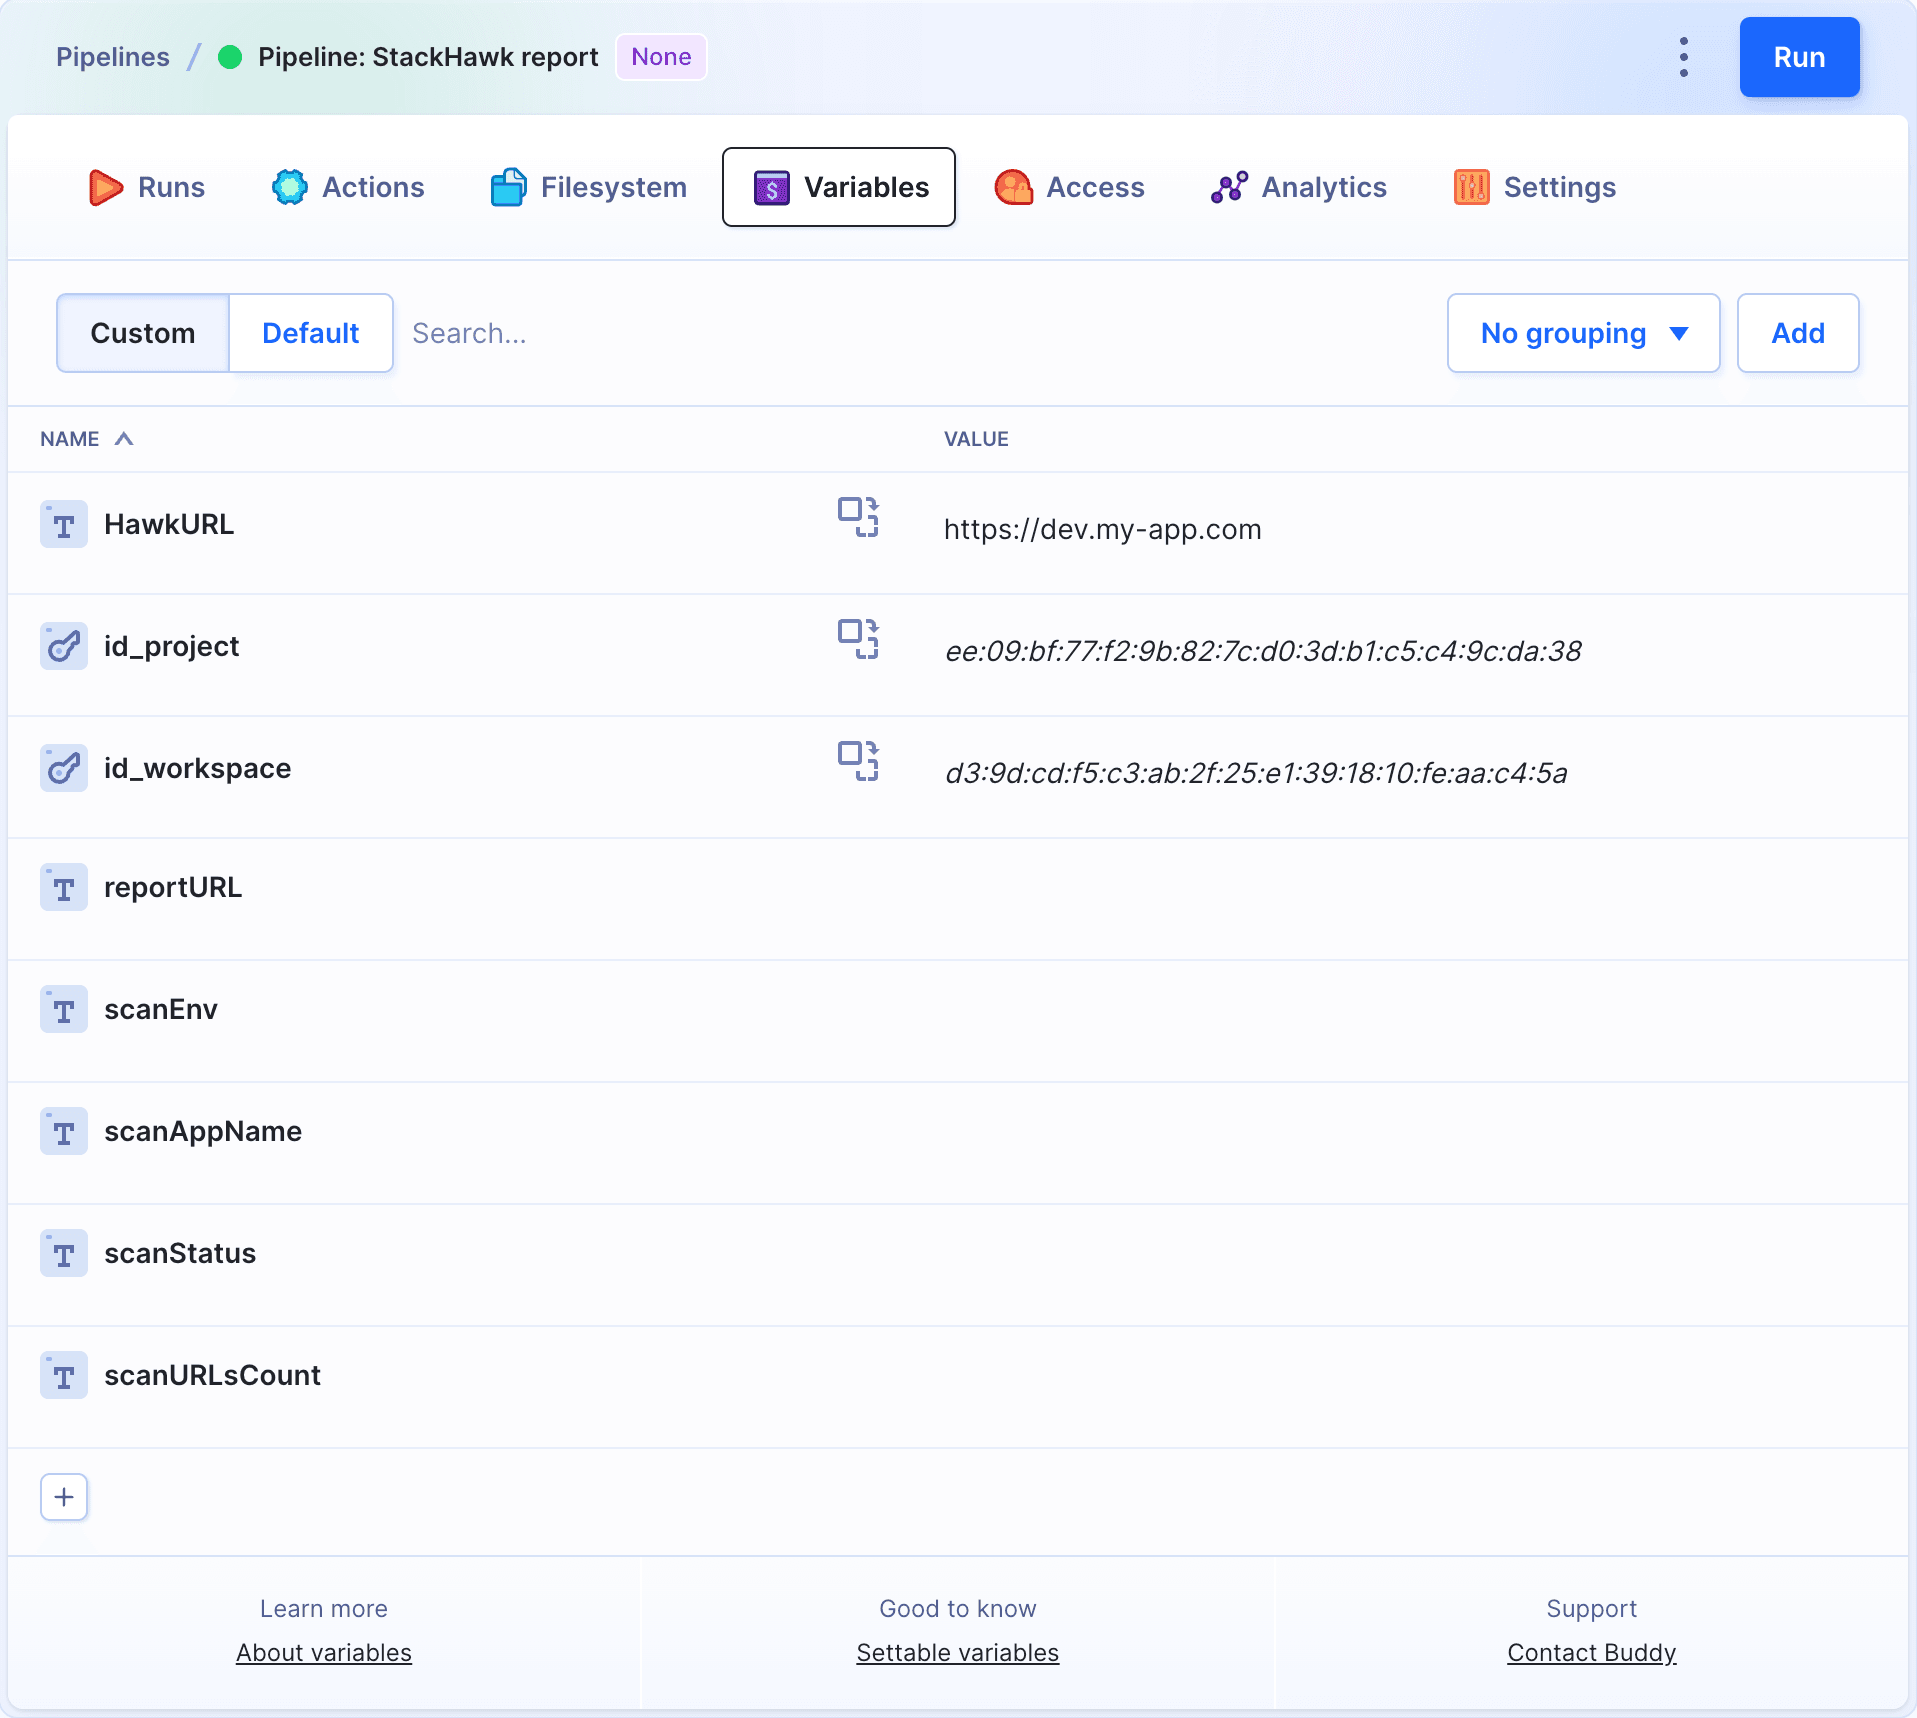
- Switch back to the Actions tab and add the messaging action. In this case, we're going to use Telegram:
Image loading...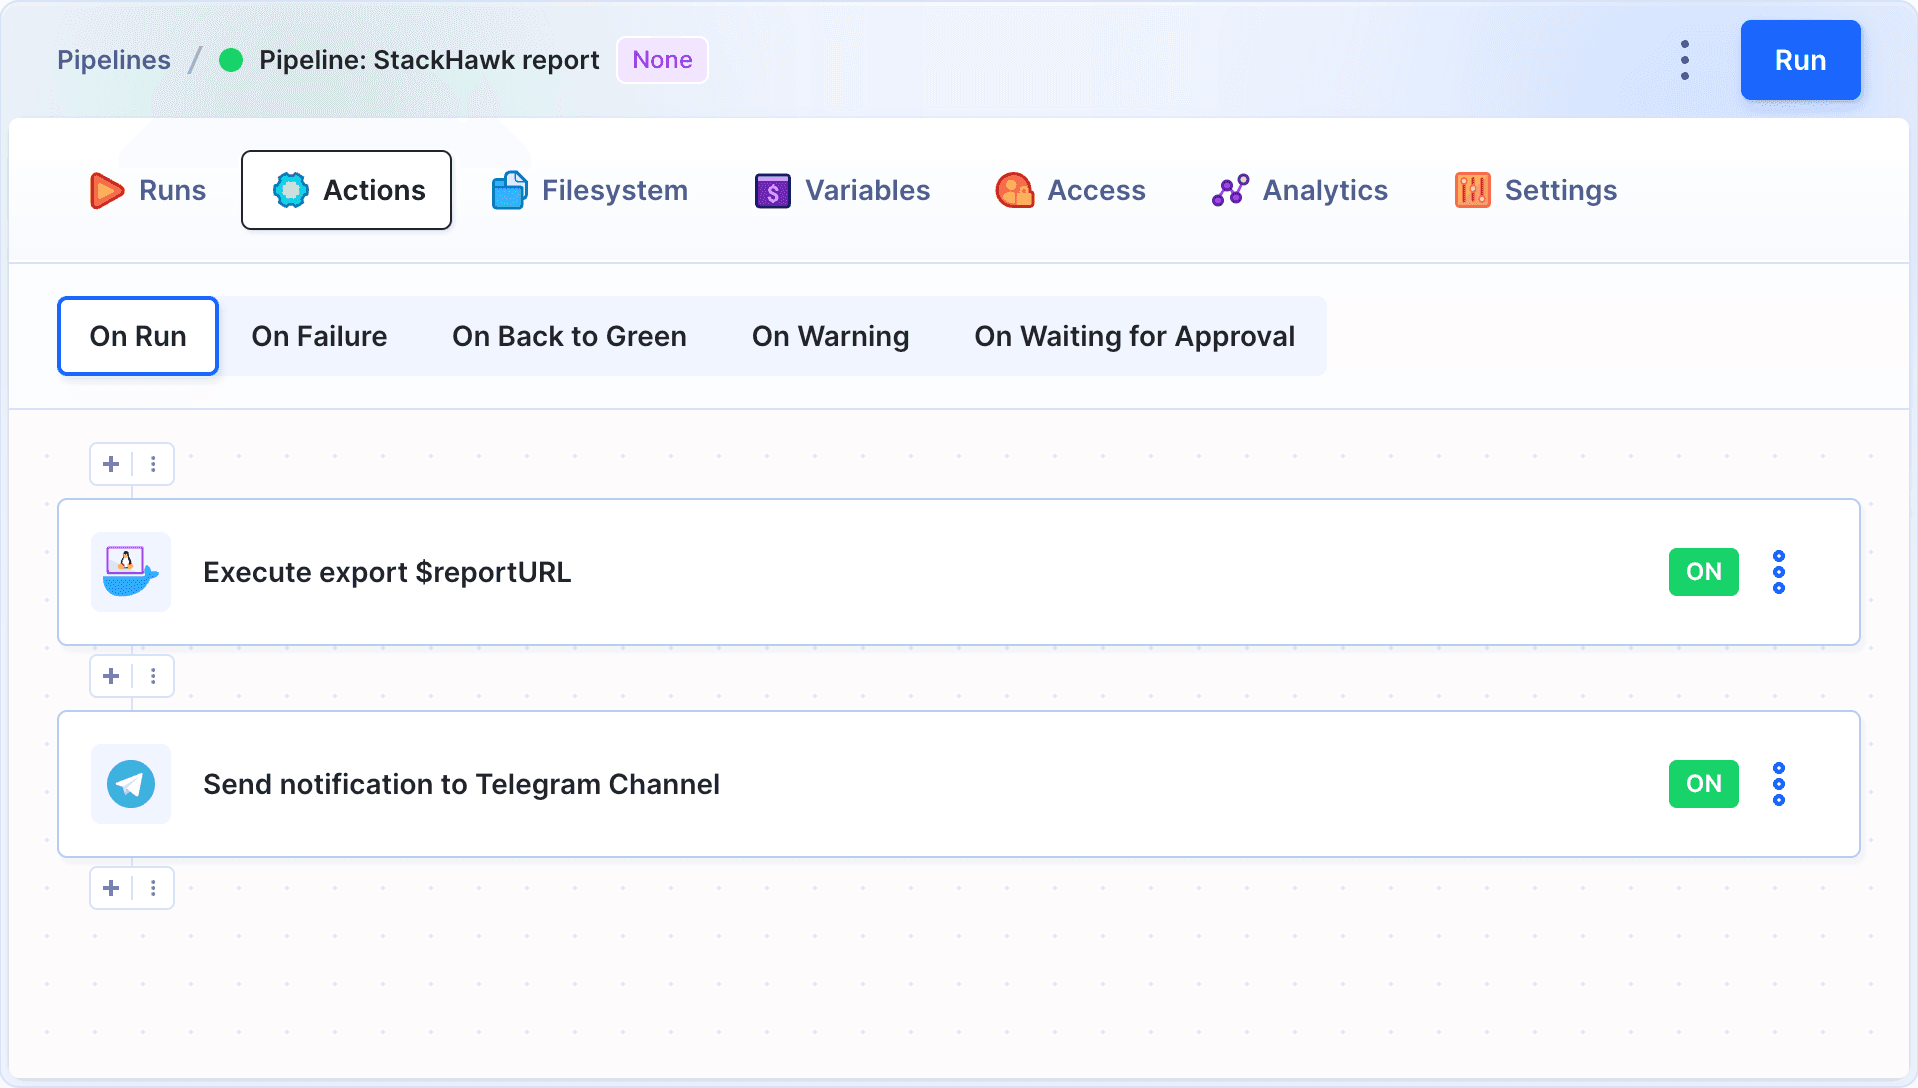
- In the action, select the target channel and paste the variables that you added before. Add some description to make the message clear. For example:
Status: $scanStatus
App name: $scanAppName | Env ID: $scanEnv
Scan URLs Count: $scanURLsCount
Report URL: $reportURL
Image loading...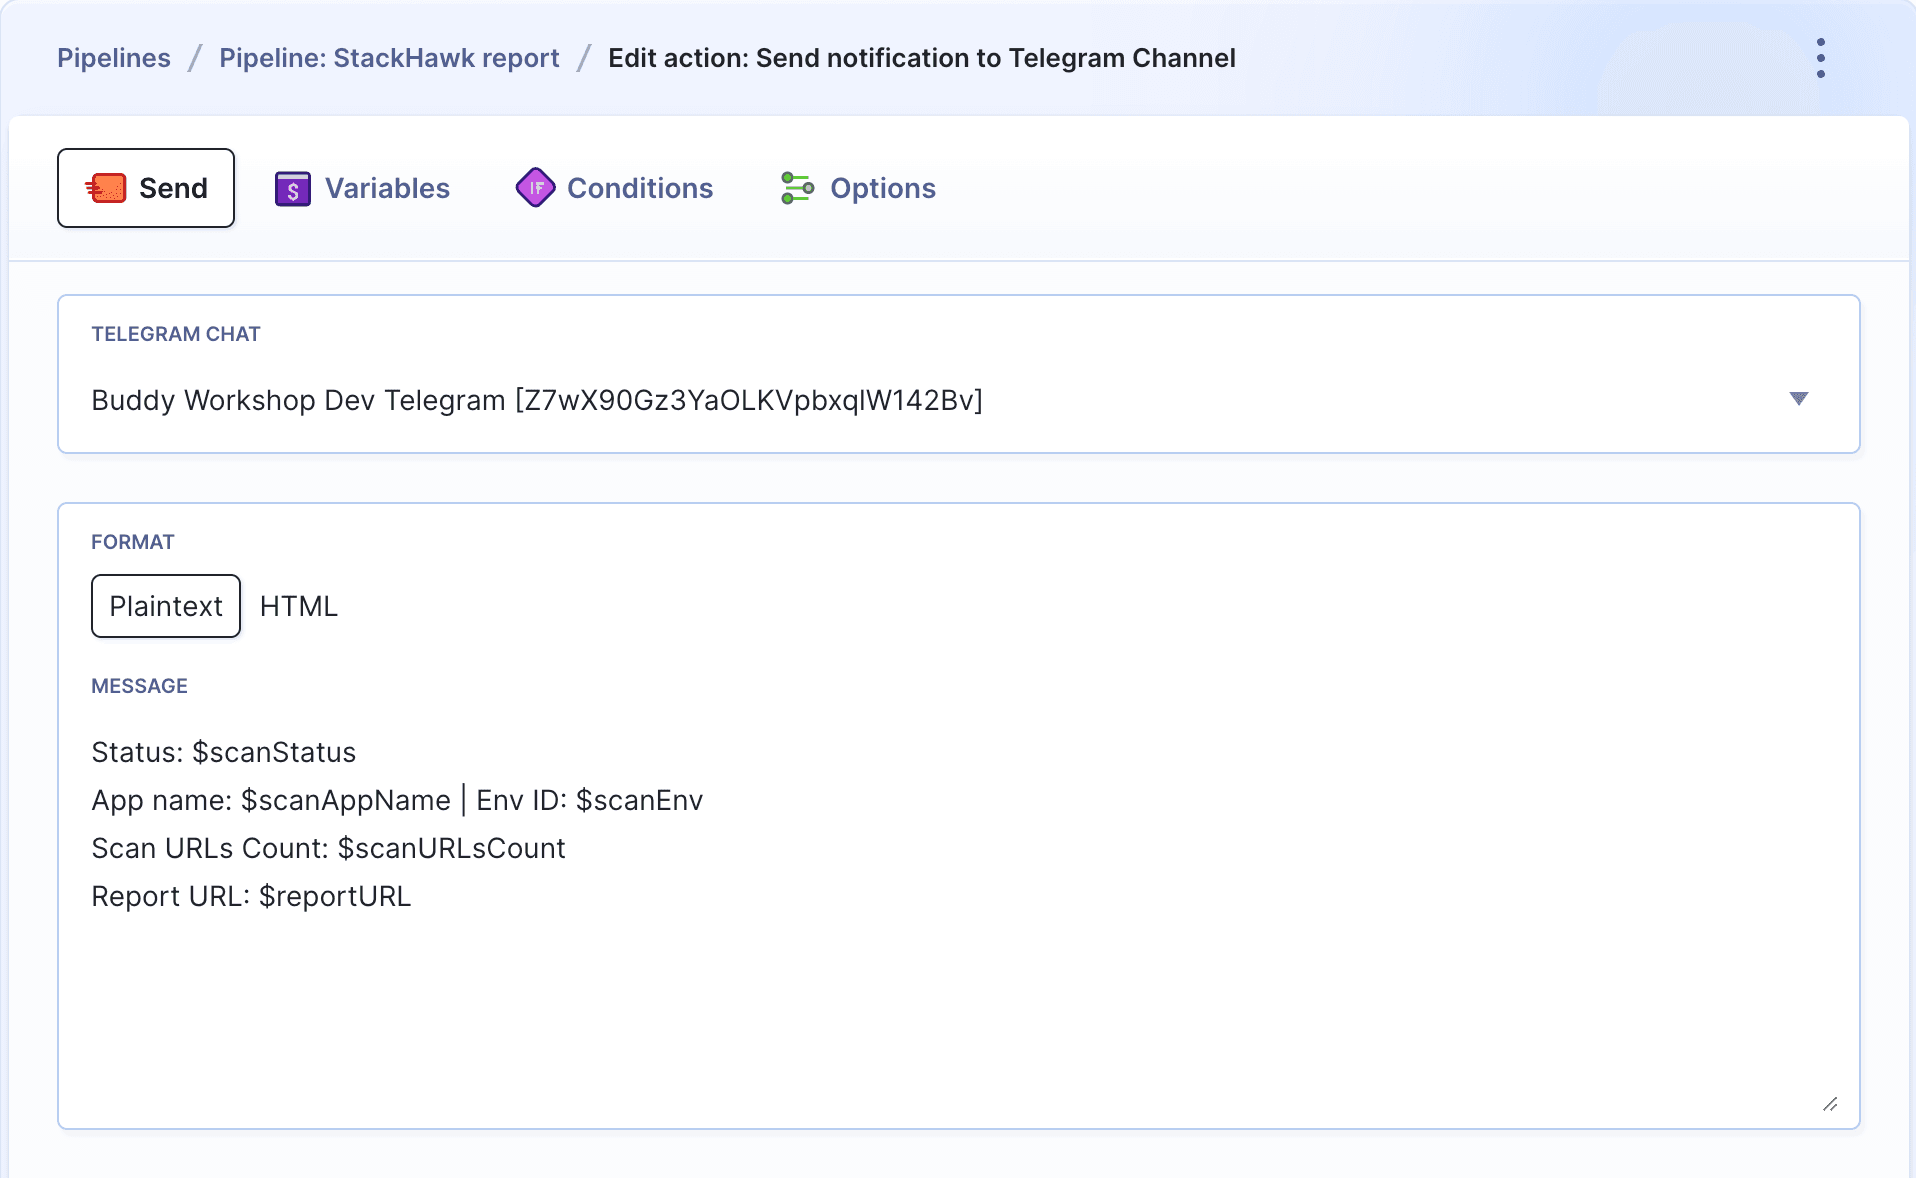
- With the pipeline configured, it's time to see if everything works as expected. Run the StackHawk pipeline to perform the tests. Once done, the webhook from StackHawk should trigger the second pipeline, populate the variables with scan results, and send everything to the selected Telegram channel:
Image loading...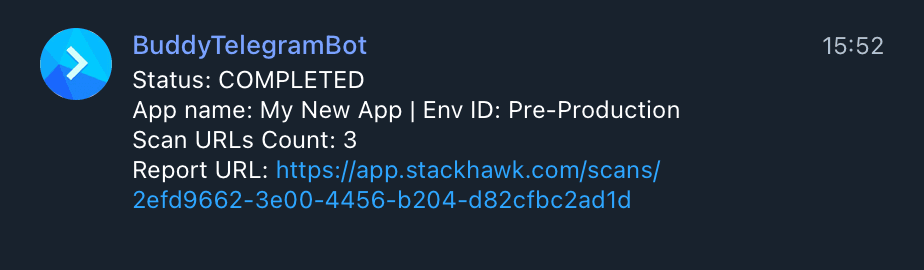
Image loading...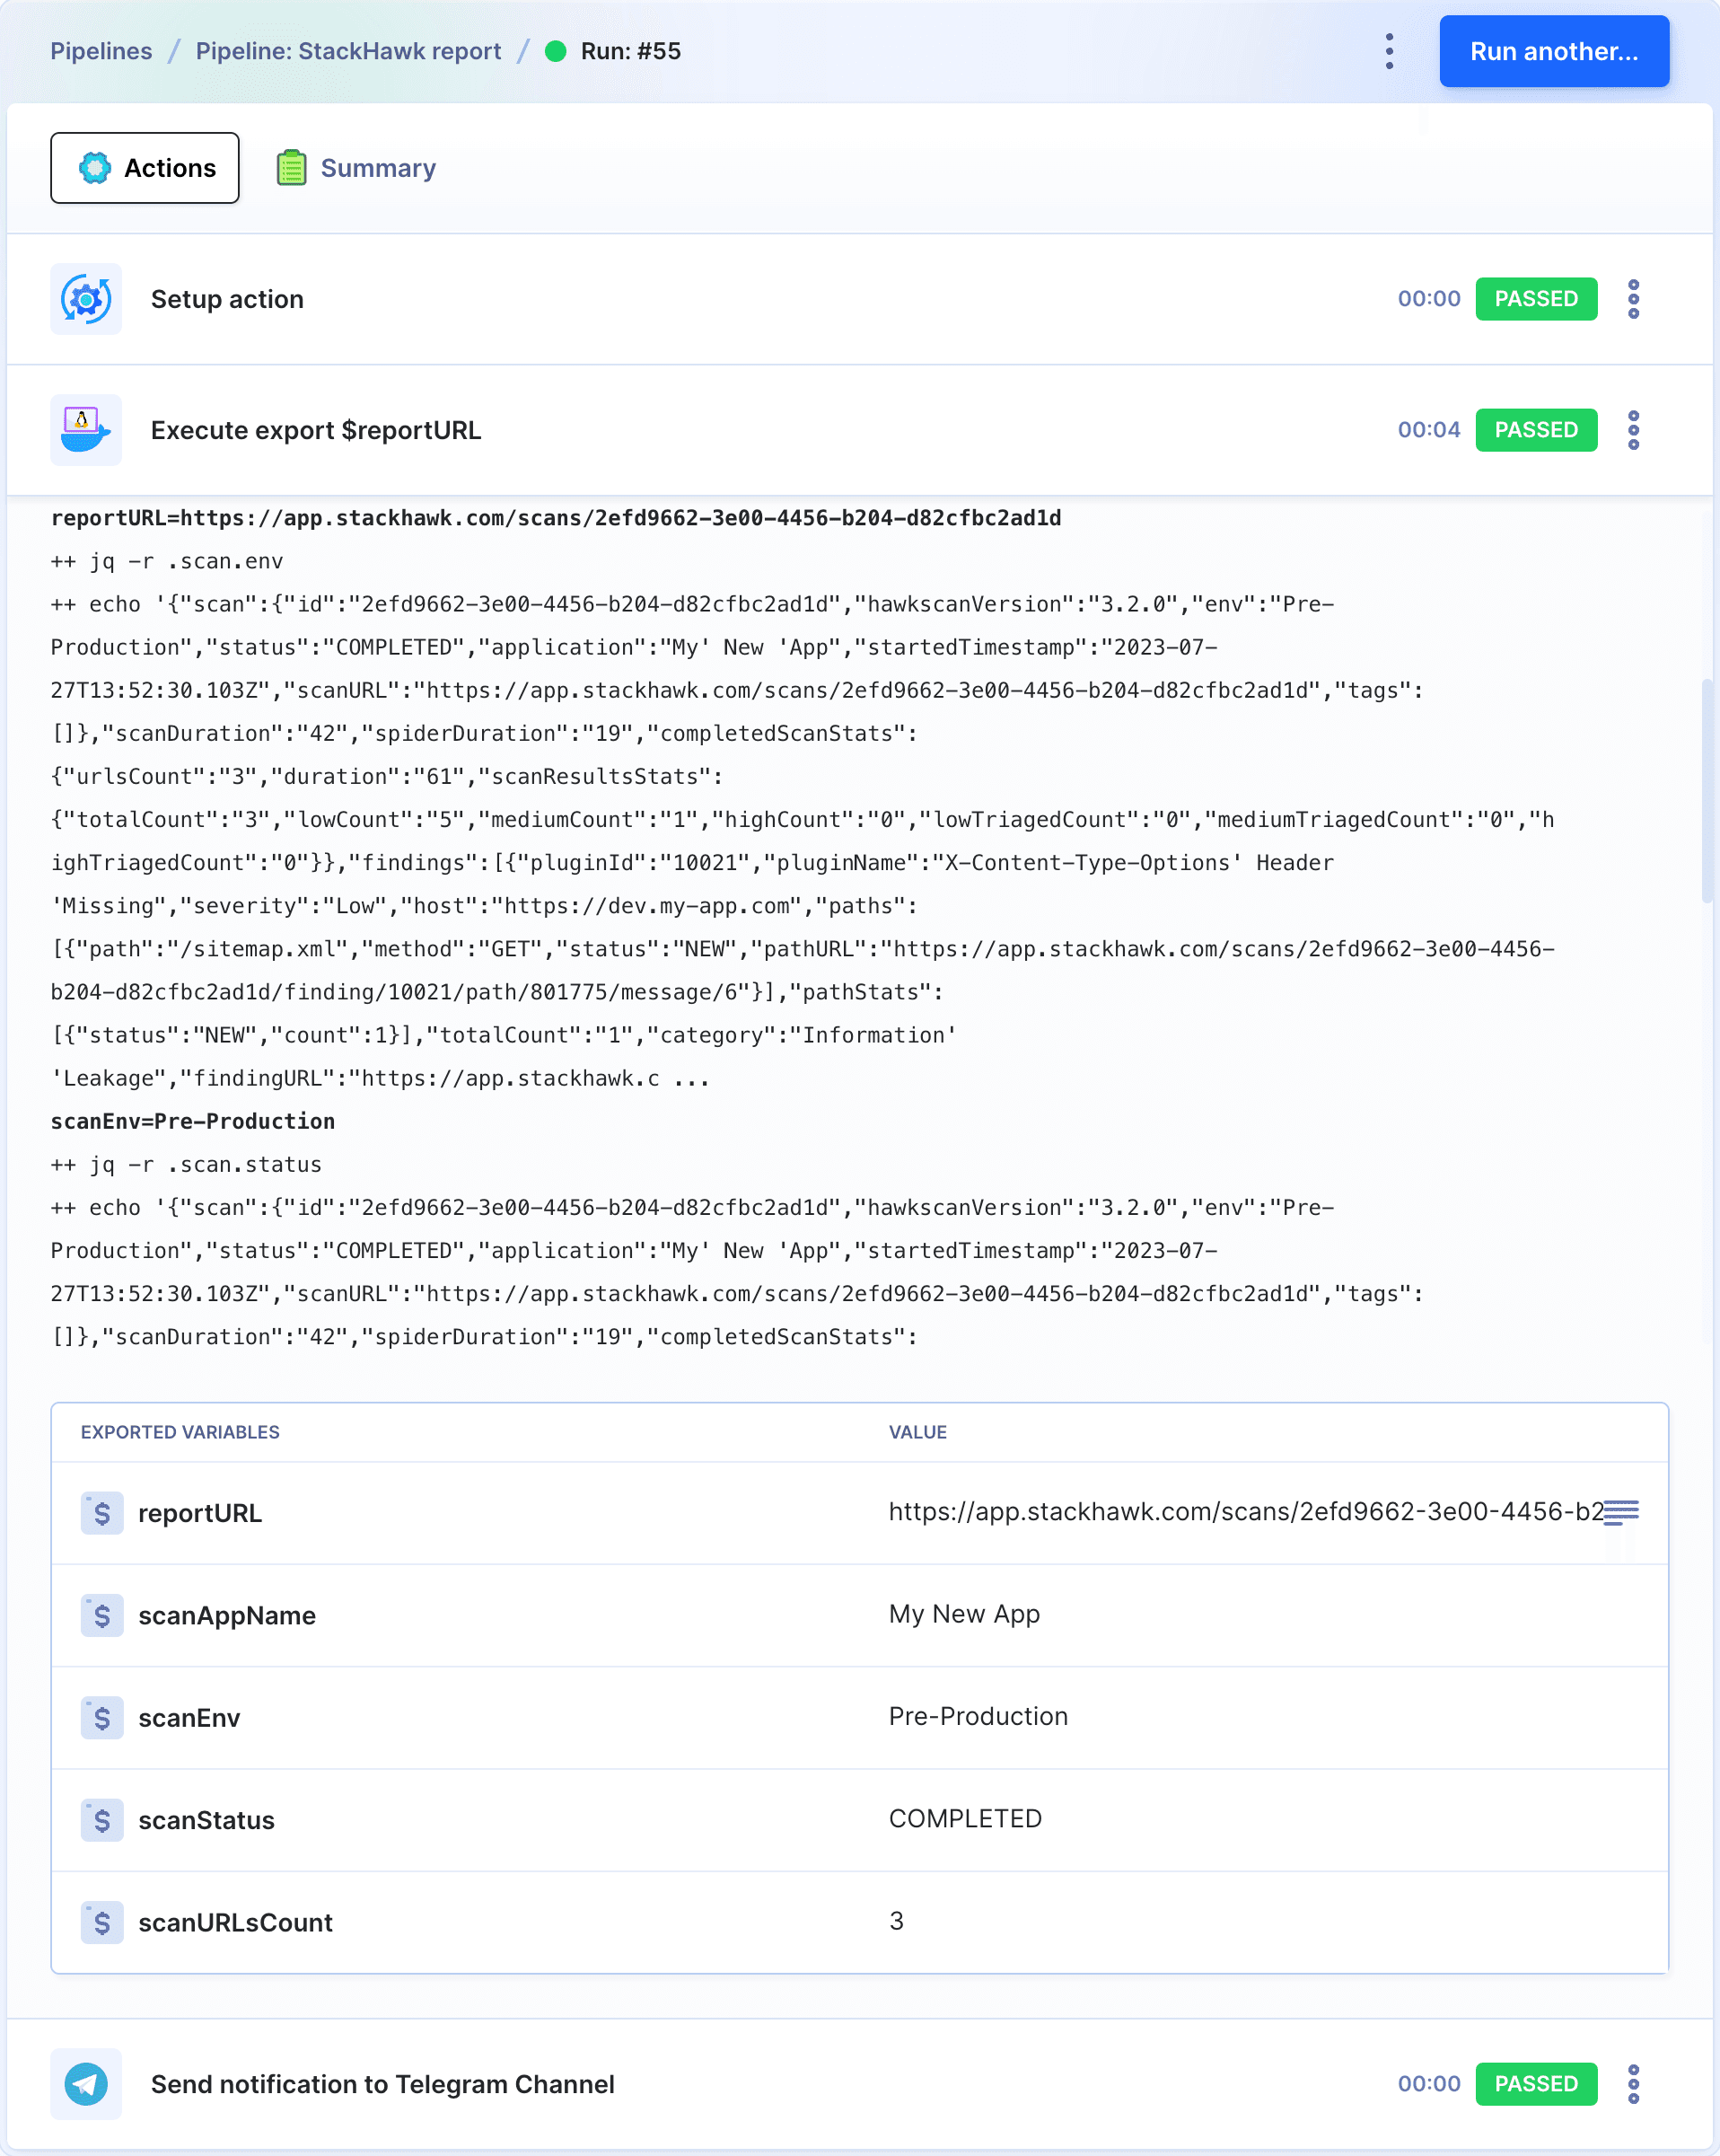
Congratulations - you have just taken StackHawk to the next level with Buddy!

Jarek Dylewski
Customer Support
A journalist and an SEO specialist trying to find himself in the unforgiving world of coders. Gamer, a non-fiction literature fan and obsessive carnivore. Jarek uses his talents to convert the programming lingo into a cohesive and approachable narration.