February 1, 2017 | Last updated: December 21, 2020
Share:

The idea of Continuous Delivery is to allow developers to build, run CI tests and release software faster and more frequently.
This tutorial will show you how to optimize your workflow so that your application is automatically tested and pushed to Heroku on every push to GitHub (or any other repositoy) Master branch using Buddy CI/CD. Please bear in mind you'll need a Heroku account with one empty application to use it in your Buddy pipeline.
Initializing version control for your project
First we need to import your project to Buddy and put it under version control. For this presentation we shall use a simple servlet-based Java web application.
- Create a new project, choose Buddy as the Git provider, use the Import ZIP archive option and paste the link to the Java project:
https://assets.buddy.works/guides/buddy-simple-java-project.zip
 Creating a new project
Contents of buddy-java-app.zip
The project is a simple Maven app that runs one servlet class and a trivial unit test suite: a perfect material for CD-based actions (build, test, deploy).
There are two config files inside the repository: pom.xml and procfile. You can switch to the Code tab and browse their contents if you like:
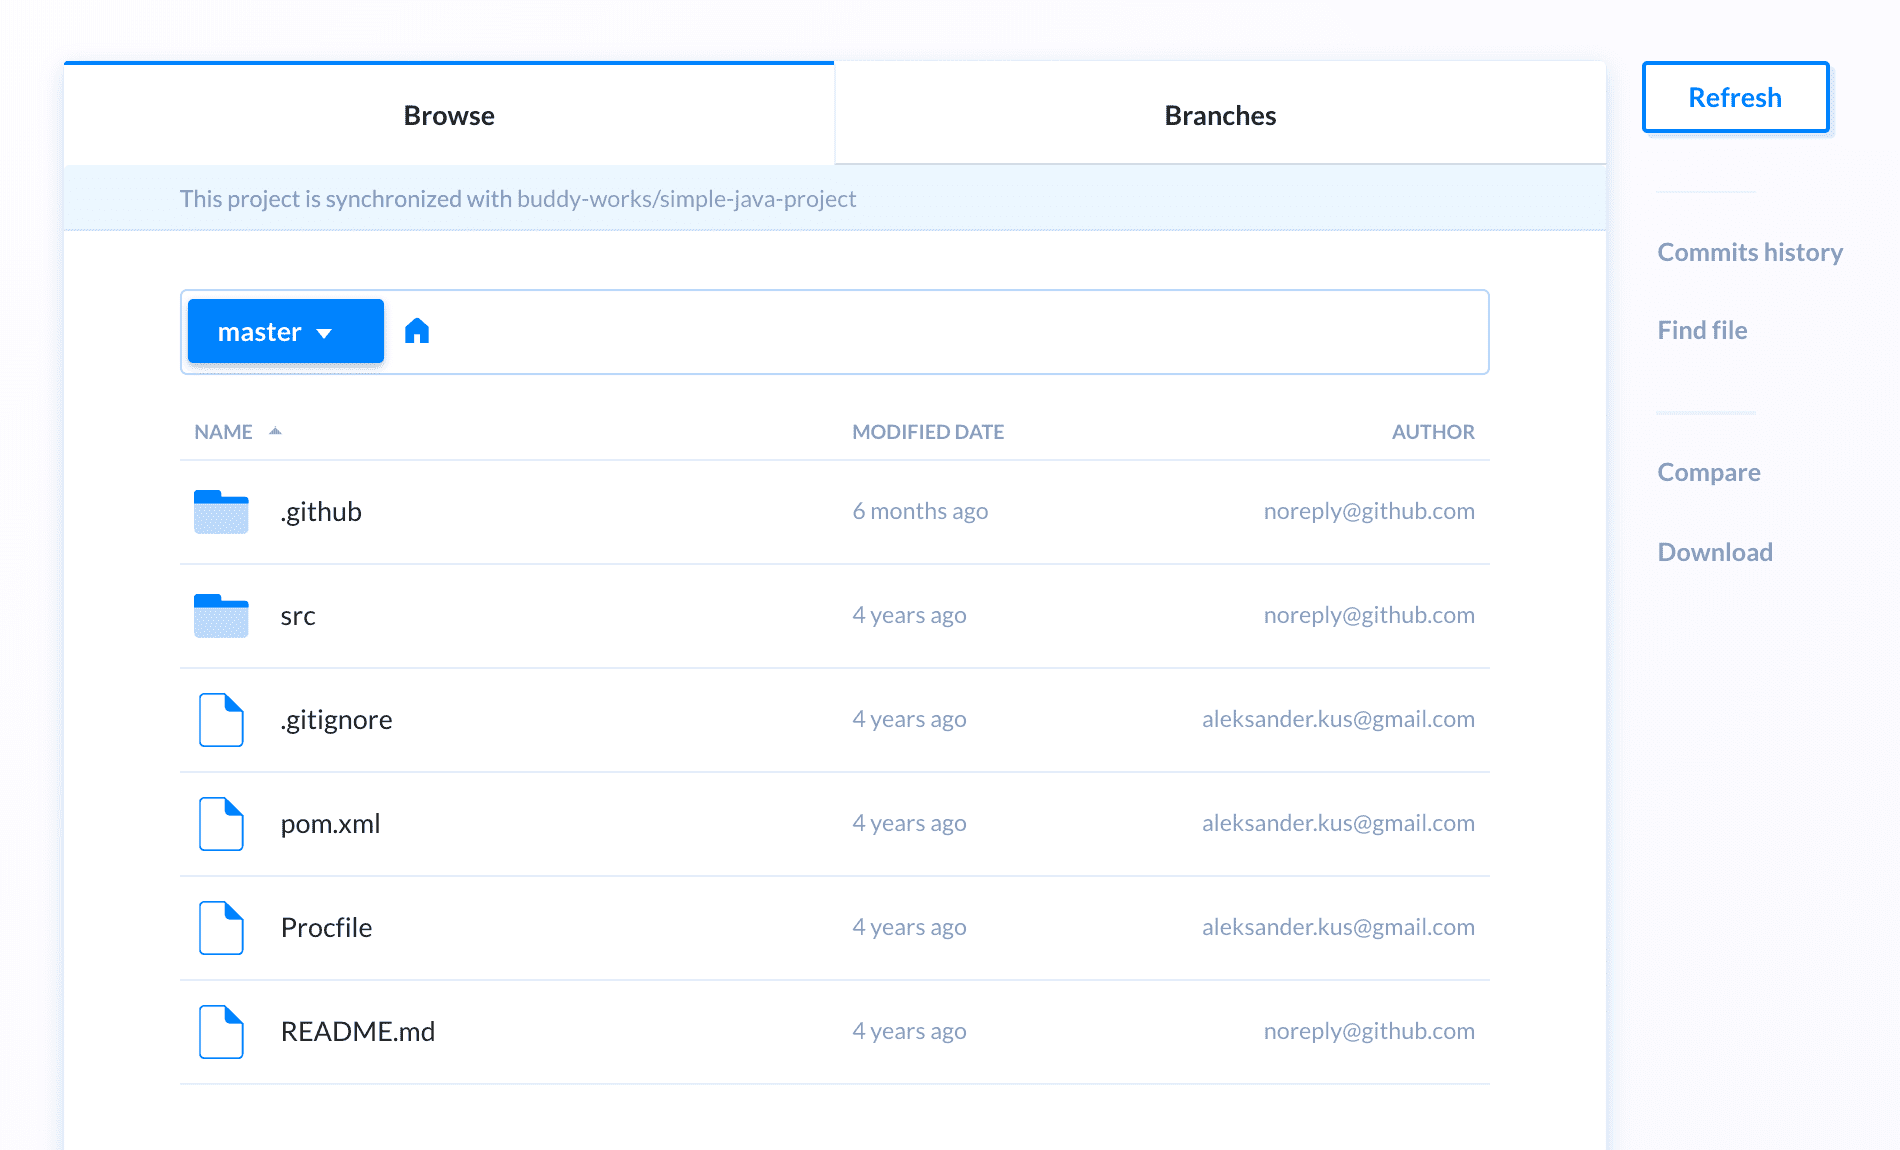 Browsing the repository
Here are the contens of
pom.xml:
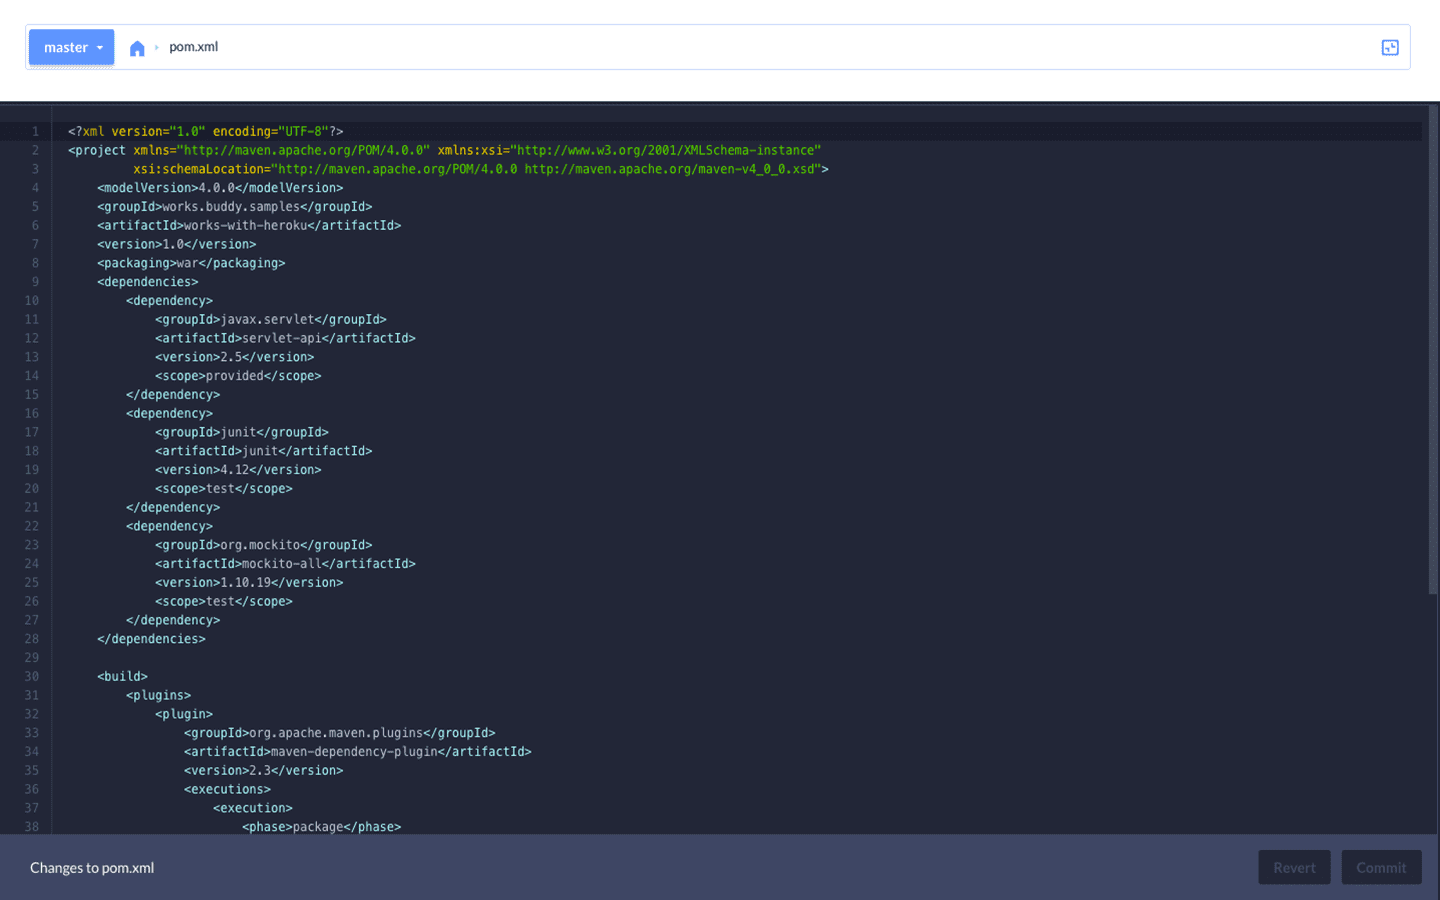<?xml version="1.0" encoding="UTF-8"?> <project xmlns="http://maven.apache.org/POM/4.0.0" xmlns:xsi="http://www.w3.org/2001/XMLSchema-instance" xsi:schemaLocation="http://maven.apache.org/POM/4.0.0 http://maven.apache.org/maven-v4_0_0.xsd"> <modelVersion>4.0.0</modelVersion> <groupId>works.buddy.samples</groupId> <artifactId>works-with-heroku</artifactId> <version>1.0</version> <packaging>war</packaging> <dependencies> <dependency> <groupId>javax.servlet</groupId> <artifactId>servlet-api</artifactId> <version>2.5</version> <scope>provided</scope> </dependency> <dependency> <groupId>junit</groupId> <artifactId>junit</artifactId> <version>4.12</version> <scope>test</scope> </dependency> <dependency> <groupId>org.mockito</groupId> <artifactId>mockito-all</artifactId> <version>1.10.19</version> <scope>test</scope> </dependency> </dependencies> <build> <plugins> <plugin> <groupId>org.apache.maven.plugins</groupId> <artifactId>maven-dependency-plugin</artifactId> <version>2.3</version> <executions> <execution> <phase>package</phase> <goals> <goal>copy</goal> </goals> <configuration> <artifactItems> <artifactItem> <groupId>org.eclipse.jetty</groupId> <artifactId>jetty-runner</artifactId> <version>9.3.3.v20150827</version> <destFileName>jetty-runner.jar</destFileName> </artifactItem> </artifactItems> </configuration> </execution> </executions> </plugin> </plugins> </build> </project>The second file,
Procfile, is the place where we inform Heroku of our deployment process:web: java $JAVA_OPTS -jar target/dependency/jetty-runner.jar --port $PORT target/*.war
Setting up delivery pipeline
Pipelines are series of actions that visualize your delivery workflow. In this case we'll create a pipeline that will test and push your app to Heroku.
- Create a new Pipeline, switch the trigger mode to On every push, and select Master as the triggering branch:
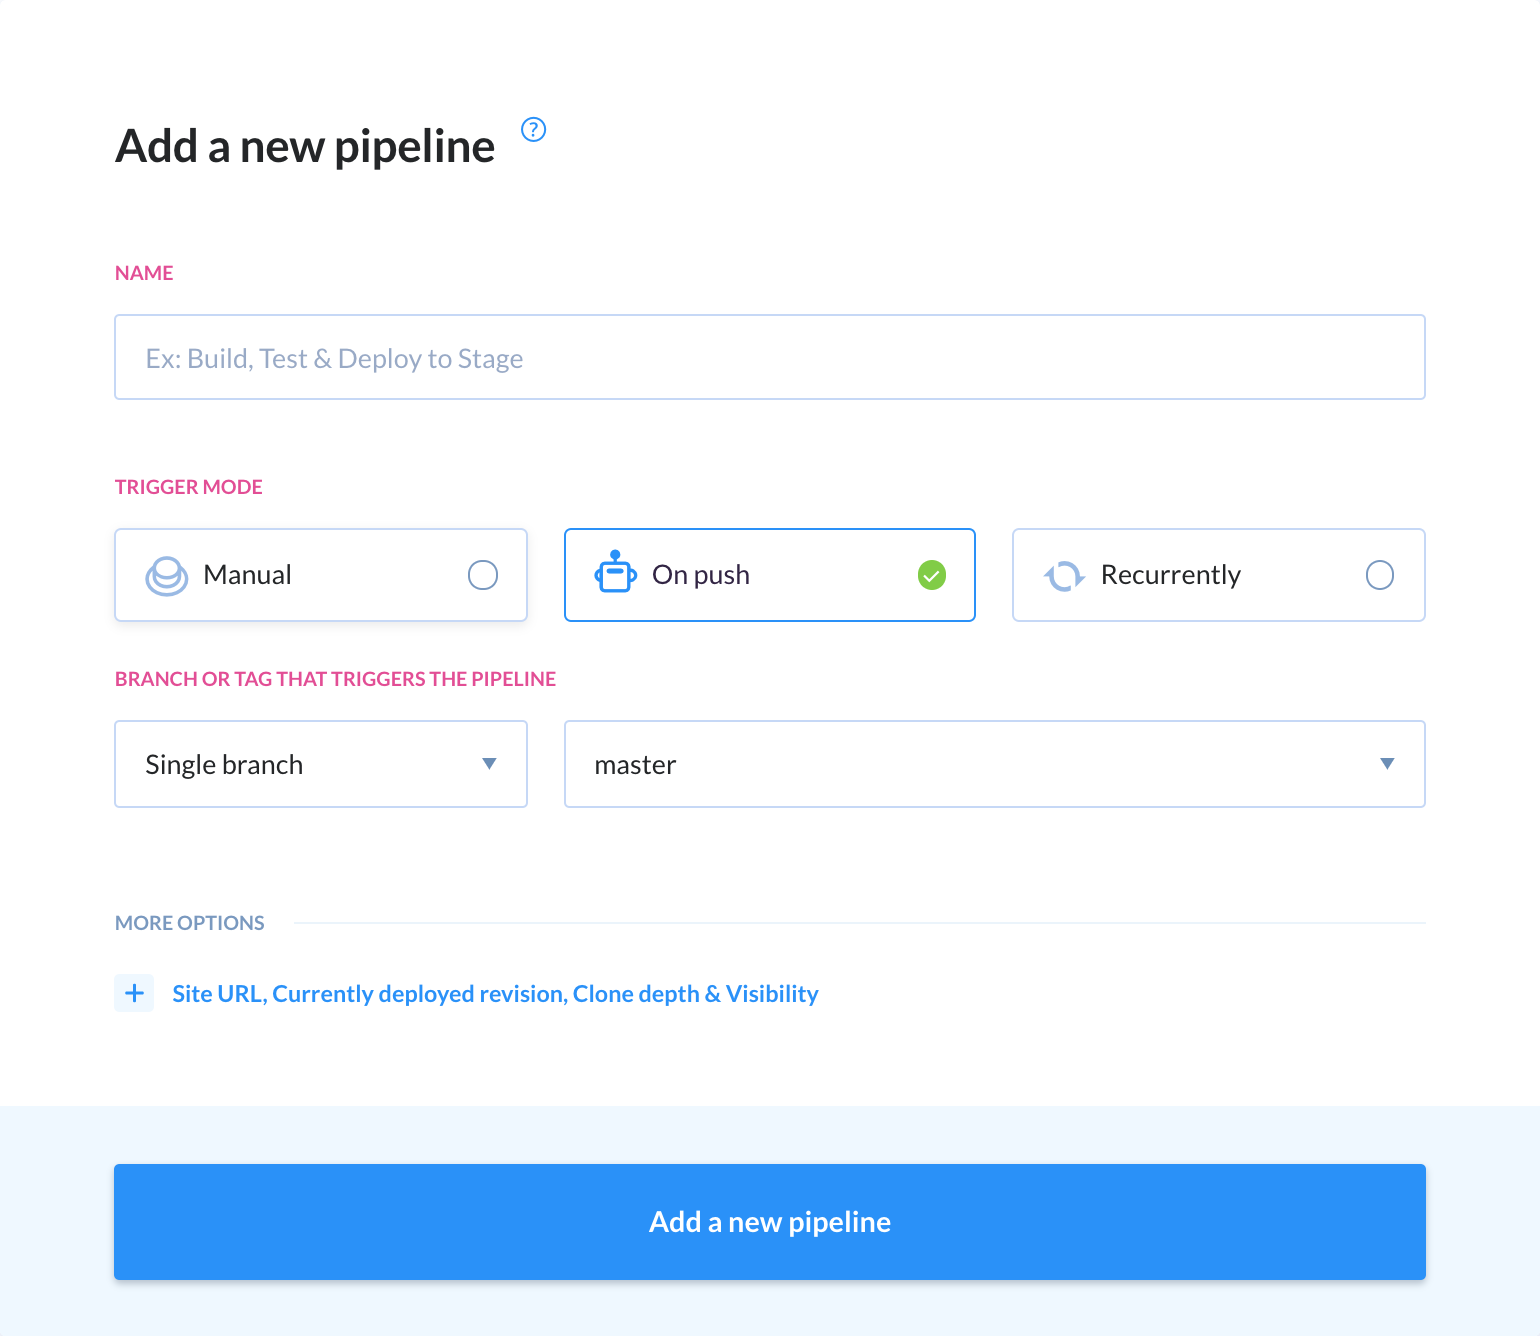 Setting a new delivery pipeline
Step 1: Configuring Maven tests
The core idea of Continuous Integration is to test your app before deploying it to server. Buddy runs tests in Docker-based containers, allowing you to maintain one consistent environment for all users in the workspace:
- Add Maven as the first action in the pipeline. You can change the Docker image to a different version in the Environment tab and add more run commands in the action settings if you need:
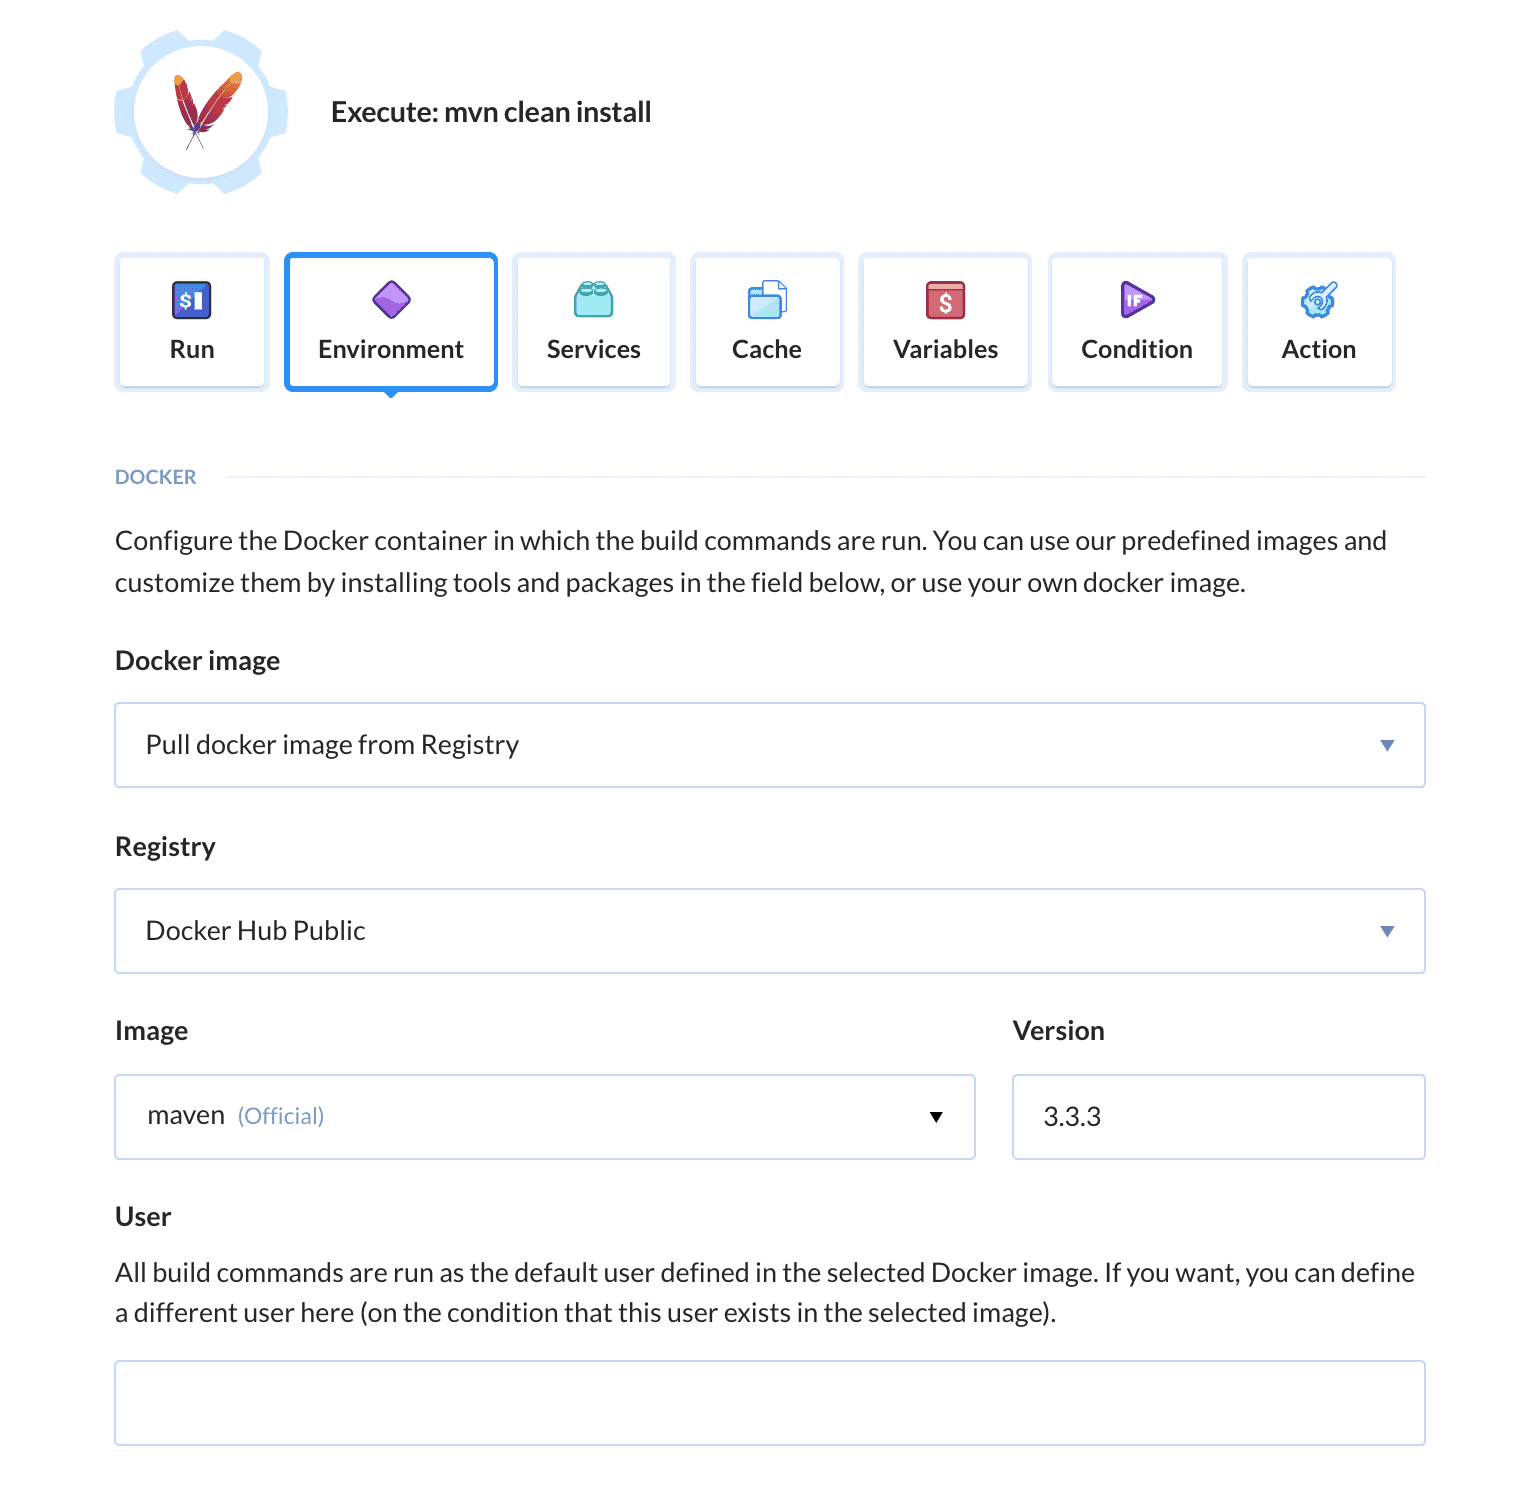 Configuring Maven
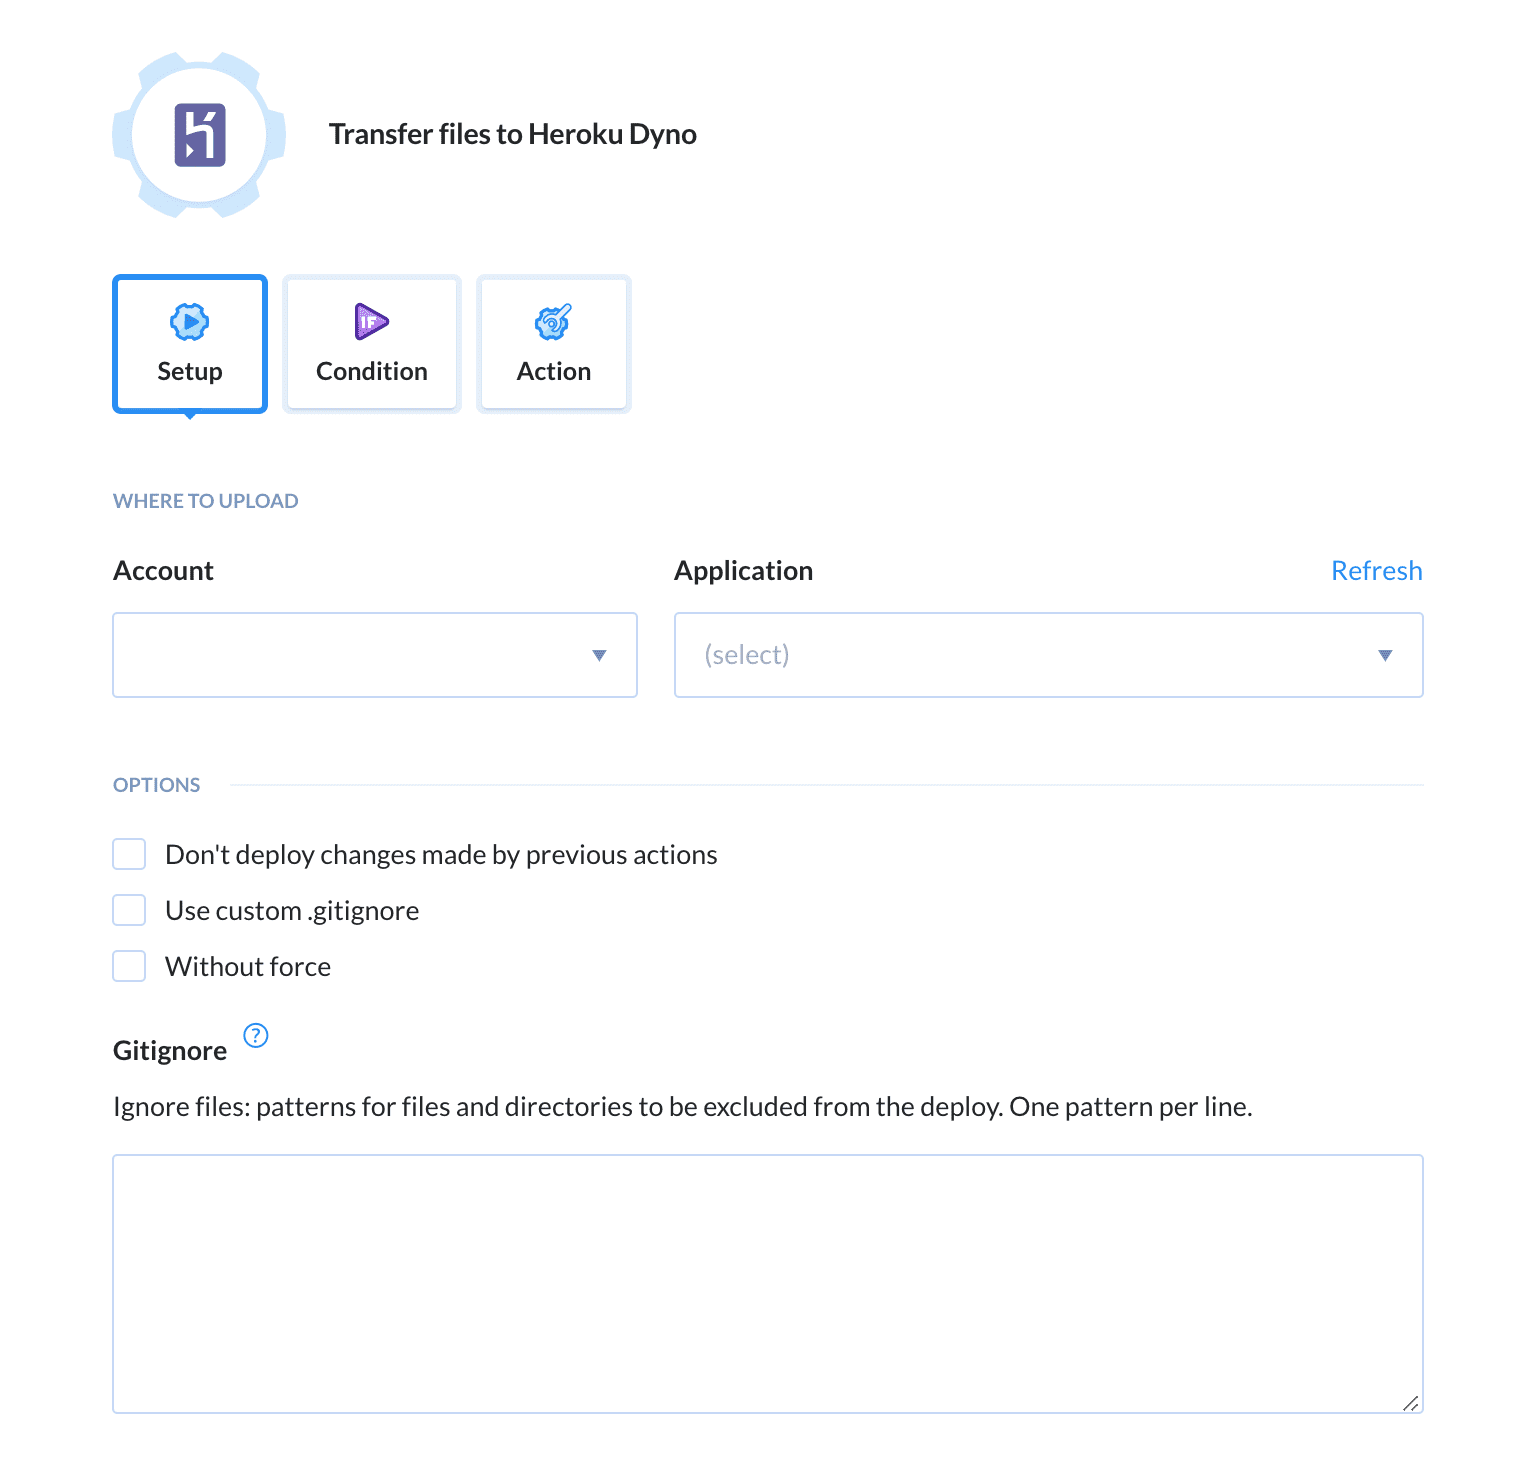
Step 2: Configuring deployment to Heroku
Once your app is tested, you can use a transfer action to deploy it to the target location:
- Click the plus icon to add another action, select deploy to Heroku, and choose the Heroku app to which you want to push the build.
 Adding Heroku Deployment
Step 3: Executing pipeline in Buddy
The pipeline is all set. Click Run pipeline to execute it:
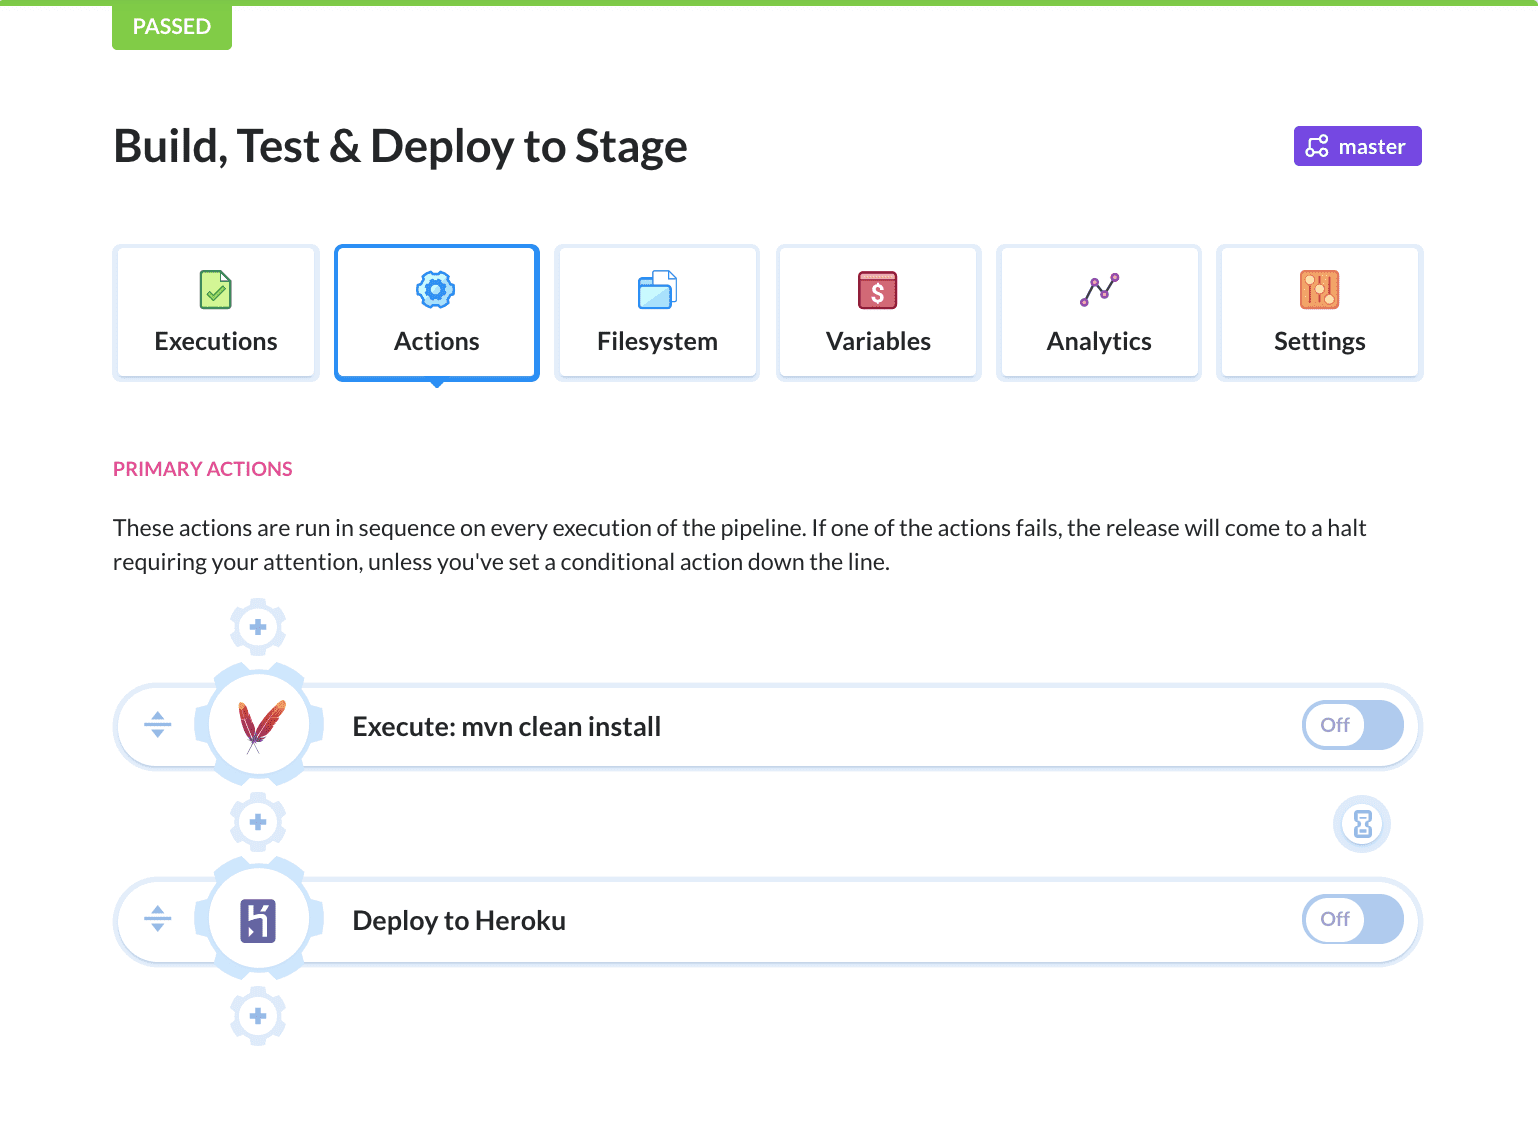 Executing a pipeline
Congratulations! You've successfully configured Buddy to automatically test and deploy your build to Heroku on every push to repository. You can add more actions to the pipeline to further automate your workflow, for example notification actions about failed builds, so that you can take action when needed.
Appendix: Running tests in Heroku
If you'd rather test your Java app with Heroku and use Buddy for deployment purposes only, you can do that, too. In this case you don't need to add the Maven action to the pipeline. However, by default Heroku doesn't run tests in Maven builds, so we need to fix that. All you need to do is:
- go to your Heroku app and switch to the Settings tab
- click Reveal Config Vars
set the KEY to
MAVEN_CUSTOM_OPTSand VALUE to-DskipTests=false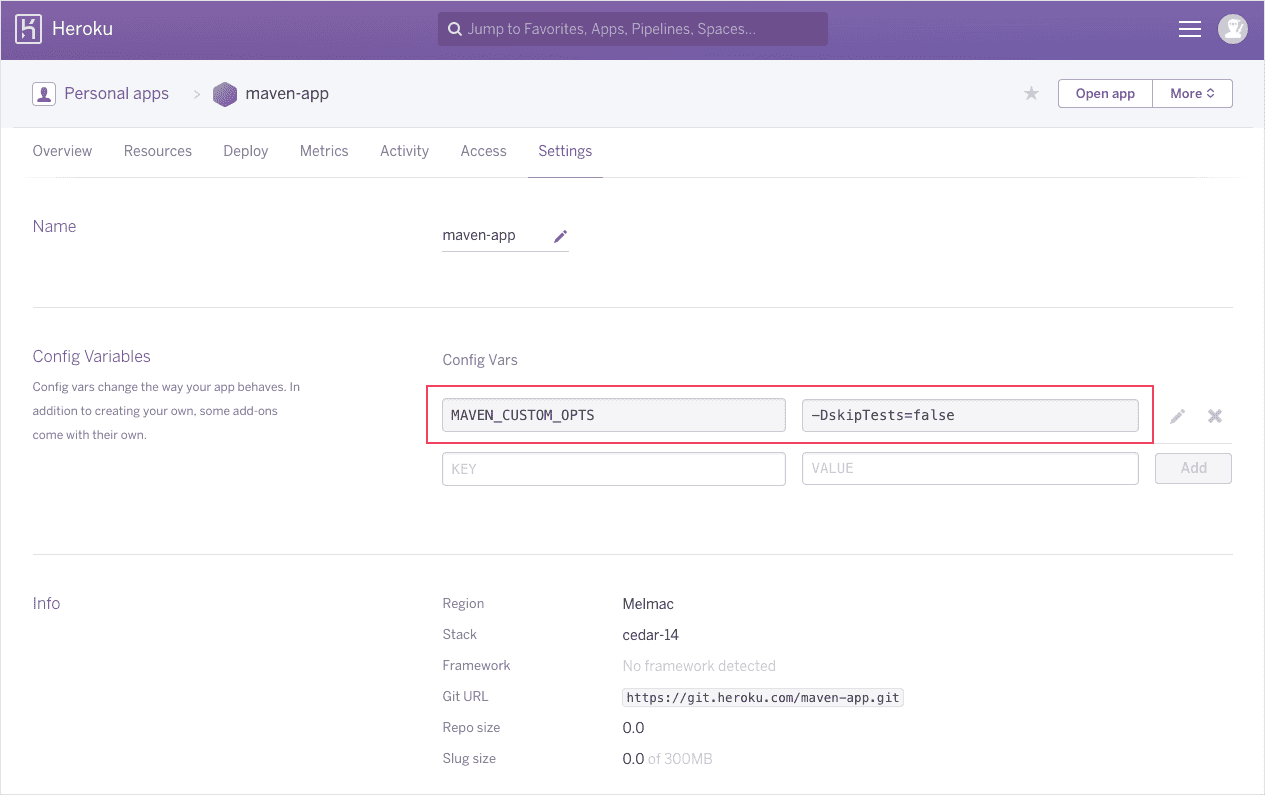 Setting config variables in the Heroku app
Et voila - the tests are now conducted in your Heroku app. If you'd like to learn how to further optimize your workflow using Buddy, drop a line to support@buddy.works - we'll be happy to assist!

Alexander Kus
Customer Success Manager
With Buddy even the most complicated CI/CD workflows take minutes to create
Sign up for Buddy CI/CD
Start a free trial