Azure SAML
Follow these steps to add Azure as the SAML SSO provider for your workspace:
- Open Buddy SSO settings in one browser tab and switch to SAML → Azure.
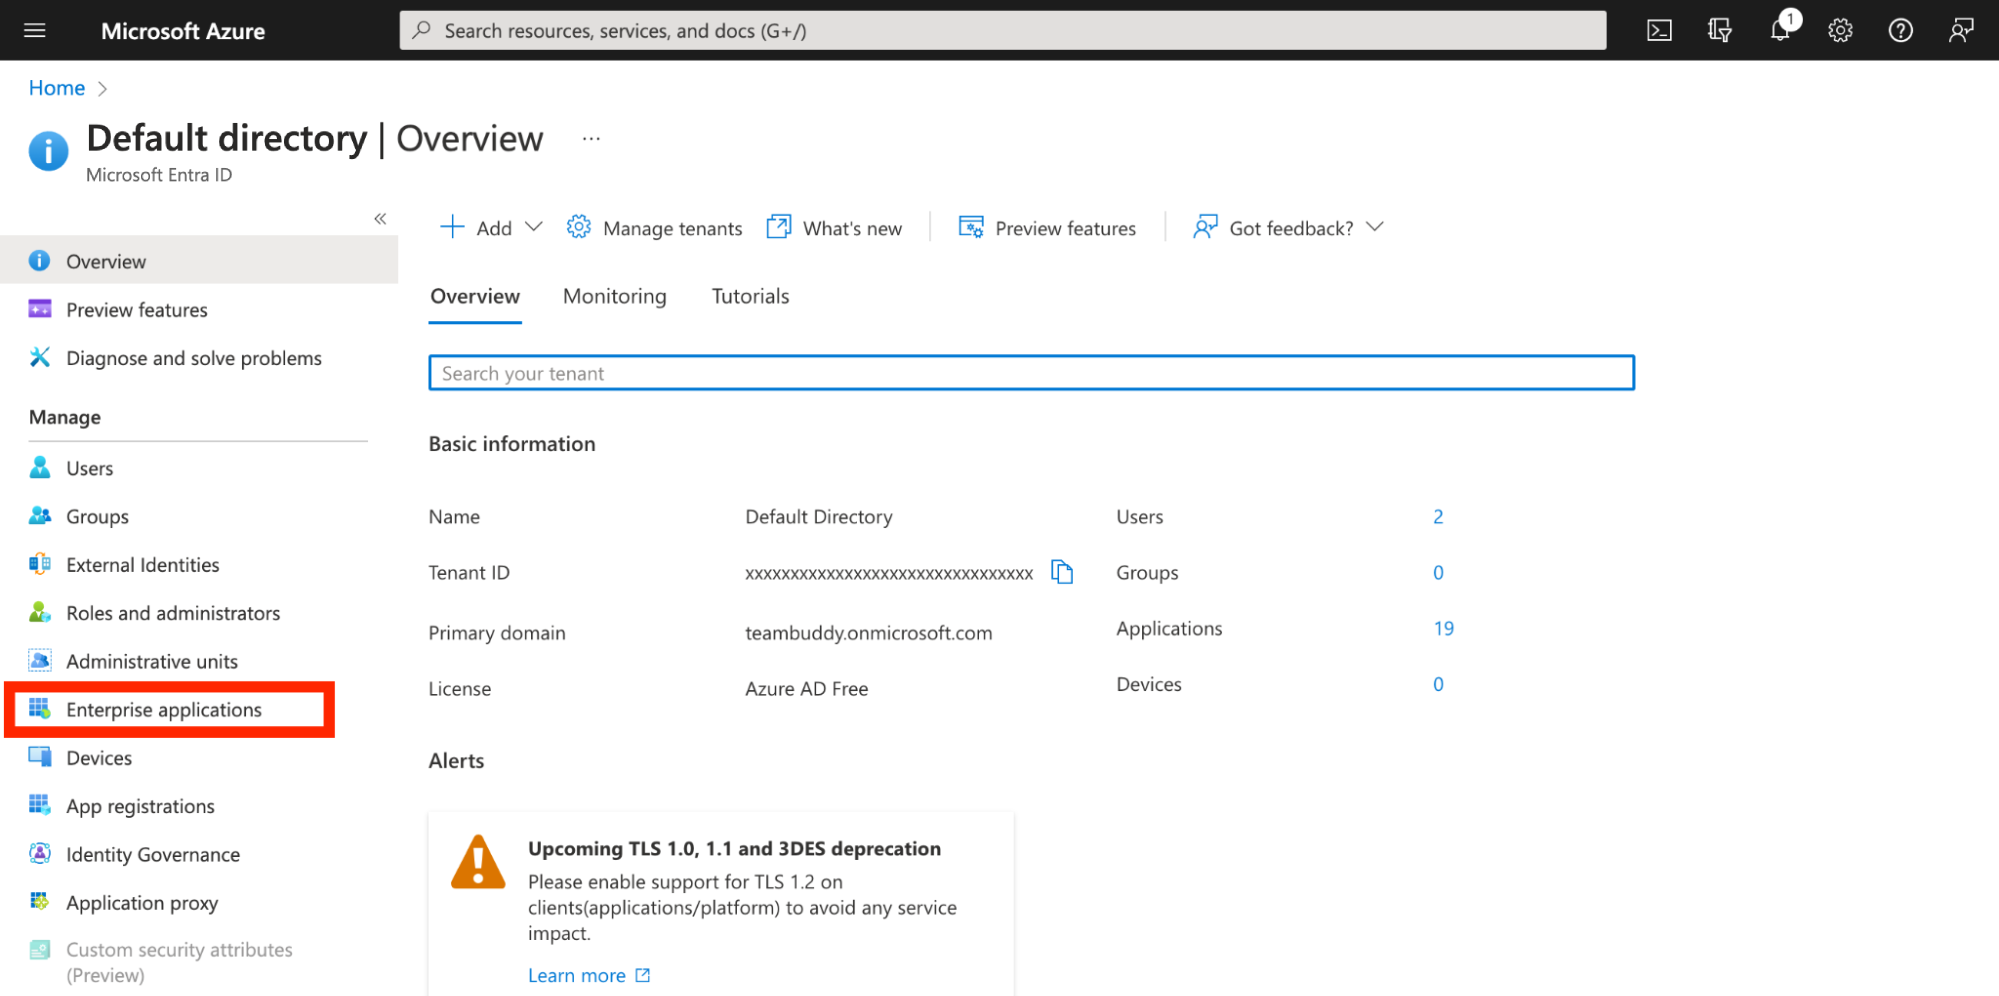
- In another tab, sign in to Azure and open Microsoft Entra ID:

- From the left navigation, select Enterprise Applications:

- Click the +New application button:

- Click +Create your own application, define the app name, and click Create:

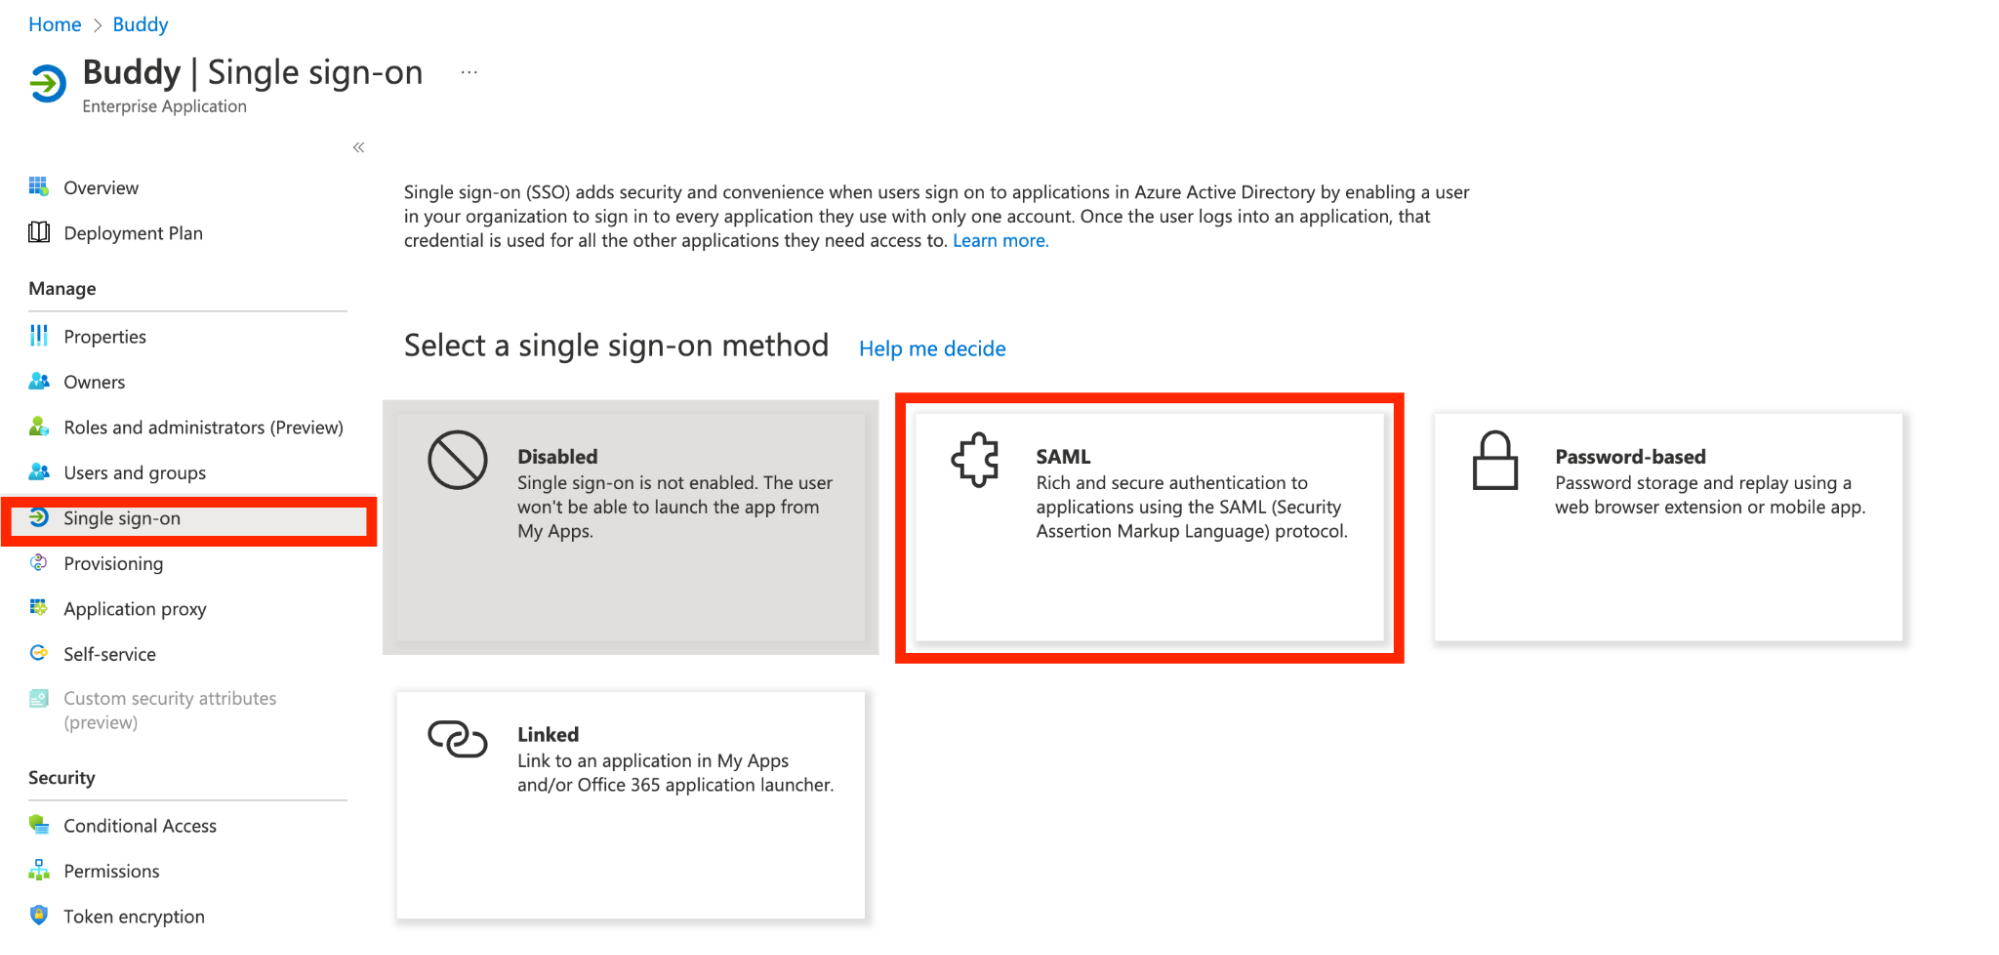
- Go to Single sign-on and select SAML:

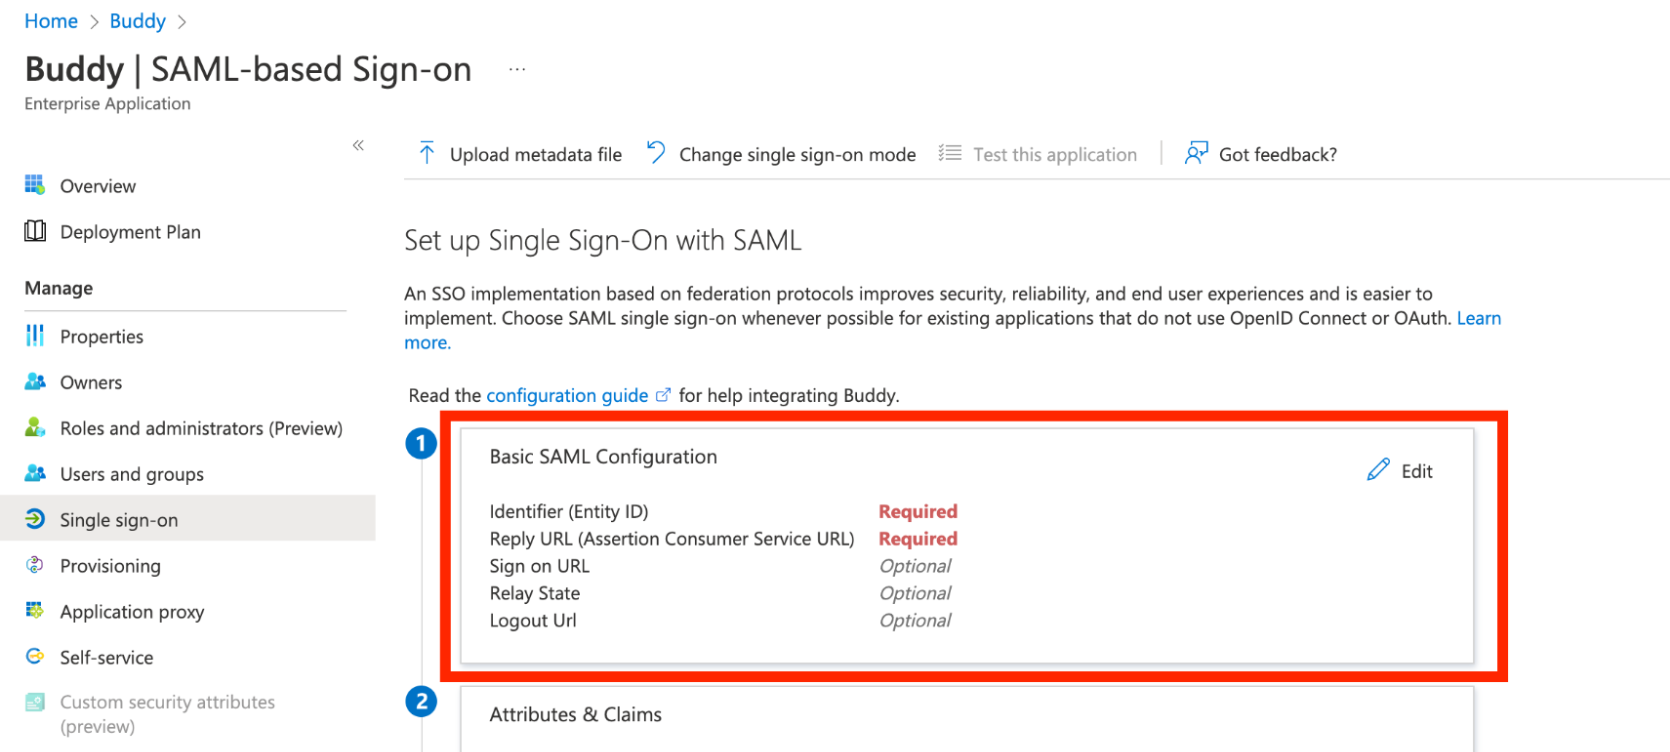
- Edit the Basic SAML Configuration:

Fill in the application details with the data copied from Buddy SSO configuration:
- Identifier (Entity ID)
- Reply URL (Assertion Consumer Service URL)
- Save the changes.
- Refresh Azure page
- Save the data required for SSO configuration in Buddy for later use: Login URL, Azure AD Identifier, and download the certificate.
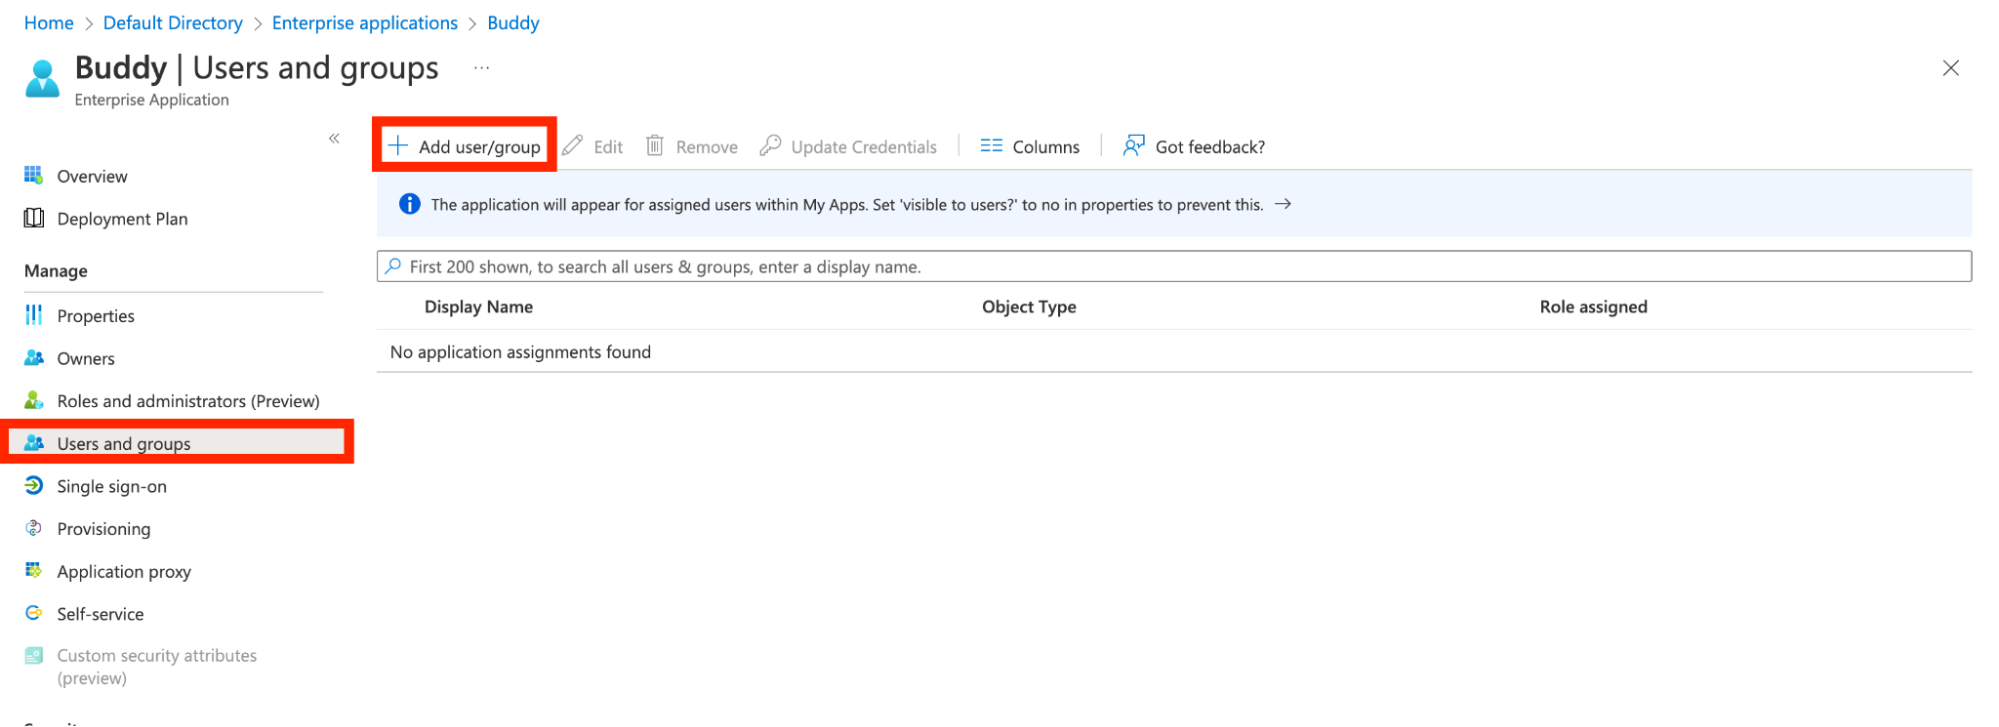
- Go to Users and groups and assign users to the application according to your need:

To see the Azure SSO identifier in the People tab:
- In Azure, go to Single sign-on → Attributes & Claims
- Set the Unique User Identifier to
user.mail:

Return to Buddy's SSO settings tab and provide the information you copied from Azure:
- Login URL
- Azure AD Identifier
- Certificate → upload the Azure certificate that you downloaded
- Signature / Digest Method → leave at
Most popular
- Click Test configuration and enable SSO on success.
- Sign in to your Azure account to save the SSO configuration.
Learn more about SSO implementation and configuration in Buddy:
Last modified on March 28, 2024